|
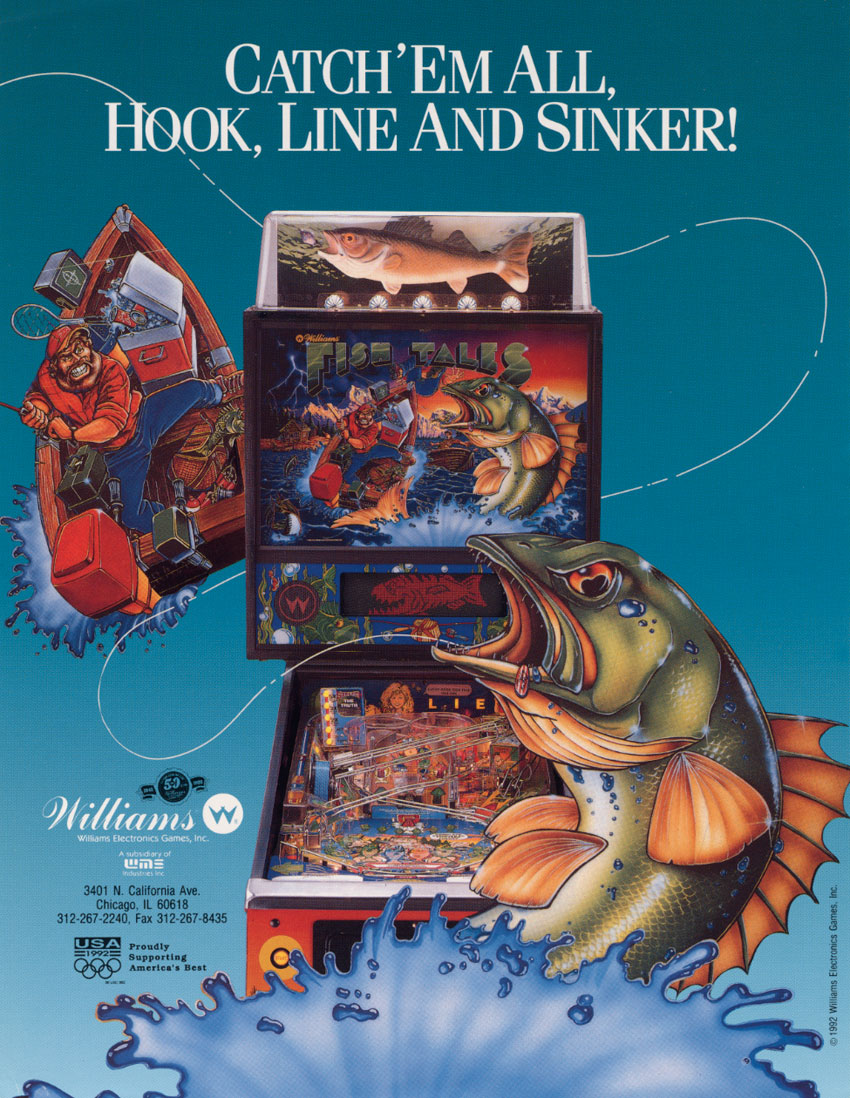
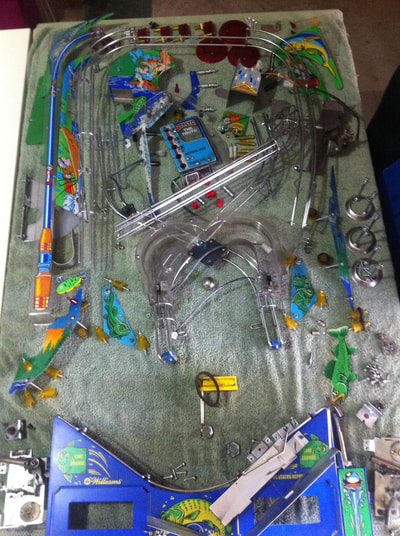
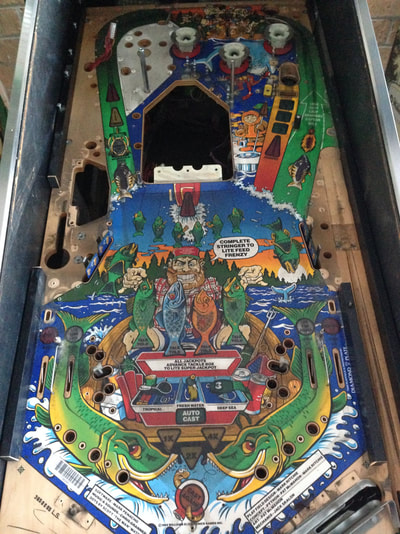
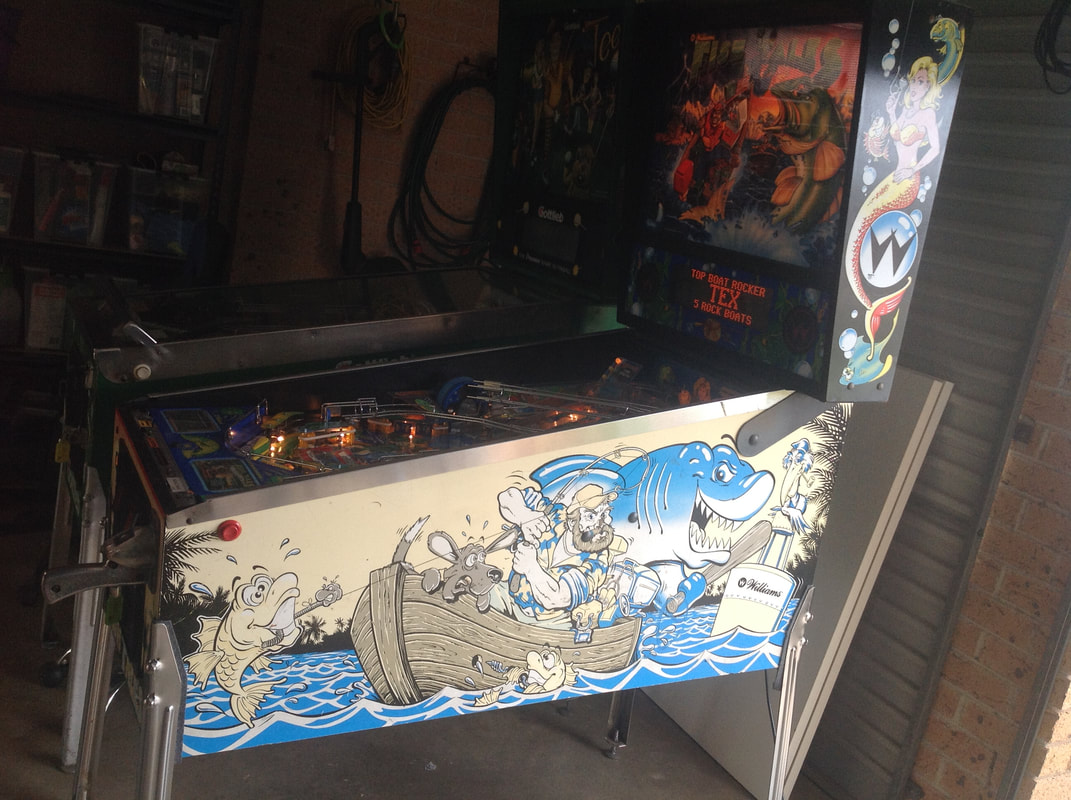
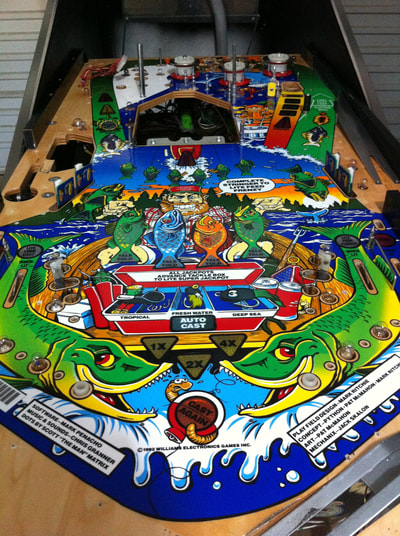
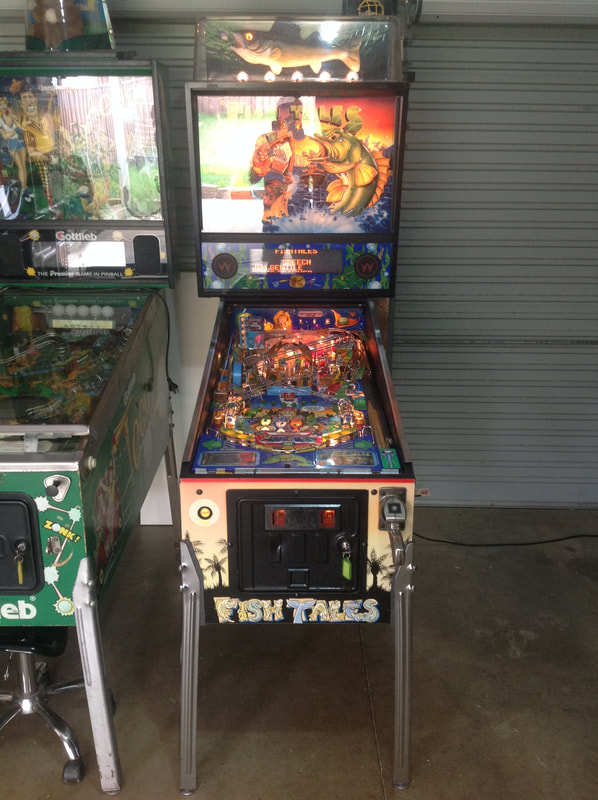
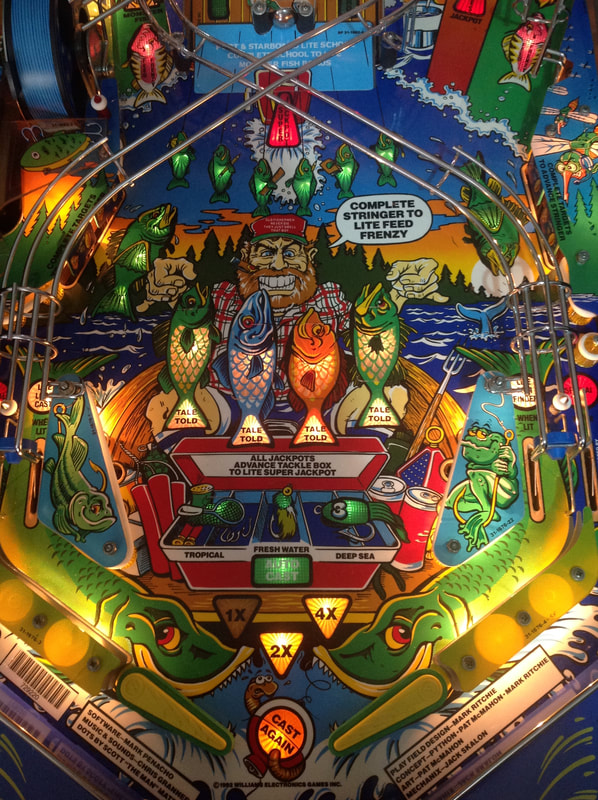
I have to admit, Fish Tales (Williams, 1992) is never a game I had thought seriously about owning. I had seen it a few times but the theme threw me totally off. I hate fishing. So it stood to reason that I'd never like a pinball machine based on fishing, and I never paid Fish Tales much attention. It just happened to be that there were two Fish Tales machines in the lot I purchased during our pinball road trip. I figured I would restore them both and sell them on. This restoration post is a little different from the others. Both of the Fish Tales games were very similar in appearance and condition, but each had their own issues to troubleshoot. I restored these games at the same time, swapping parts between the cabinets as necessary and they were both finished at around the same time. So I didn't take many pictures of the individual machines. Instead, I'll deal with both of the machines in this single post. The pictures are a mix of photos from both machines, but as they were both so similar, it doesn't really matter. Initial condition report (click on sections below to view details) This condition report is an amalgam of reports for both machines. Cabinet
Poor condition overall.
Above playfield
Good condition overall.
Under playfield
Average condition overall.
Electrical
Good condition overall.
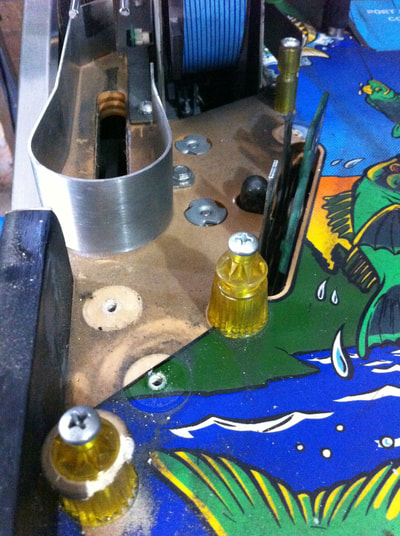
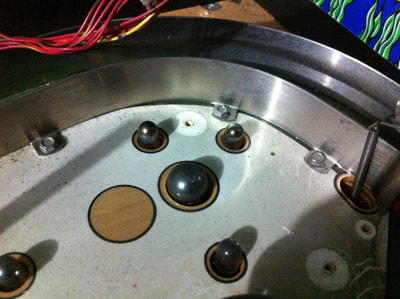
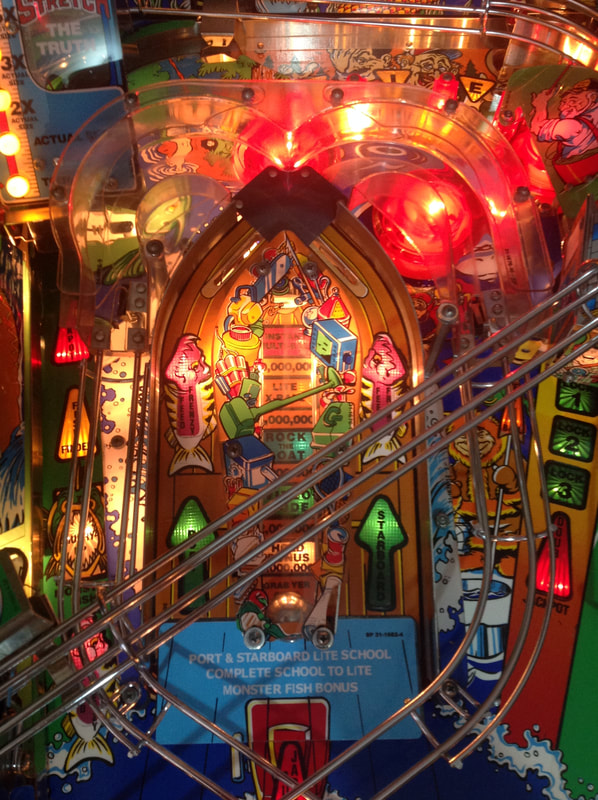
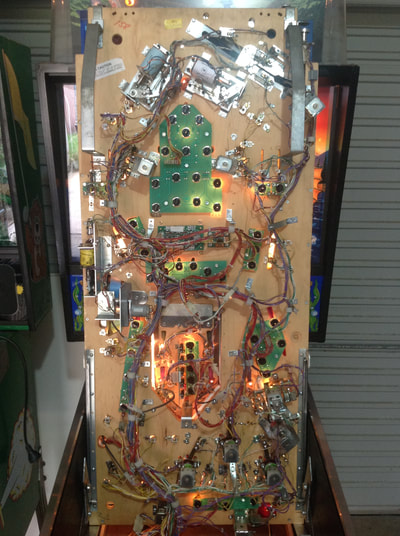
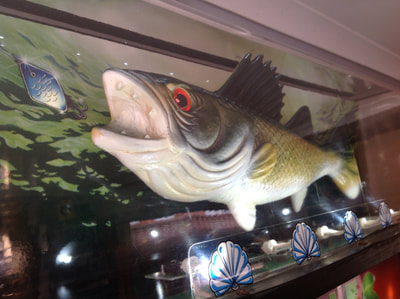
Both of the games booted and played; albeit poorly. The best part was that both backbox toppers were fully intact. This is the hardest Fish Tales part to replace if it ever gets lost or broken. One of the fish didn't flap, but was intact as far as I could tell. This was where it was useful to have a second machine to compare to. Plenty of cleaning to do on these two machines! Disassembly Fish Tales is a simple game, playfield-wise, and there's not really much to take apart. The trickiest thing is probably the boat ramp in the centre of the playfield. This needs to be loosened from underneath the playfield at the top (one nut) and bottom (supporting plate with multiple screws). Then it can be lifted up or down out of the playfield. After disassembly, the game went through my standard restoration process to get it playing and looking like new. During the restoration process, I dealt with a number of issues, described below. Tips & Troubleshooting (click on sections below to view details) These tips and troubleshooting logs relate to both machines. Fish topper not flapping
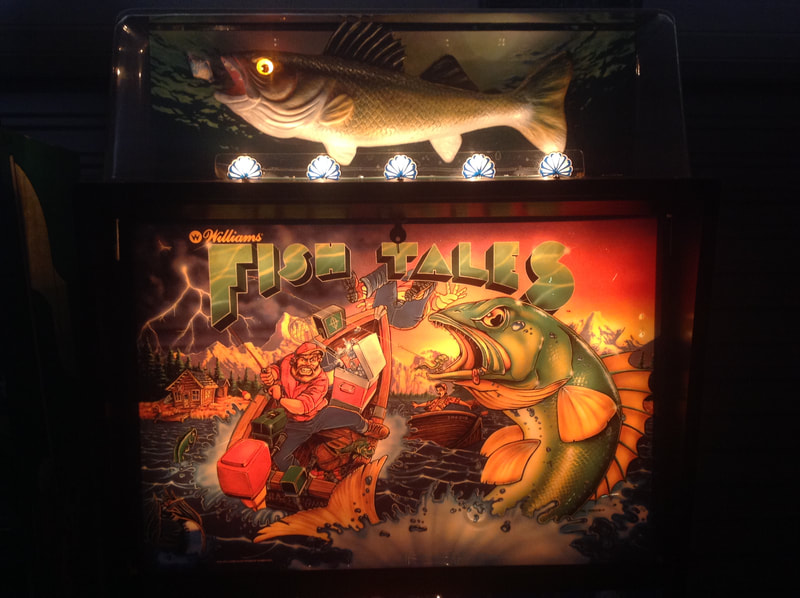
The flapping of the backbox fish topper is the most recognisable thing about Fish Tales (even though most people disable is since it is so noisy!). The fish on one of the machines wasn't flapping and after going into test mode to test the fish's coil, I found that the coil wasn't even activating. First thing to check in this case is the connector in the backbox. Most people disconnect the topper due to the noise is creates, so sometimes it's as simple as plugging it back in. Not this time; it was all connected. I inspected the topper and the issue was pretty easy to spot once I got close - one of the coil's wires had come off the coil lug. The topper creates a lot of movement and vibration, so naturally these wires absorb the brunt of it. After soldering the wire back to the coil lug, the fish was flipping like normal. Drop target would not reset
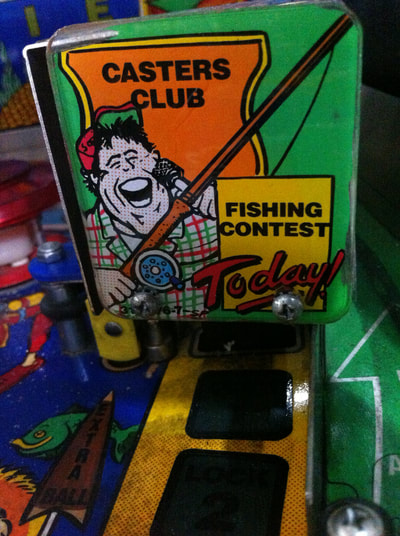
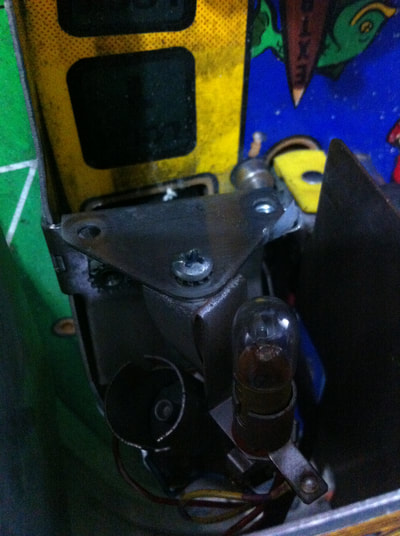
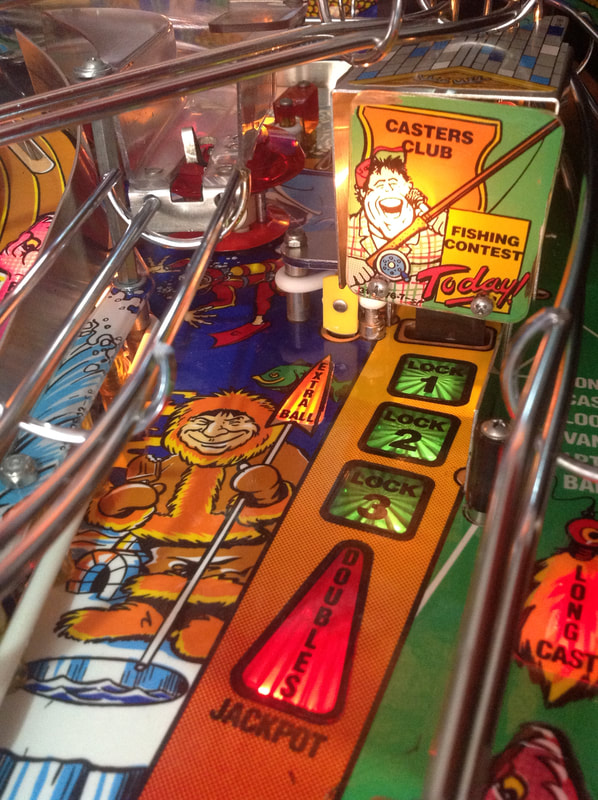
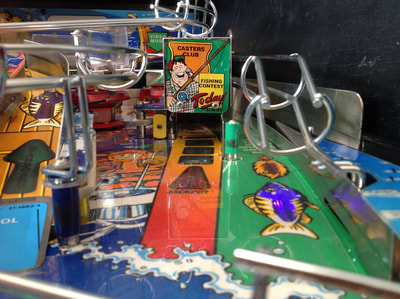
The drop target in front of the Caster's Club is meant to reset at the start of each ball (on default difficulty settings) and after ball searches. This wasn't happening on either Fish Tales machine, which initially made me think it was how the game was designed. Not so!
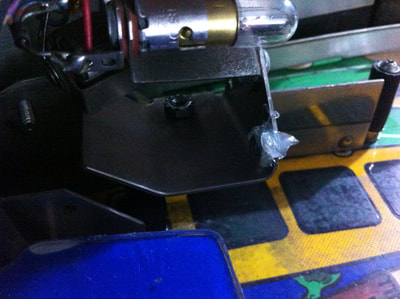
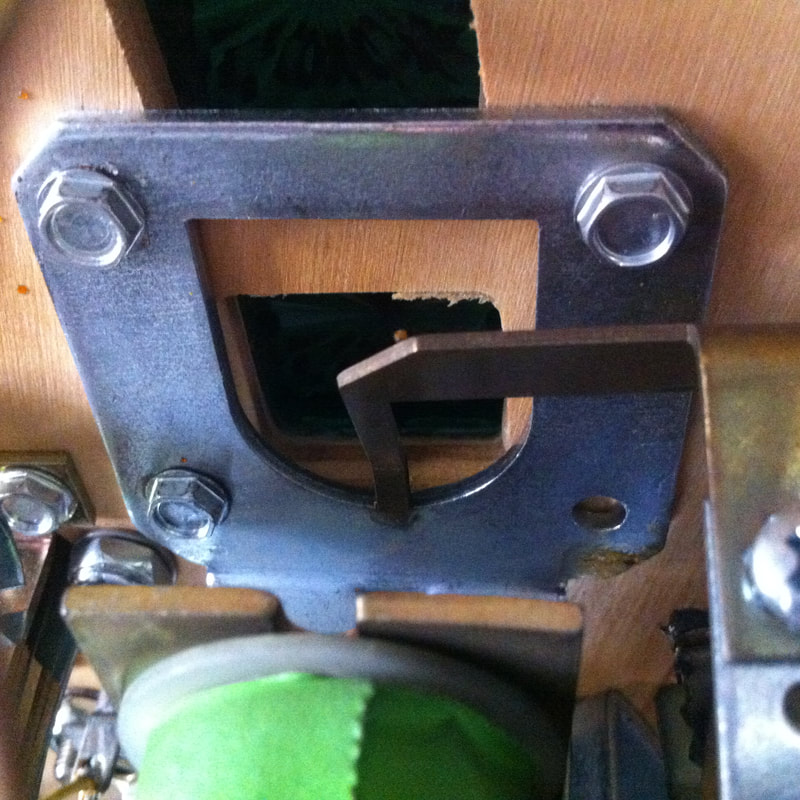
This is a common issue on all games that use the 1-bank drop target assembly (part no. A-15211). The drop target is brought down by a coil-activated actuator (part no. 01-8647-R), which pokes the drop target backwards so it falls down. This actuator gets bent out of shape after so many cycles, and eventually gets stuck against the target assembly bracket, which prevents it from moving. All that is needed is to bend the actuator so the arm that pushes the drop target is free to move without hitting anything. Centre post holes and other touch-ups
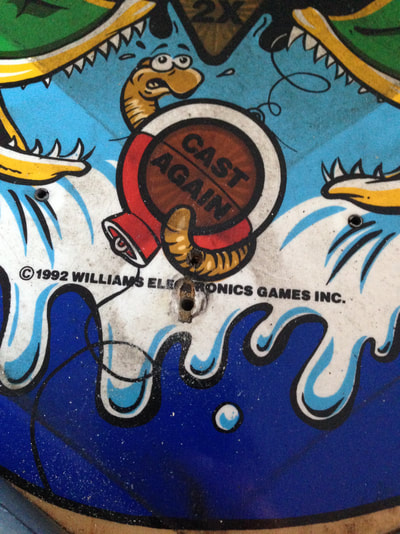
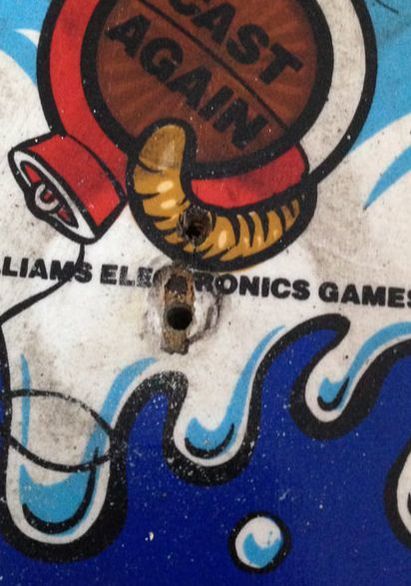
The most irritating thing about one of the machines was that it had two holes for a centre post in between the flippers. This reminded me of the first Doctor Who restoration, where I needed to patch two similar holes. Not fun.
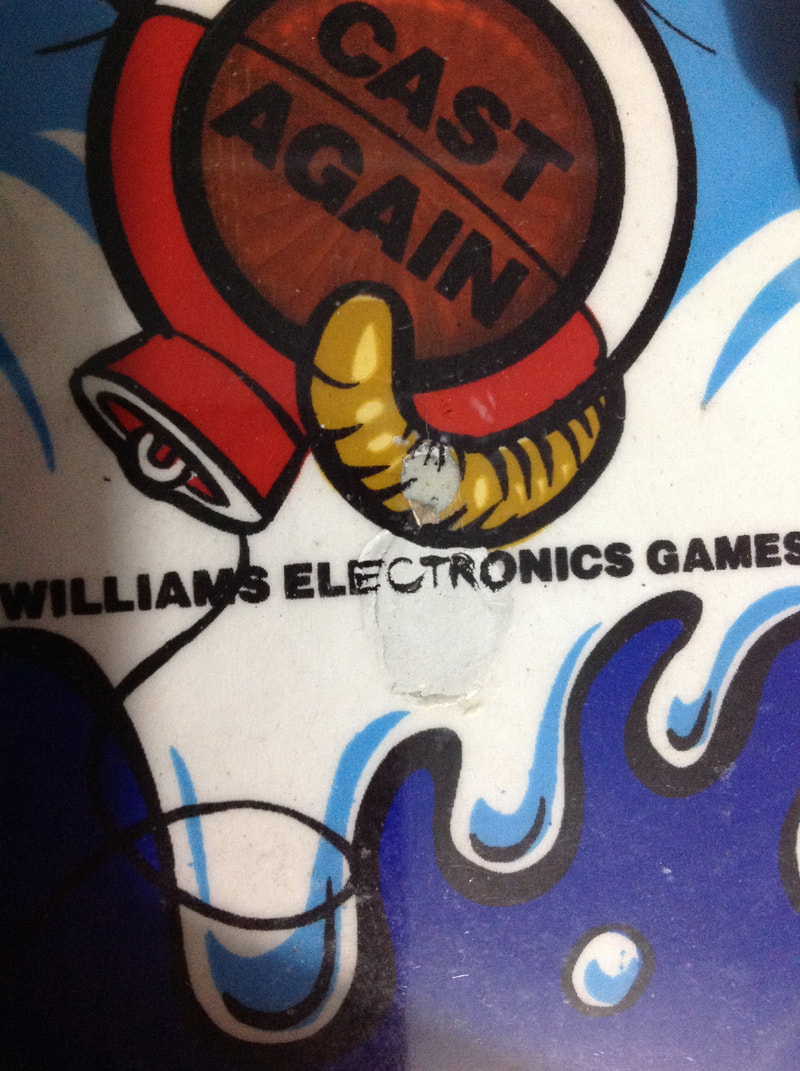
I used some Selley's Knead It to fill the holes, which were not too deep. I then sanded everything flat. At this stage, Fiona decided to fill in some of the black outlines just to see what the repair might look like. She hand painted the black using Createx opaque black paint. These areas would be difficult to repaint because the hole in the worm art required light brown and black paint, while the hole in the water artwork was an off-white colour. Not the easiest colours to match. We decided to leave the full paint repair for another time as we were too tired to keep going at that point. Well, that point never actually came. To this day we still haven't bothered to fully repaint the artwork! The holes are filled, which is the main thing, but since it plays so well and the holes are so hard to notice anyway, we just haven't bothered finishing it off. Maybe one day we will get around to it! Display driver board high voltage section hacks
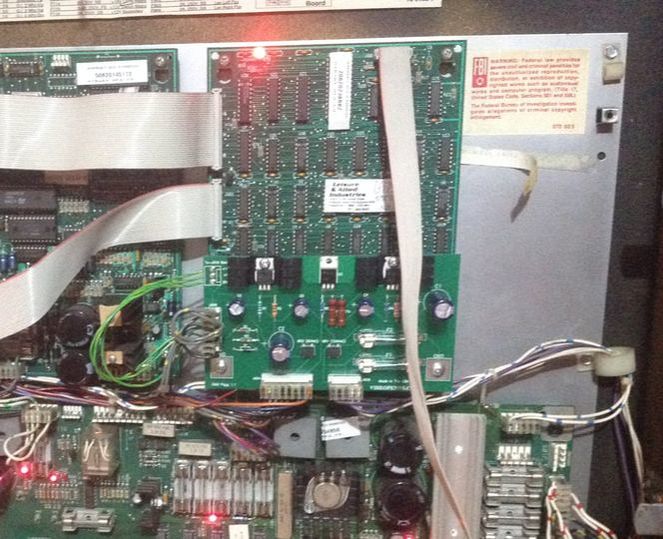
The display driver board in one of these games had some interesting hacks done to it. Apart from the typical crispiness and burn marks from the hot components, there was a gaping hole near the bottom edge of the board with some impressive component hacking going on. The Zener diodes at D4 and D5 had been removed and this section of the board had been cut out. A couple of replacement diodes had been threaded through the board and soldered to components on the underside. Very, very ugly. Although it worked without issue, I did not like having components sticking out of a high voltage section of the board like this, so I replaced the entire section with a Video Penny piggyback board (Marco). No need to worry about the dodgy prior reworks now!
Incorrect shooter lane coil
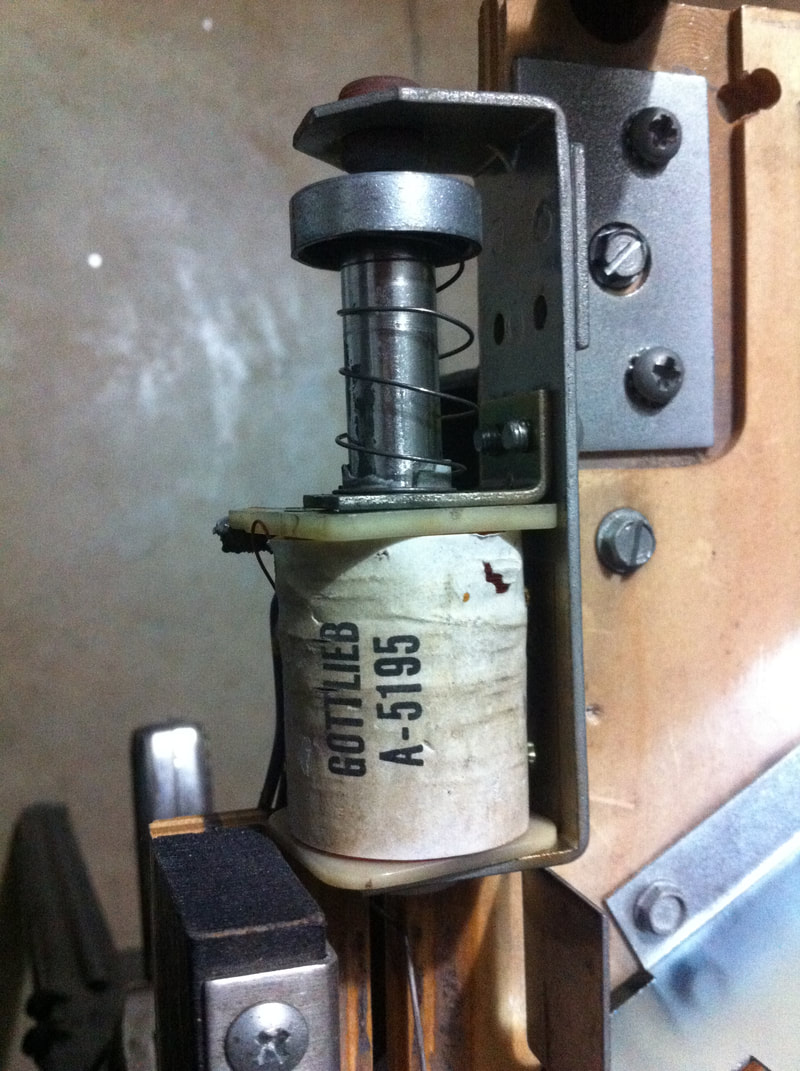
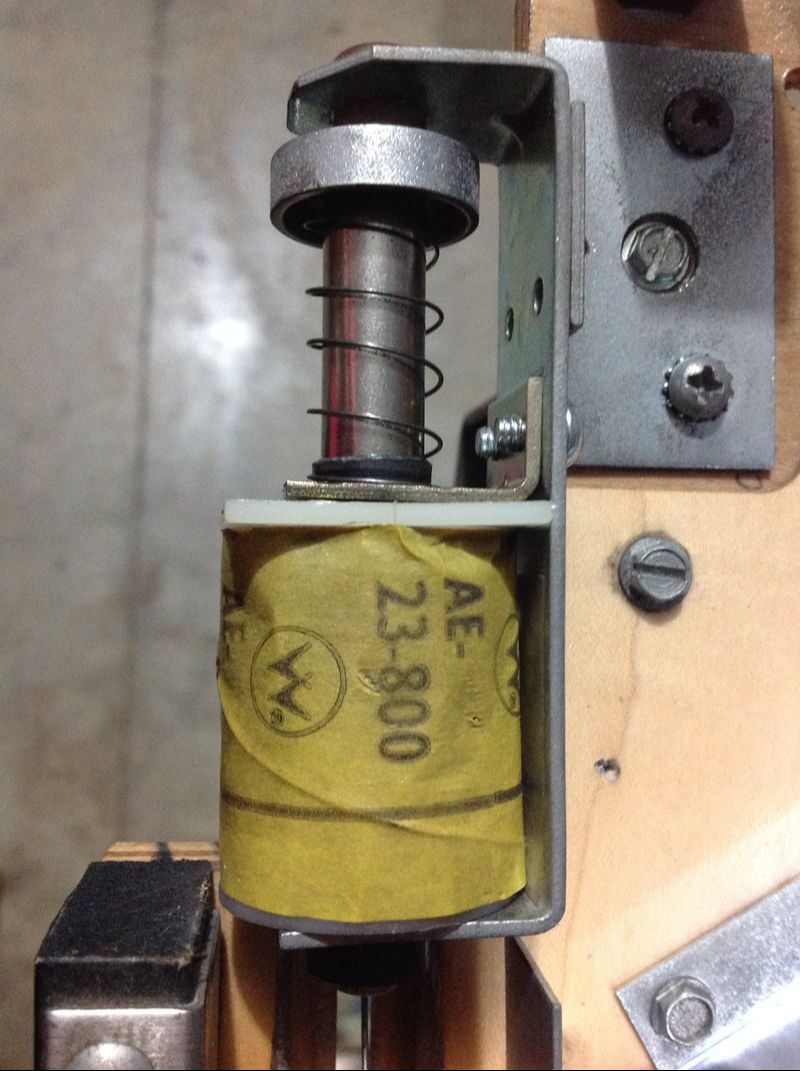
The shooter lane coil in one machine had been replaced with a Gottlieb A-5195 coil instead of the correct Williams AE-23-800 coil. These two coils have quite difference resistance values, so I replaced it with a spare AE-23-800 coil. Here's a handy tip - you can often substitute most coils on the playfield (except for the flippers) with the knocker coil if you're desperate. In fact, the knocker coil in Fish Tales and most other WPC games is an AE-23-800 as well, which is used by a number of different under playfield assemblies.
Right flipper blowing fuse
This was a relatively simple problem to fix. During gameplay, pressing the right flipper would cause the flipper to fire, but it would continue to fire again and again, causing it to "chatter". Then the flipper would fall back down, so it was impossible to hold the flipper up normally. This turned out to be due to a break in the hold winding, which couldn't activate to hold the flipper in the up position. "Easy!", I thought, and replaced the coil with another one. The coil I replaced it with was a used one which I thought was OK. However, when I started a game, I found that pressing the flipper button caused the right flipper fuse (F904) to blow. Damn. It seemed that the coil I had installed was faulty after all. It was probable that this coil had a short in the windings which was causing it to blow the fuse. I installed a third coil and made sure that it was brand spanking new. No problems since! Lesson learned: always label your spare coils properly. Catapult switch not working
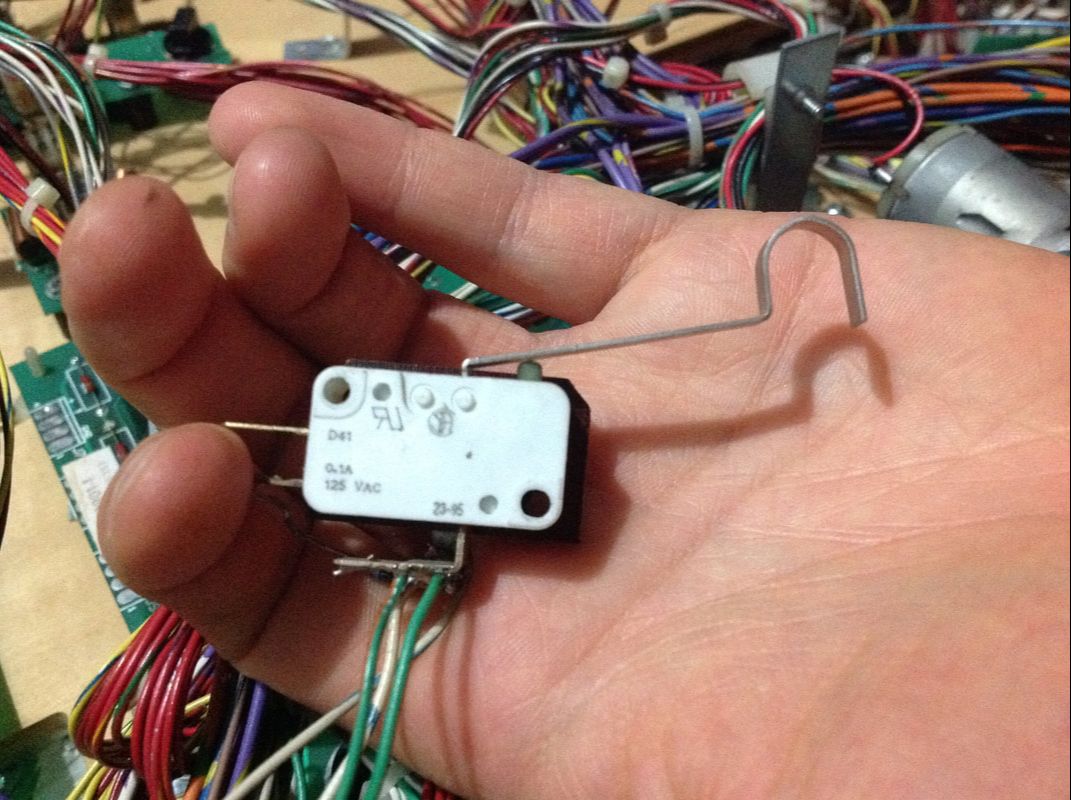
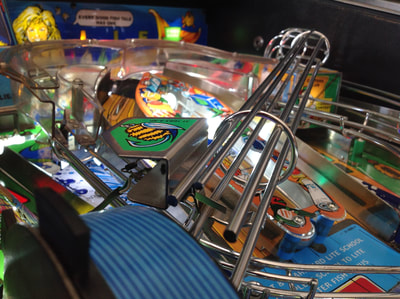
When you start multiball after locking three balls in the reel, it releases the balls for the catapult to shoot out onto the playfield. It took me a little while to realise that the way the balls were being kicked out on my game was actually incorrect. There was a delay of about five seconds after each ball before the next one was released. This is a symptom of a faulty catapult switch (part no. 5647-12693-12), which detects when a ball is sitting in the catapult. The game will fire balls out even if the switch is not working, but a correctly working switch makes it release them more quickly (in quick succession, about one per second). Check out this YouTube video - this is an example of a delayed ball release due to a faulty catapult switch.
The switch actuator on my game had been hacked together from a couple of different switch blades, and then soldered together. The blades were loose and would move around a lot when pushed on. Moreover, the switch actually required a lot of force to depress, which meant that the switch would sometimes not be triggered even if there was a ball sitting on top of it. I replaced the entire switch with a similar microswitch with an intact actuator blade and which did not require as much force to activate. The one I used is actually designed for outholes (part no. 5647-12133-12) but works just as well. The catapult now fires balls out more quickly than before, as it should! It also makes multiball a lot harder to manage as a result - as it should be! No grease in reel motor gearbox
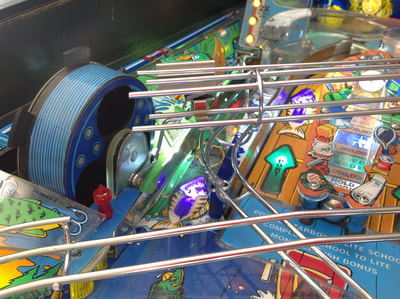
While you should never lubricate or grease most parts of a pinball machine, motor gearboxes are the exception to this rule. I try to open up and re-grease all gearboxes as a part of my standard restoration process. The reel motor (part no. 14-7967) is no different, and it is usually the case that when you open a gearbox up, there is a bunch of dry, sticky grease that was applied at the factory and has since dried up. The difference with this motor was that there was no grease at all inside. Either it had not been applied at all, or had been cleaned up previously. It's important not to go overboard with lubricant however a little grease is a good idea to prevent wear of the gears and shafts. I greased the gearbox with some Nulon Extreme Performance Grease, but any PTFE-based lubricant will work well. Missing and broken playfield plastics
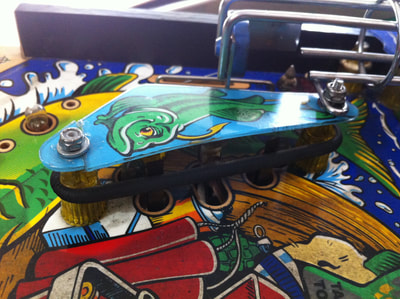
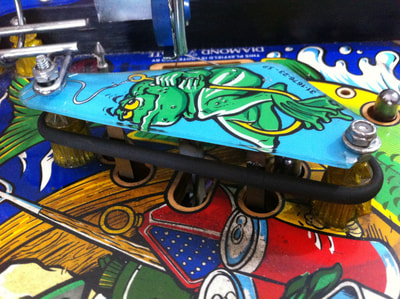
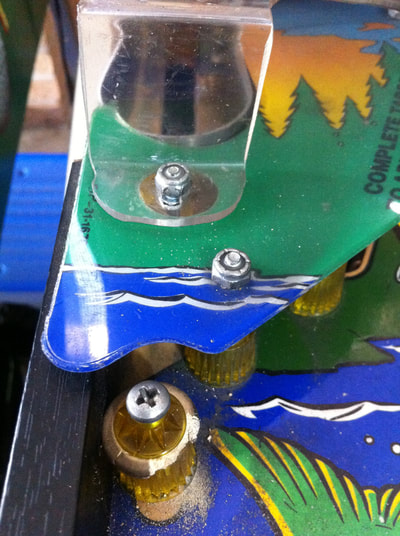
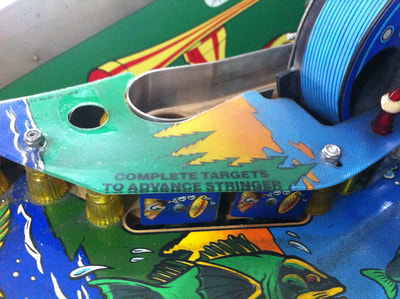
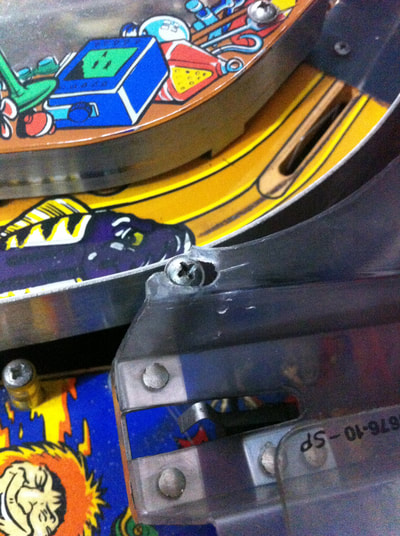
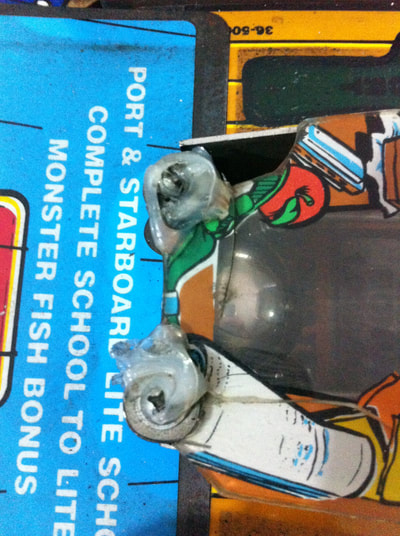
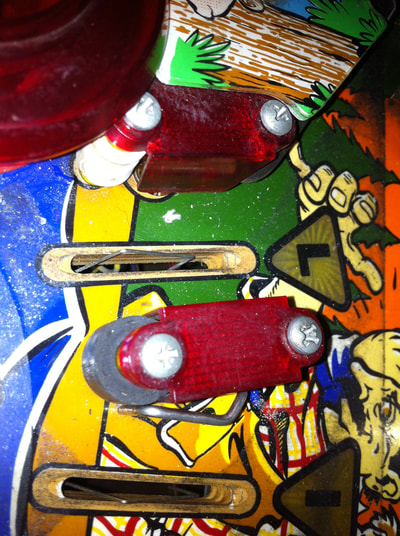
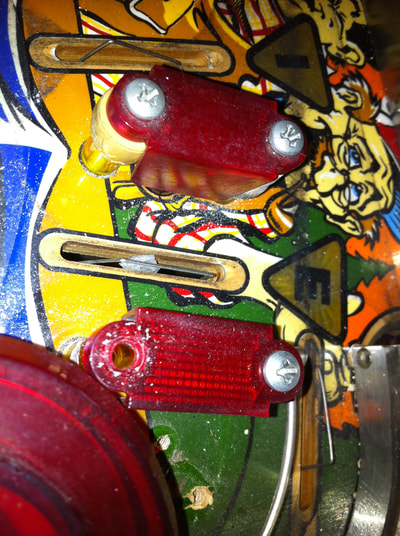
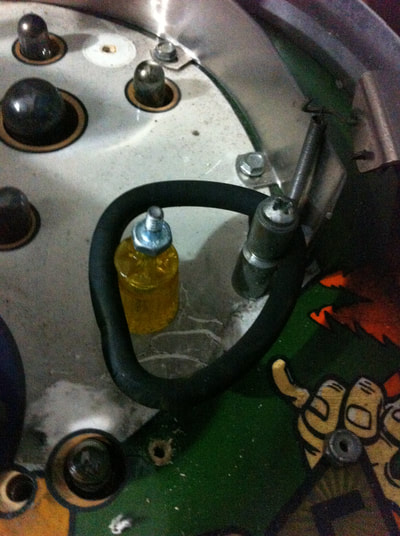
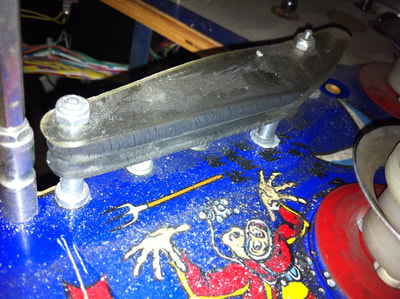
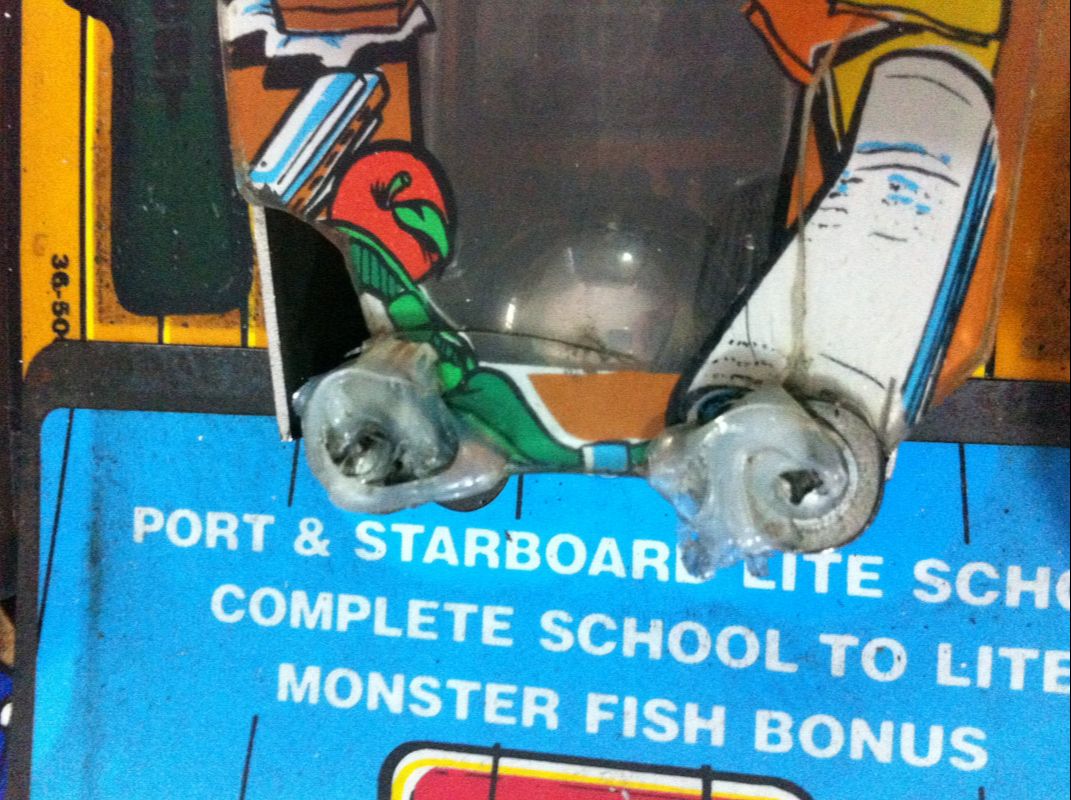
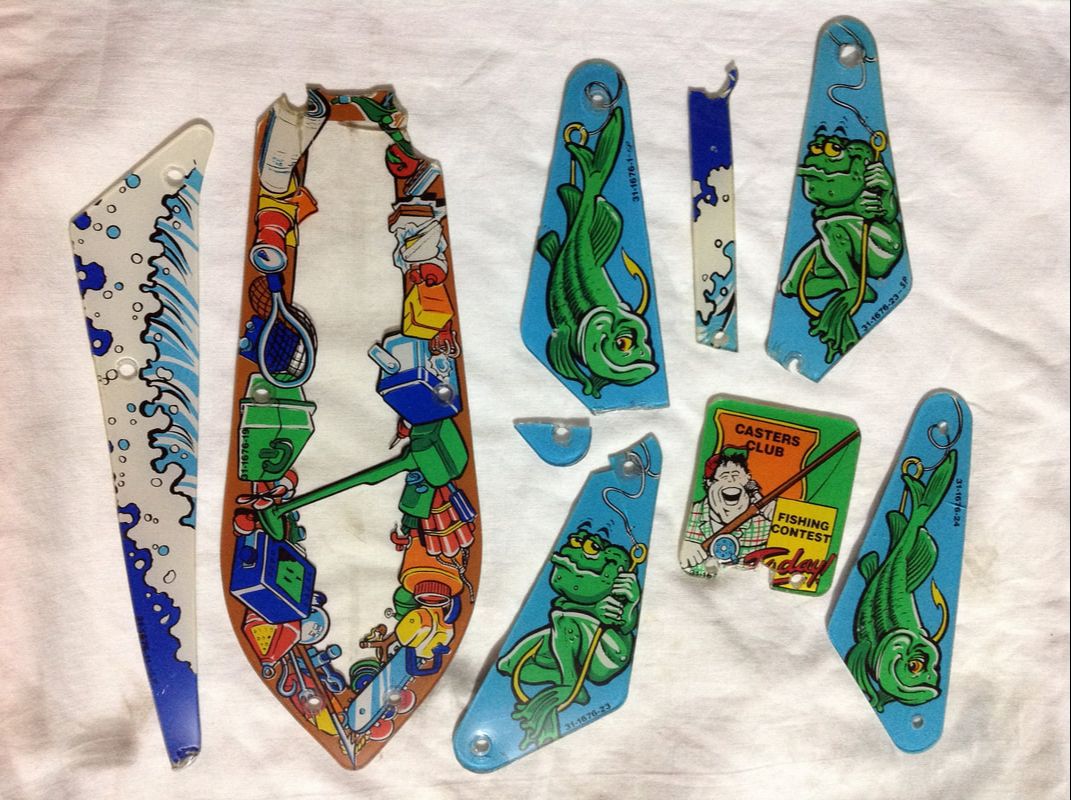
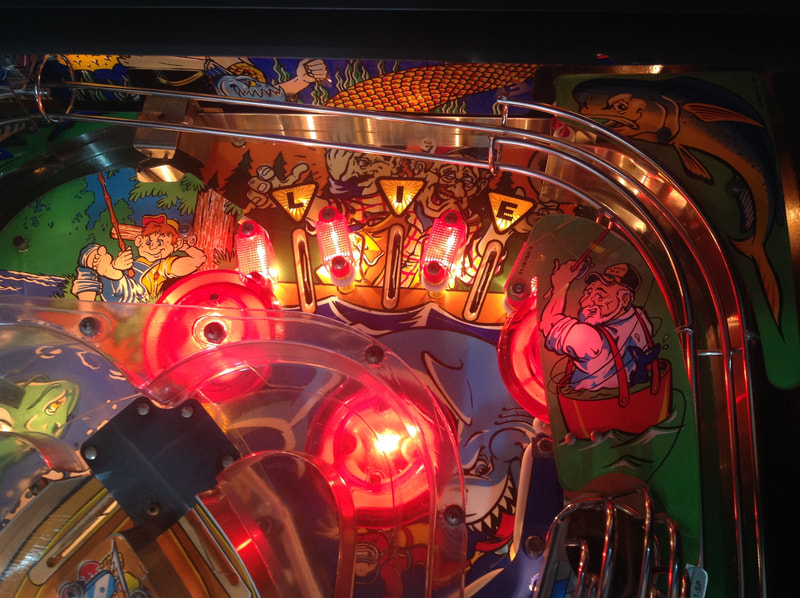
There will always be at least two broken or missing plastics on any Fish Tales game - the boat plastic that covers the captive ball area (part no. 31-1676-19), and the narrow plastic that runs down the right side of the boat (part no. 31-1676-12). The captive ball plastic is always smashed at the front edge due to balls hitting the captive ball and being pushed upwards by the curvature of the ramp flap. The long, thin plastic on the right of the boat breaks easily because it is so thin - always a bad shape for a plastic in a pinball machine.
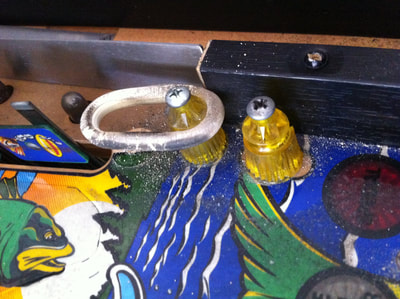
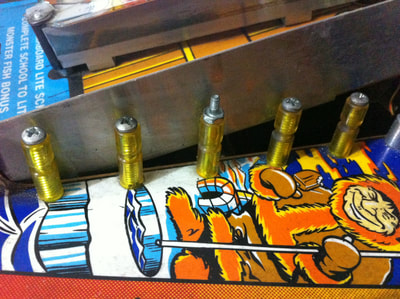
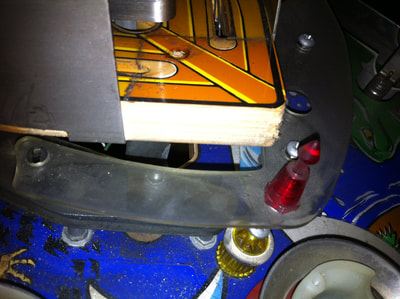
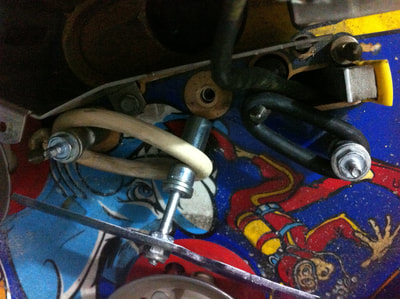
Both of my machines had broken captive ball plastics. One was even covered with a mess of hot glue, presumably to keep the screws attached to it, as the screw holes were no longer there. The plastic on the left of the boat ramp (part no. 31-1676-11) had its bottom corner snapped off on one of the machines. And finally, the Caster's Club plastic (part no. 31-1676-7) looked to have been smashed by a ball as it had a perfect ball-shaped chunk removed from the bottom edge of it. One of the inlane plastics (part no. 31-1676-3) had cracks in it from over-tightening. And, of course, three out of the four slingshots (part no. 31-1676-23 and 31-1676-1) were also chipped. Fish Tales is a plastics graveyard! Believe it or not, between the two machines, I had enough intact plastic pieces to make one complete plastic set, minus the captive ball plastic, as both of these were broken. I installed the complete plastic set (with the better of the two boat plastics) on the machine I planned to sell first. That way, most of the plastics would be complete, and I could take my time tracking down another plastic set for the second Fish Tales. Luckily, a lot of these plastics are being reproduced and you can get them at various retailers overseas. The supply of new old stock plastics has basically dried out, so your best bet is buying a reproduction. You can get various plastics from heaps of suppliers including Little Shop of Games, Pinball Center, Ministry of Pinball, Planetary Pinball, MAD Amusements, and various other retailers - your best bet is to do a search and see what appears. Fiona actually found a set of plastics on eBay in the US, including all of the broken plastics I needed with the exception of the Caster's Club plastic. She bought the set and gave them to me for my birthday. Best birthday present ever! As for the Caster's Club, I bought a reproduction one off a fellow Aussie Arcade member to complete the plastic set. Thanks, Jeff! All of these vulnerable plastics should be protected by plastic washers to absorb any ball hits. I installed two on the bottom edge of the captive ball plastic, and one on the bottom edge of the thin plastic to the right of the boat. These should safeguard against any stray airballs in future. Insert damage on boat ramp
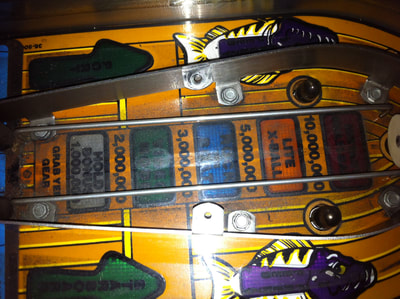
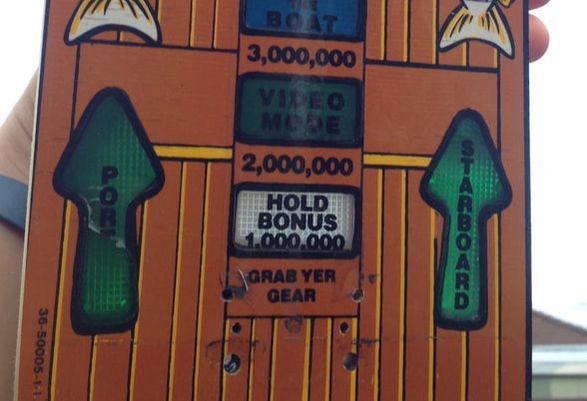
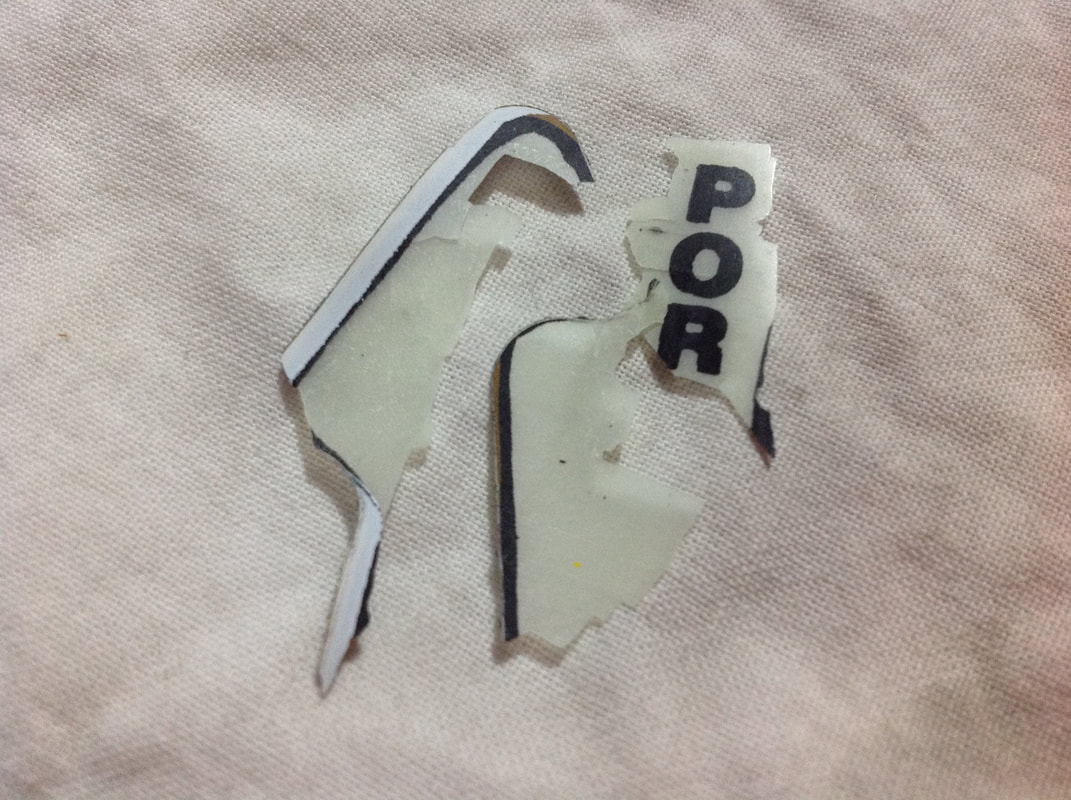
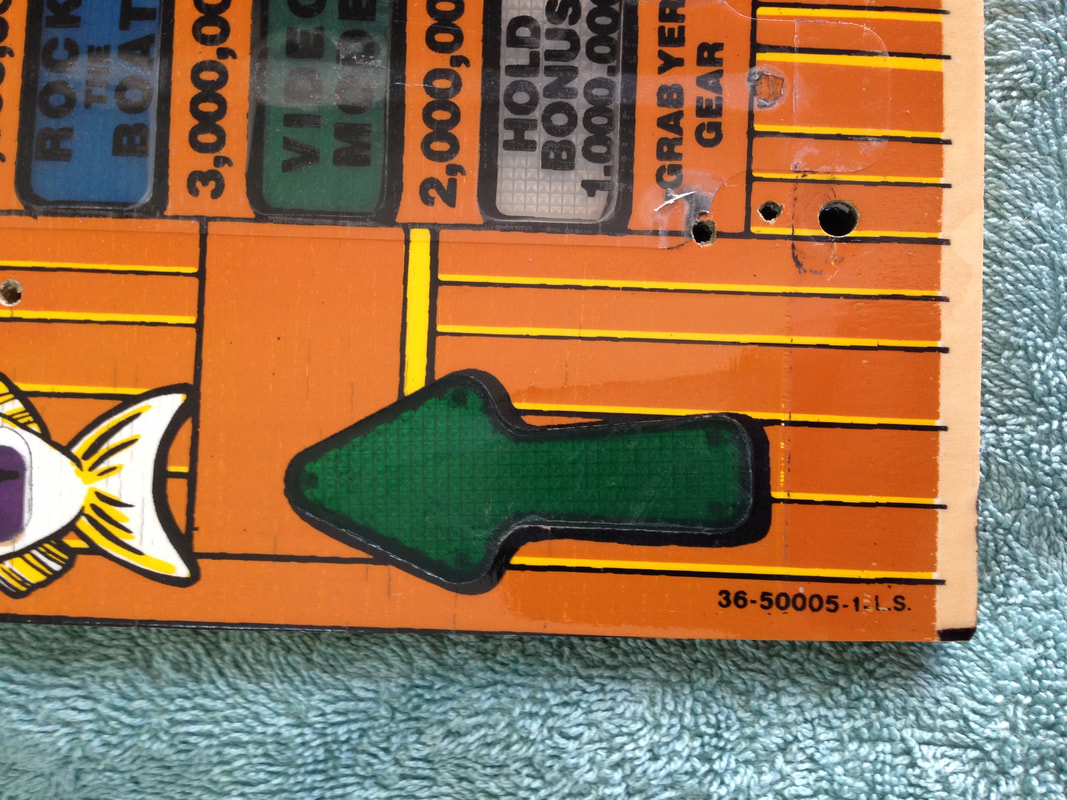
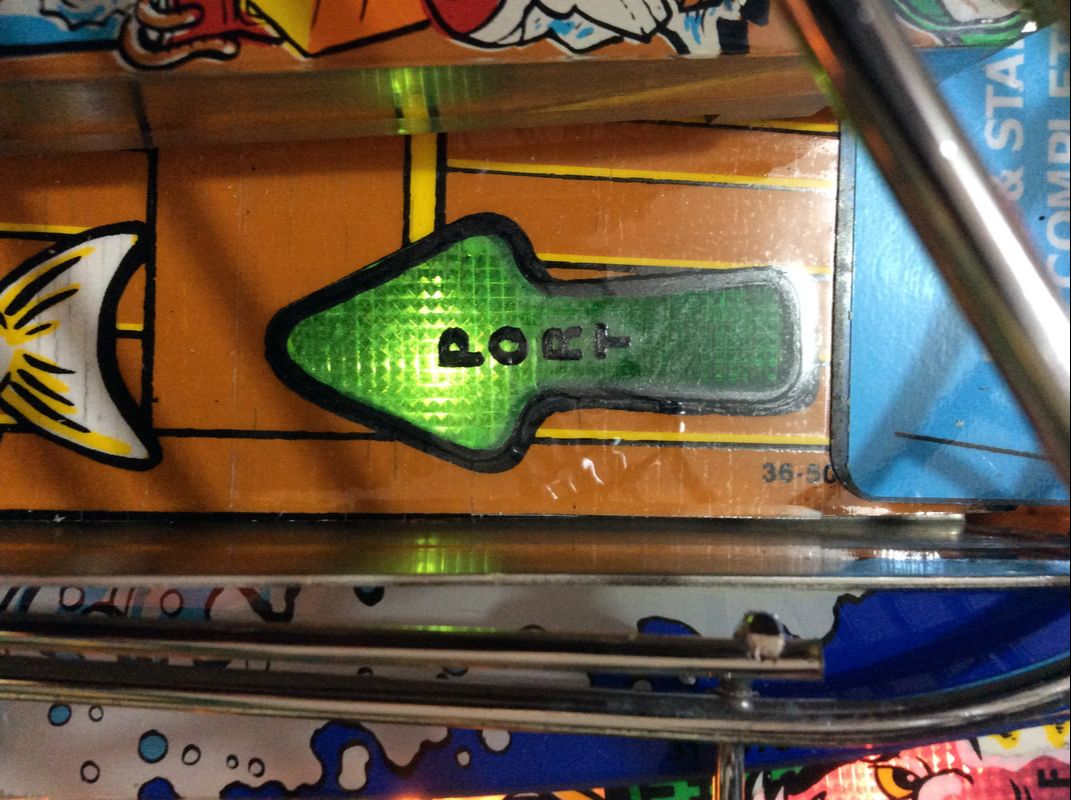
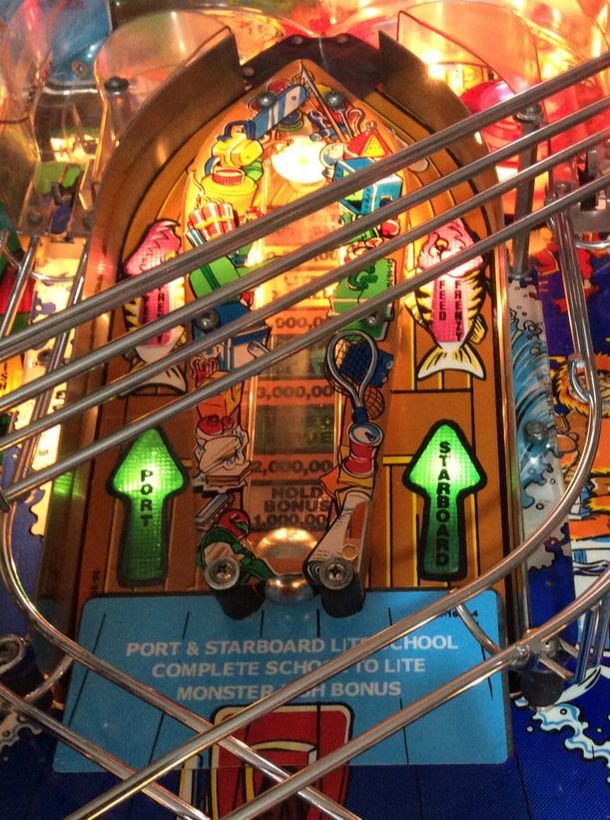
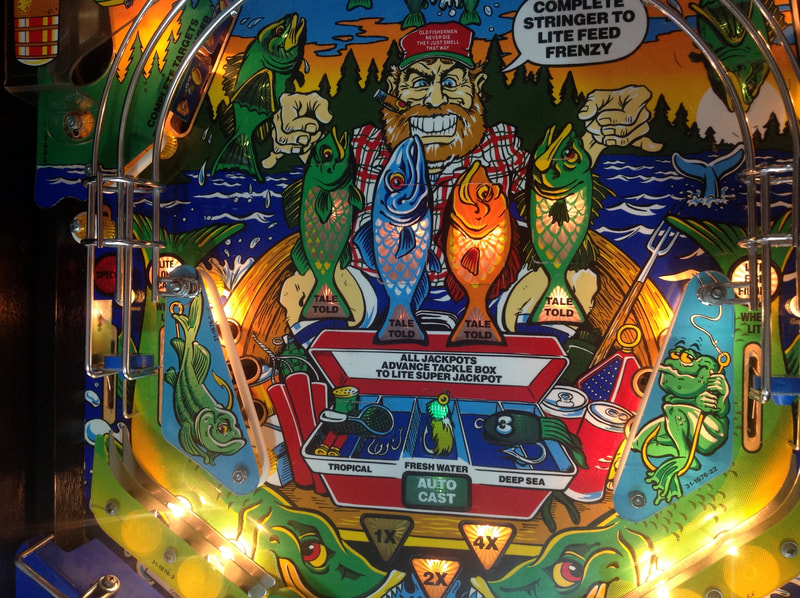
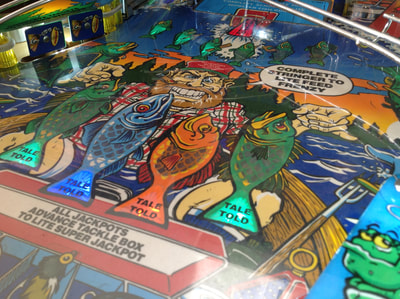
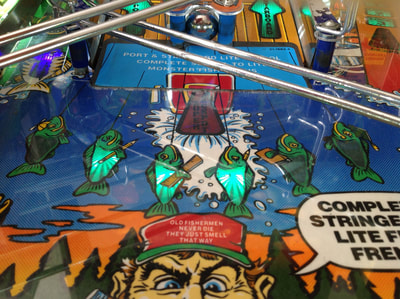
There are two main areas on the Fish Tales playfield where insert wear commonly occurs: the four fish inserts in the centre of the playfield, and the boat ramp inserts. One of the machines was almost perfect in terms of insert wear. There was some slight damage to the edges of a couple of the fish inserts, but it was minor. The other playfield was not so lucky. It had some minor, but more noticeable wear on the fish inserts, and some major insert damage to the port insert on the boat ramp - half of it was destroyed! The fish inserts didn't need any touch-ups, but the port insert needed to be redone completely.
To repair the insert, the remaining damaged sections of the insert were carefully removed using a plastic razor blade. The artwork was already peeling in several places and came up quite easily. The entire section of "PORT" text was removed so that it could be redrawn and would look consistent. After the area was cleaned, there was a clean slate to work on. Fiona did her magic and hand-painted the port text in the centre of the insert with some Createx opaque black paint. She did an awesome job! After the repair, we covered the area with a sheet of Mylar for protection. This area should look good for years to come.
Ball trough wire gate missing
Kind of a strange part to have missing, but the ball trough wire gate was missing on one of the machines (part no. 12-6542). This meant that balls would sometimes get kicked into the trough by the outhole kicker, but would then bounce back into the outhole as the gate wasn't there to stop them. I grabbed a spare from PSPA.
Caster's Club wire gate missing
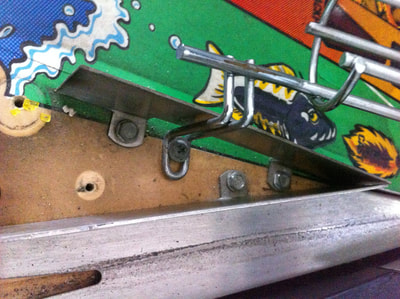
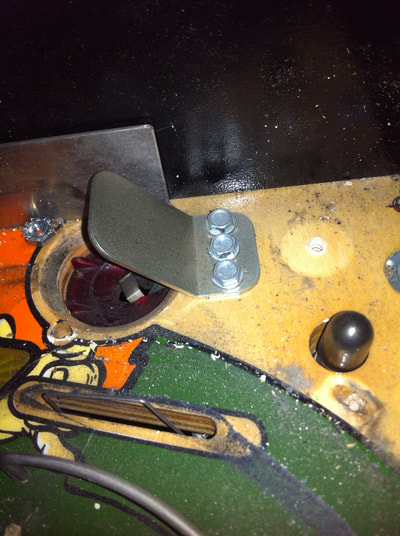
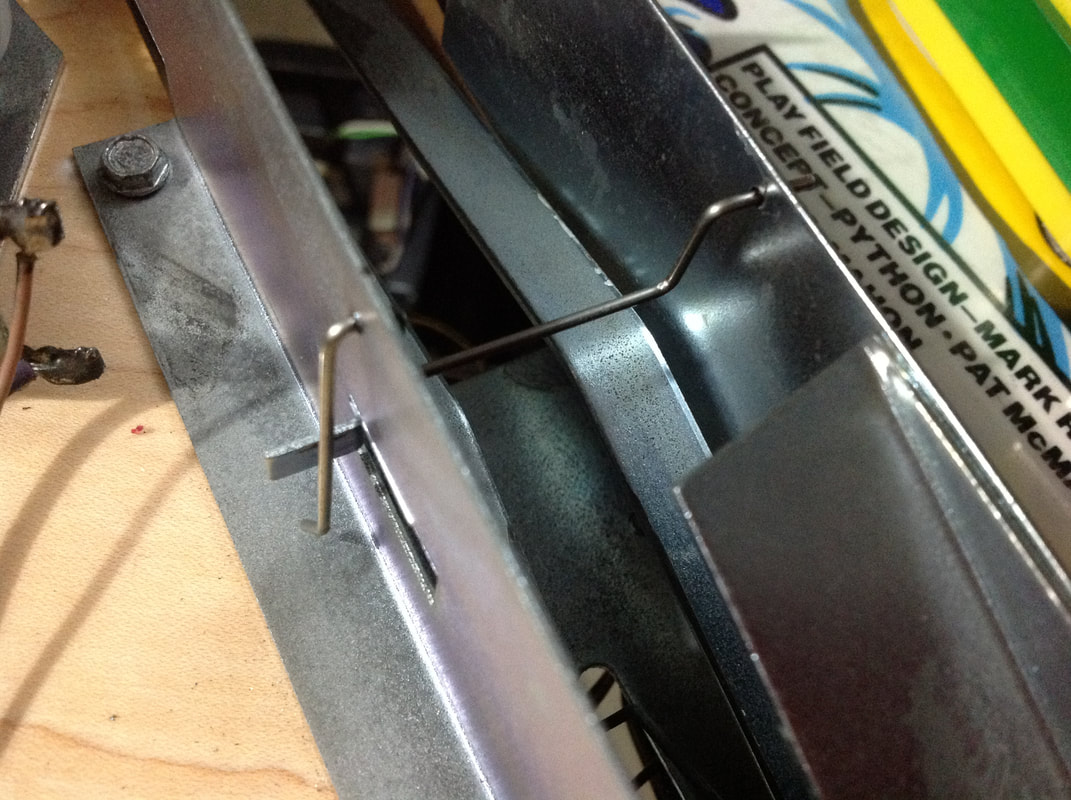
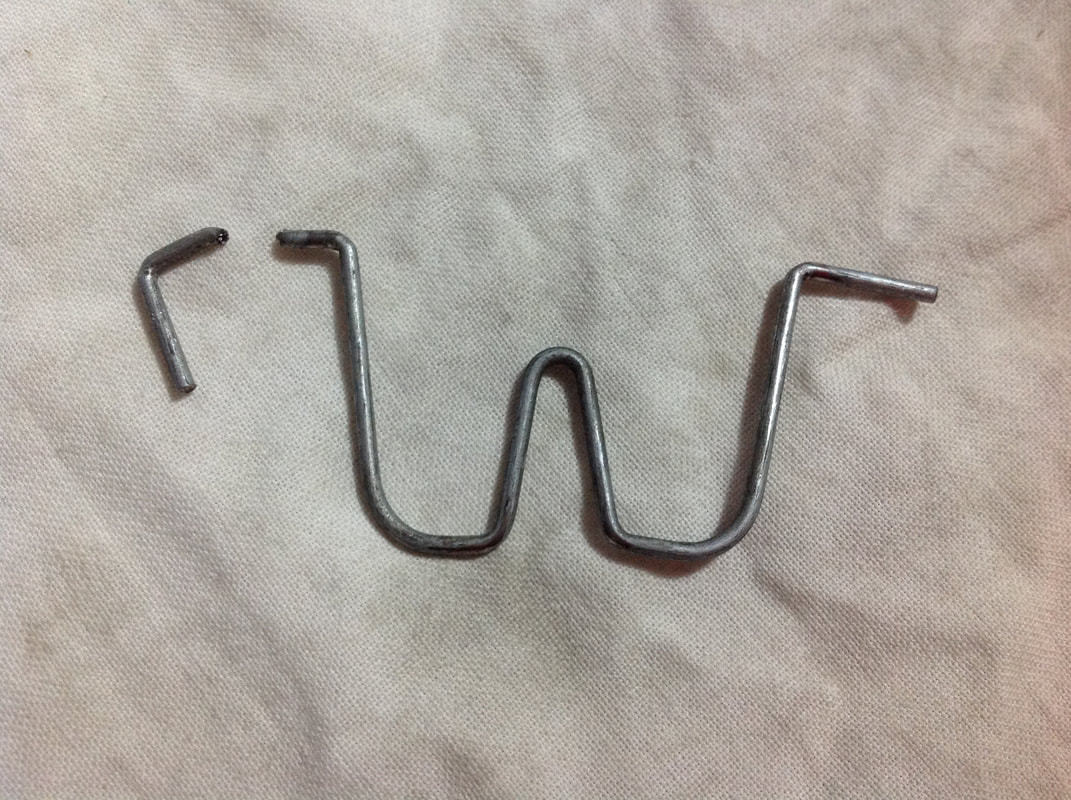
These two games definitely had issues with wire gates! One of the machines was totally missing the wire gate in the Caster's Club that sits behind the drop target. This is different to the wire gate in the trough as it is made of thicker wire and threads through different holes in the adjacent ball guides. Unfortunately, I never managed to find a replacement for it.
The other Fish Tales did have a wire gate in the Caster's Club but I found that it occasionally caused the ball to get stuck under it. This caused a lot of hang-ups mid-game, so I tried to bend the wire gate slightly to give the ball more space. Big mistake! I ended up snapping it at the bend, rendering it totally useless. So, long story short, don't twist metal the wrong way! Nevertheless, without the wire gate, the ball hang-ups were significantly reduced. Ball rejections from strong shots into the Caster's Club are rejected a little more frequently, however. So I'll have to make up a replacement for this wire gate eventually. Ball popper switch leaf broken
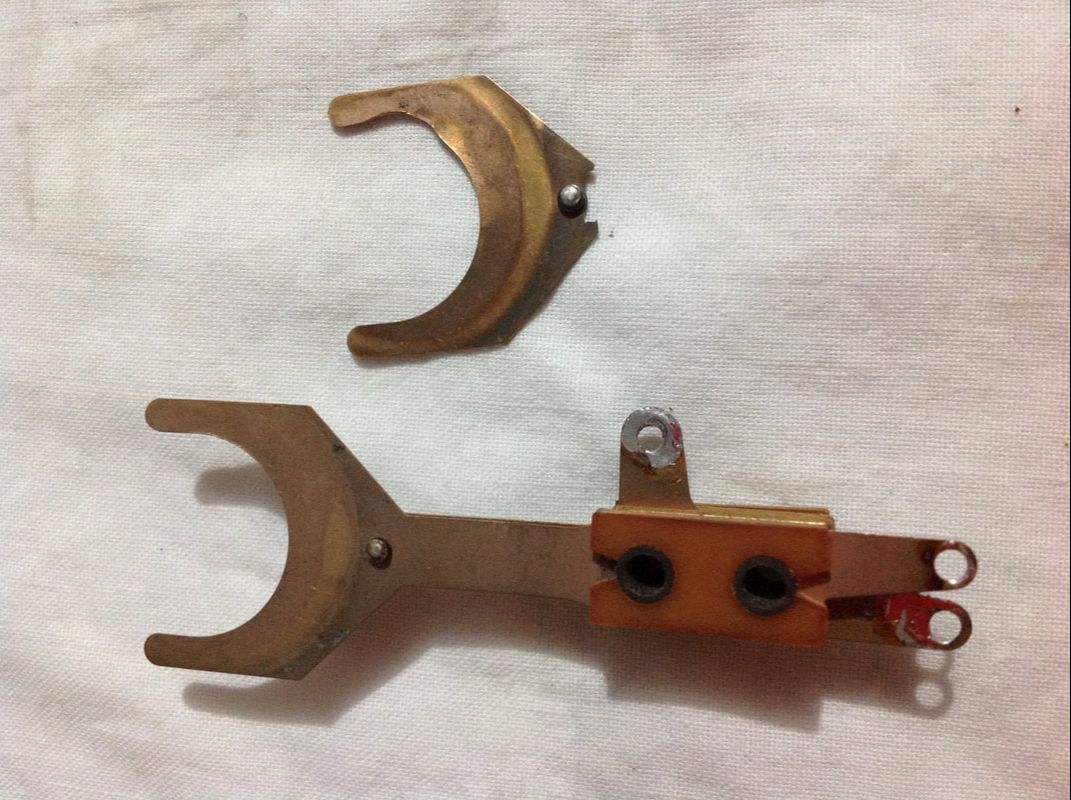
Fish Tales, and several other games, use a Y-shaped leaf switch to detect when the ball has entered a ball popper. The Y shape of the switch blade allows a plunger to pop the ball up between the switch blades. Naturally, the Y section of the switch blade gets exposed to a lot of vibration and, surprise surprise, they break. One of these switches was broken on Fish Tales and needed a replacement (part no. SW-1A-167). It's not easy to get a hold of the Y-shaped switch blade on its own, so you may have to reorder the whole switch. There are a couple of designs for this switch, but as long as it has a forked switch blade and fits around the ball popper, it should work just fine. Local retailers have stock (PSPA).
Reel motor belt incorrect
The belt used by the reel motor to drive the reel is a high-tensile, translucent polymer material (part no. 03-8614). What a lot of operators did when replacing this belt on site was to replace it with a standard pinball rubber. Both of my machines had standard playfield rubbers installed instead of the proper drive belt. Playfield rubbers will slip on the pulley and will degrade much more quickly than the proper part, so if your machine has a normal rubber belt installed, change it over. It's easily obtainable locally (RTBB, PSPA, Mr Pinball). Controlled lamp on lamp board not working
This was an interesting issue that was beyond what I'd come to expect from problems with lamps mounted to lamp boards. The 15-lamp board under the fish inserts in the centre of the playfield (part no. A-15337) had one lamp that was not working. I tried all of the basic troubleshooting steps including verifying the bulb was intact, swapping the twist socket, checking the IDC connector, reflowing the solder pads for the socket, but nothing worked. Finally, I tested the diode connected to this lamp on the board and figured out that it had failed. This was the first time I'd seen a diode fail on a lamp board. Replacing the diode fixed the lamp. Faded cabinet decals
Fish Tales is prone to extremely bad cabinet fade due to the bright orange and red colours used on the cabinet decals. The decals on my two machines were pretty similar in condition and were both extremely faded. In fact, I haven't seen a Fish Tales cabinet this badly faded since! I'm really not fussed about cabinet decal fade as long as the artwork is still there and the cabinet itself is intact. I've left the decals as-is for now, but replacement decals are readily available (Mr Pinball).
General illumination cabinet connector
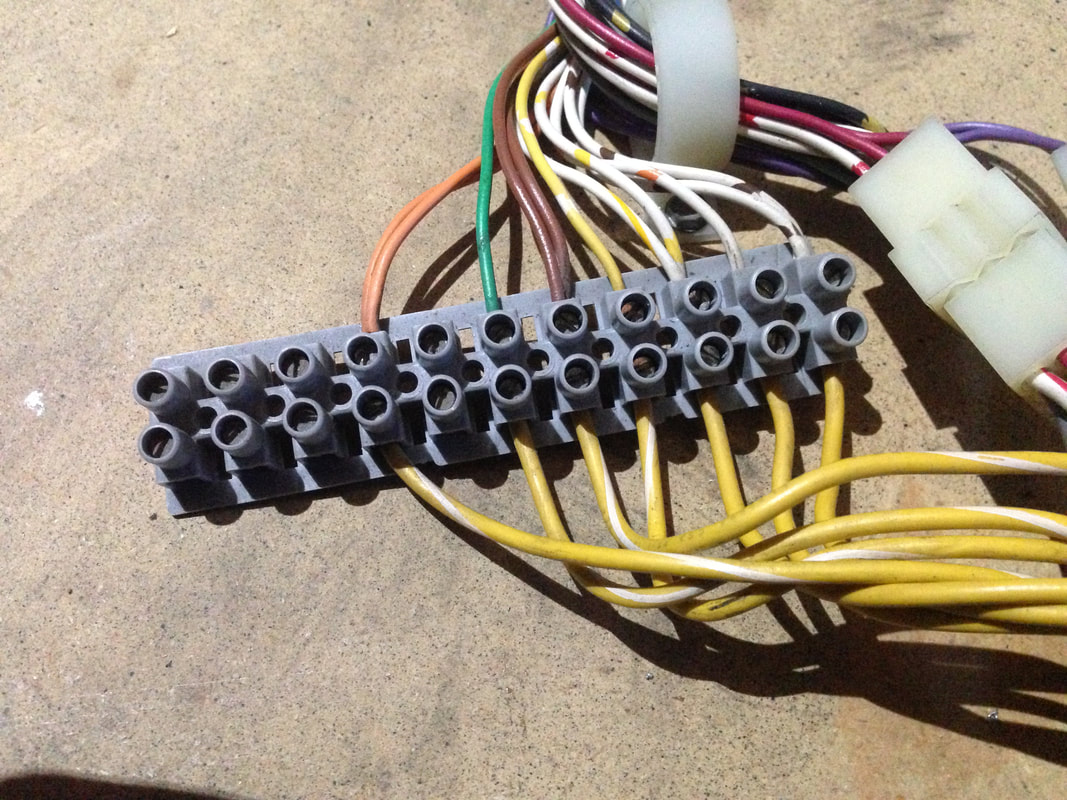
Sometimes I gawk at some of the crappy part replacements operators do to a sited machine, particularly using dodgy automotive connectors to join wires in the backbox. Automotive connectors in he backbox are always a bad look and are usually not the best way to make a wiring join. In one of the Fish Tales cabinets, somebody had replaced the general illumination connector (yellow wires from the transformer) with a strip connector with screw terminals. Now, the original Molex connector used here is notorious for burning up and creating problems with lamps. So I actually left this connector as-is instead of replacing it with an original connector. Even though it's a bit ugly, it does the job and is less likely to fail in future due to heat issues.
Game resets
Up until this point, I had been pretty lucky in that I had not had any issues with the 5 volt logic circuits on any of my games. One of the Fish Tales machines was the exception. It reset very rarely, but often enough for me to notice and decide to get it fixed.
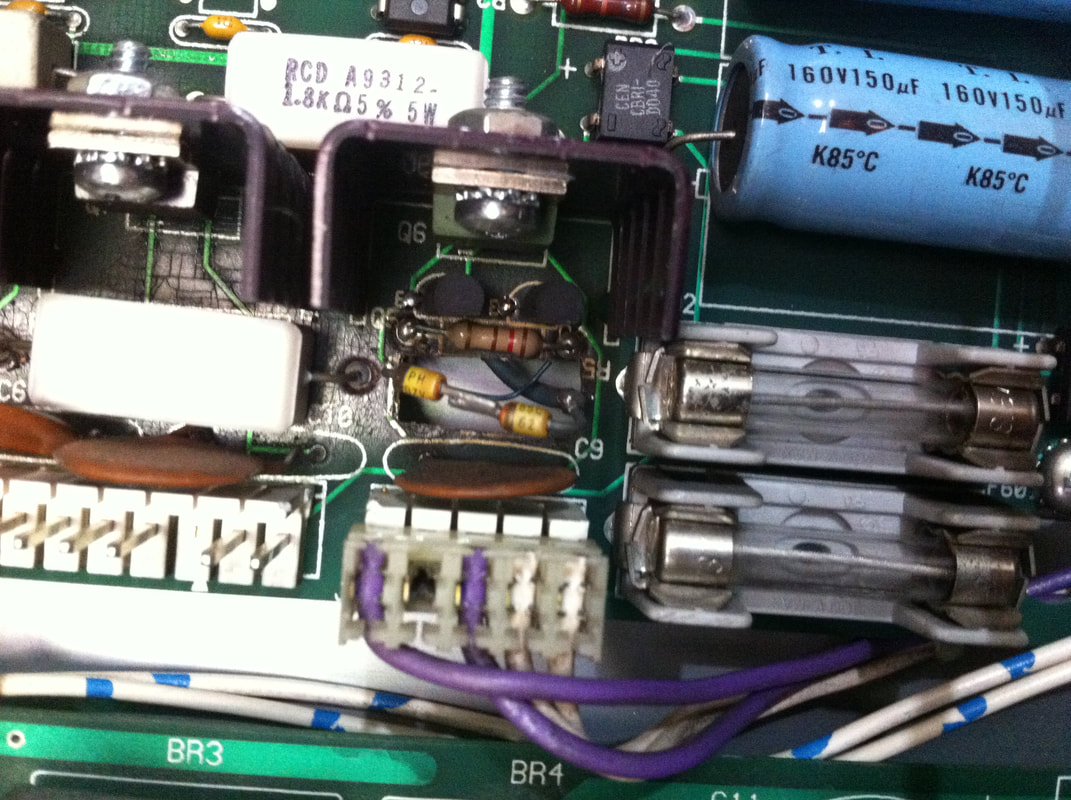
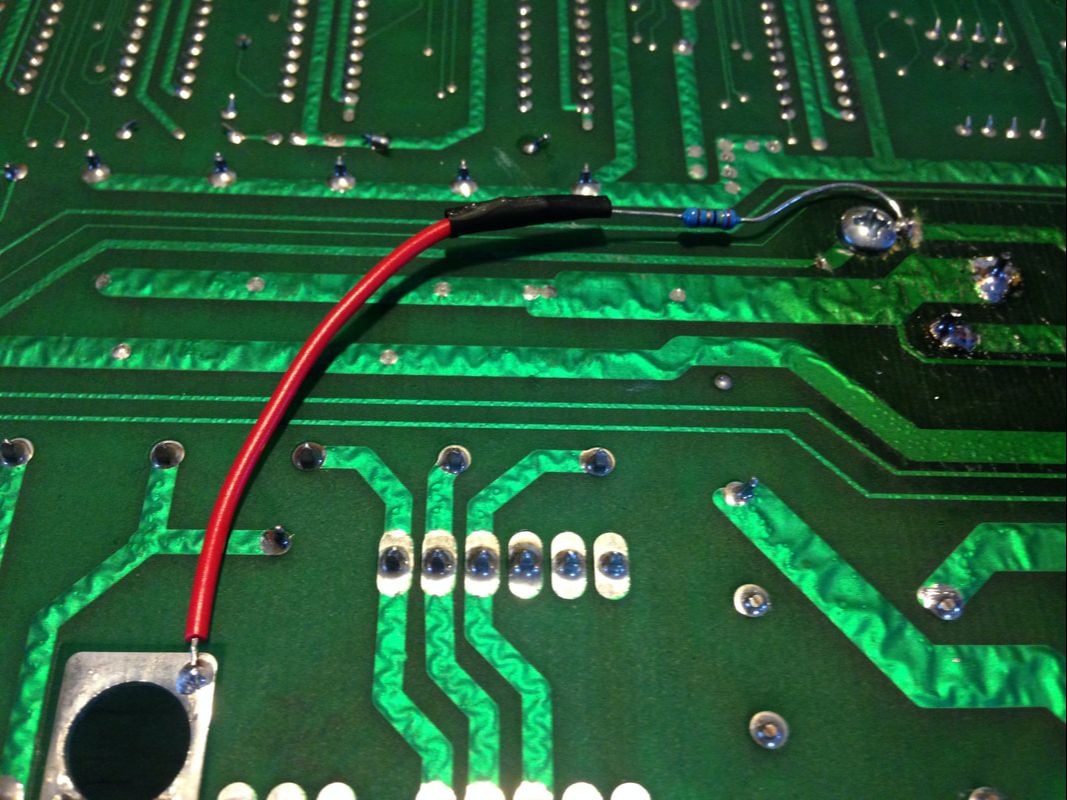
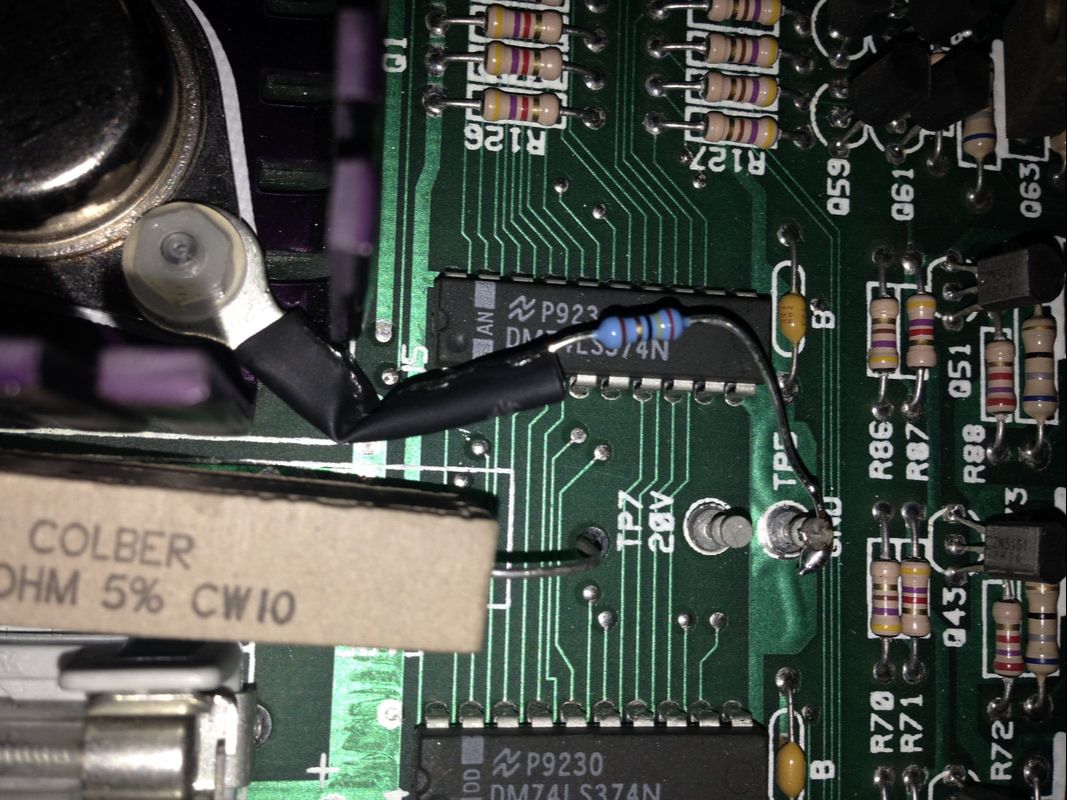
Game resets are a very common issue on WPC era games. There is a huge section on Pinwiki devoted to the issue and it is an excellent guide for working through reset problems. So, naturally, it was my first stop for advice. The 5 volt circuit on this game was always low. It hovered around 4.82 volts most of the time, but would occasionally dip below 4.8 volts. The resets would occur randomly during gameplay and were not associated with flipper activations or double-flipping. The game was also resetting long after it had been turned on. This ruled out diodes on the flipper coils and the thermistor as likely causes of the resets. So I was left with the lengthy list of other components to look at. I worked through the entire list quite thoroughly and, surprisingly, all of the components and connections seemed fine. I eliminated the connectors by unplugging them halfway or wiggling them around and checking for spikes or dips in the voltage reading, but it stayed the same. The board was relatively clean, but BR2 and BR1 had been replaced at some point in the past. The solder work was messy with flux, but otherwise OK. Line voltage from the wall was also good. Reseating cables and connectors did nothing to improve voltage readings. So, I started looking at components to replace. The first thing I replaced was the voltage regulator, as both BR2 and C5 tested OK, whereas I had no way of testing the regulator to verify it was still in spec. These can be bought more cheaply from pinball suppliers (PSPA, Mr Pinball), but electronic parts suppliers also have them (RS). After replacing the regulator, there was no improvement. So I figured the test on BR2 and C5 may not have been accurate, and I replaced them just to be sure. I replaced BR1 as well, although only for consistency. There was no change in voltage readings after this, either. Still below 4.9 volts. In desperation, I even replaced C4 on the power driver board and C31 on the MPU. Both of these were blue Phillips-branded capacitors which are known to fail. They weren't the problem in this instance. So at this point I only really had one option left - the resistor mod/hack. This isn't a mod I have had to do before, so I went ahead and carried out the resistor mod as per the relevant section on Pinwiki. It involves severing the ground trace to the regulator case as well as the connection to C9. Note that you can simply cut C9 from the board altogether instead of cutting the trace. I hacked away at the solder mask and traces on the underside of the board with a knife until they were severed. Don't cut a massive chunk of trace out as this will just make it harder to repair the hack in future, if necessary. I connected the resistor to the ground point at the screw mounting hole as this was a nice big solder pad to attach to. Overall, it looked pretty neat, I think. I plugged the board back into the game, turned it on, and voila! Test point 2 was reading 5.09 volts! Yay! Haven't had a reset since (fingers crossed!). Although this mod is certainly a lot of effort, and tricky to implement, it definitely does the job. The resistor mod as described on Pinwiki involves hacking away at the board traces to break them. It's messy work and not easily reversible. You can actually perform this mid without altering any traces on the board. Kahr, the creator of the WPC Daughter Board, implemented this mod using nylon screws and washers to isolate the regulator from ground instead of cutting the traces. He discusses the steps in detail in this forum post. The result is a board repair that can be totally reversed. I tried this method out and secured the resistor to the ground at TP5. I like this take on the resistor mod a lot and will be doing it this way in the future. Burned general illumination connector and header pins
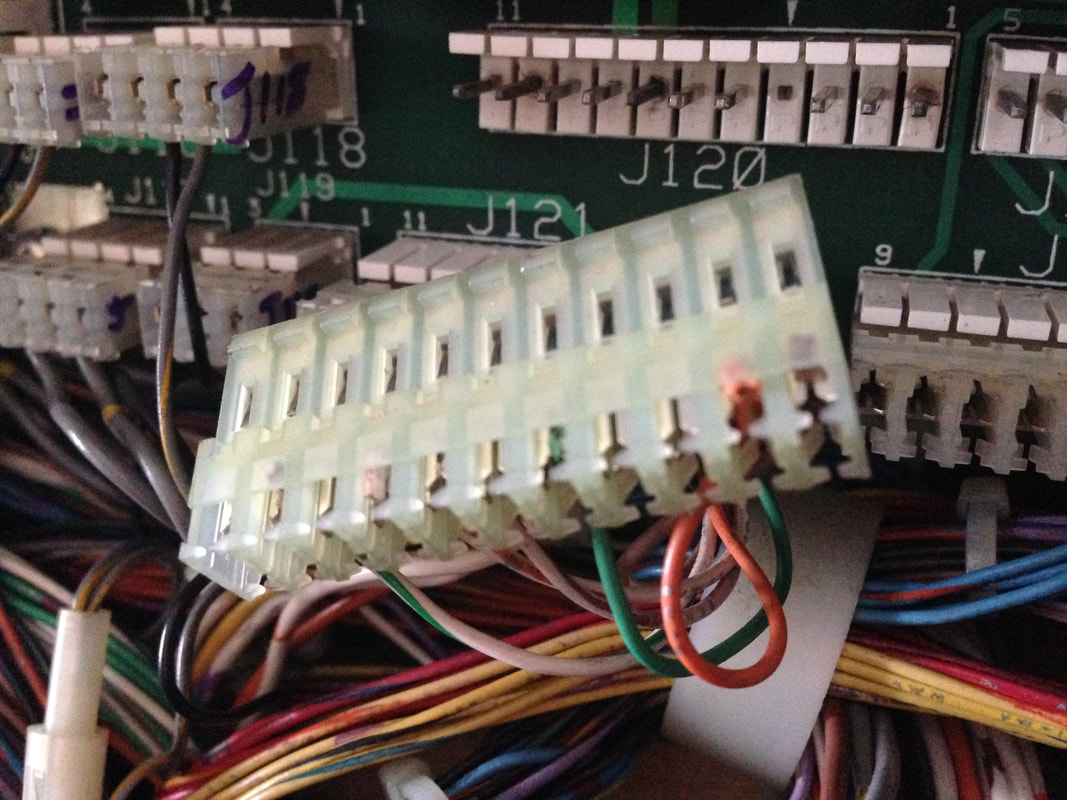
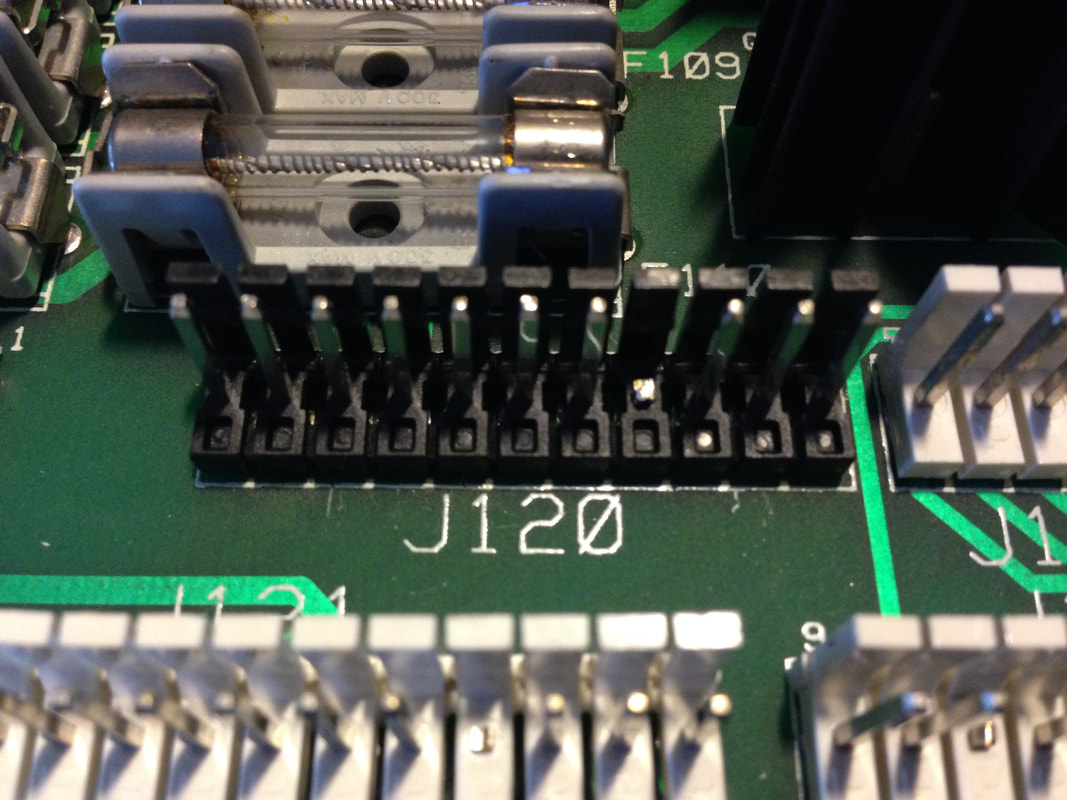
It's pretty typical to see burned connectors at J120 and J121 on the power driver board, which burn up due to the current that passes these connectors to the playfield and backbox general illumination lamps. On one of these Fish Tales, the connector was a little crispy as expected, but there were also cracks in the header pin plastic housings and some of the pins were badly tarnished. So, I replaced the connector and header pins as well.
The header pins can be tricky to replace. Simply break and snap off the plastic housing sections, exposing the bare pins. It can take a fair bit of force to break them off, but if they are already heat-damaged, they should break off quite easily. Then, just desolder the old pins and solder the new header pins in place. These pins are 0.156" in diameter, so the through holes in the board need to be nice and clean before you can insert the new pins. Check fuses F114 and F115 message
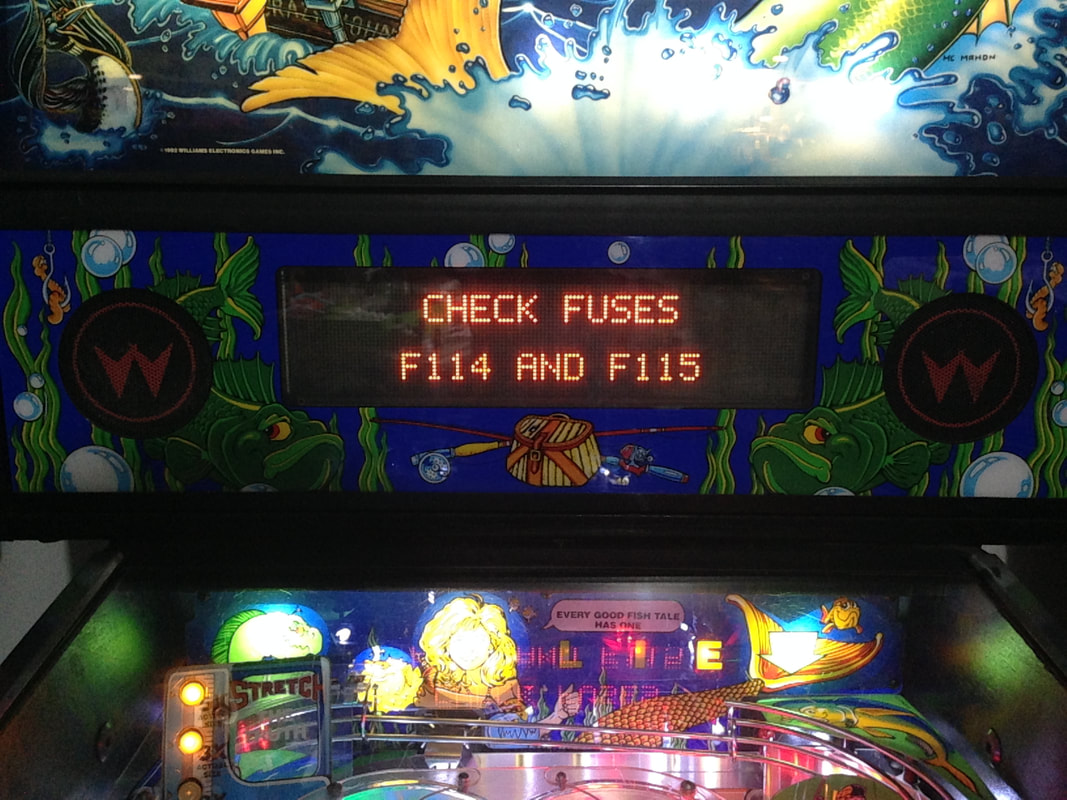
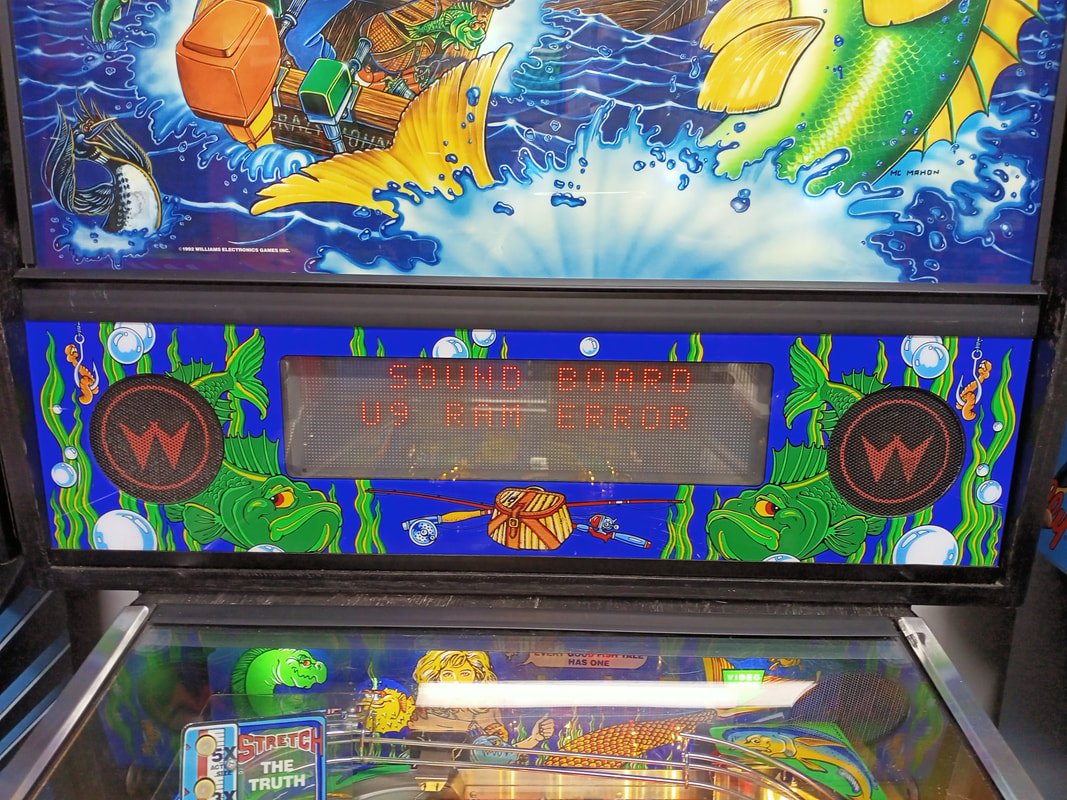
Not long after I had fixed the game reset issue, I had another power driver board problem. This time, I booted the game up and got this message.
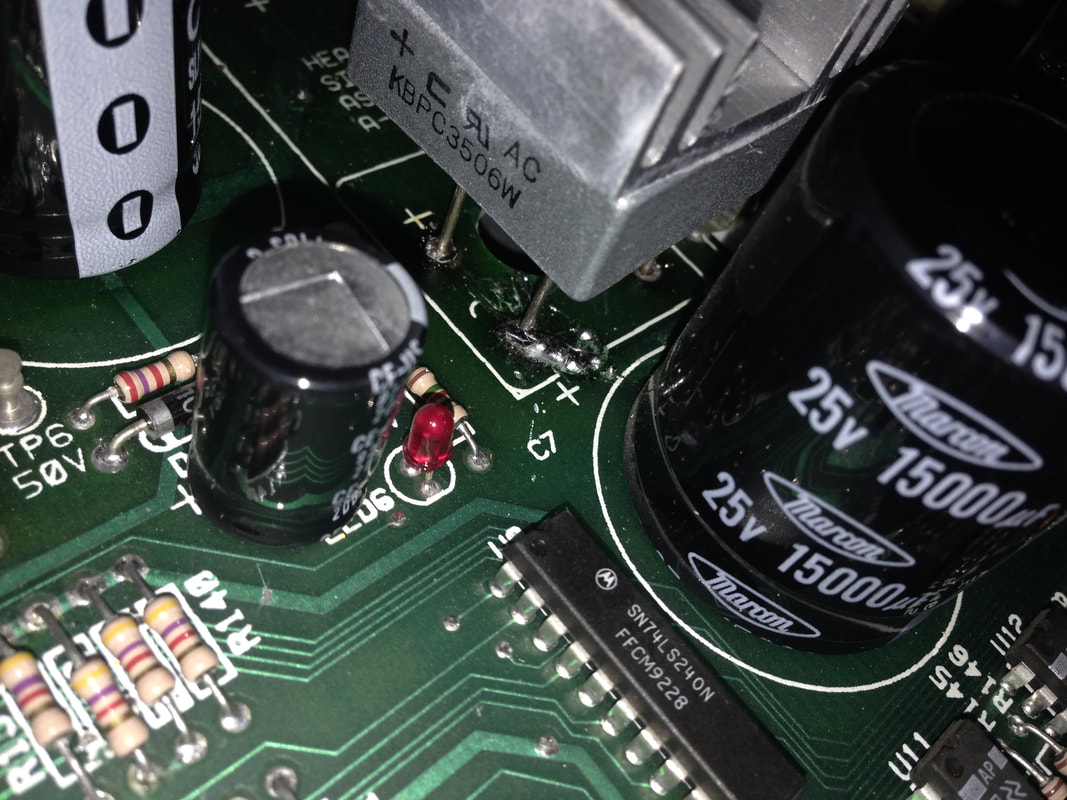
This message appears whenever the game's switch matrix circuit is interrupted, which requires 12 volts to run. Obviously, fuses F114 and F115 are a part of this circuit, which is why the error message suggests checking those first. I checked Test Point 3 (12VR) and it read 0. Not good! The fuses were also fine (if only it were that simple), so it was time to take the power driver board out and have a better look at it. As always, Pinwiki has a diagnostic procedure for this particular issue. The regulated 12 volt circuit is rectified by BR1. When I fixed the game reset issue I was having earlier, I actually replaced BR1 at the same time as BR2, because you may as well do this and not have to worry about it later. So I immediately suspected there was a problem with BR1. BR1 had been a little difficult to install because one of the traces on the component side of the board had been damaged and whoever replaced BR1 previously had put a big clump of solder around the BR1 leg to bridge the gap. Having a look at the solder joints, I found that this leg of BR1 was not making good contact with the solder, so I reflowed the solder here and made sure there was good continuity. This turned out to be the issue as the game booted without any problems after that. Cast button replacement
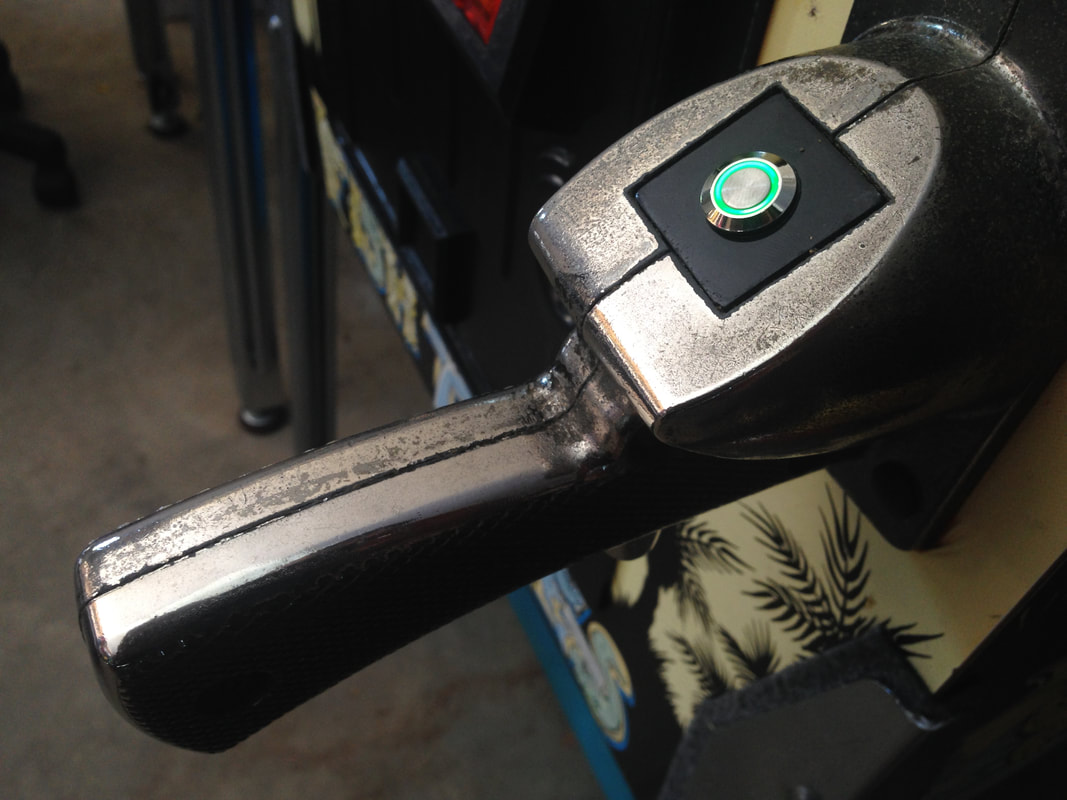
Like most games, some features included on the prototype version of Fish Tales were cut from the production version. One of these features was a cast button on the reel which larger and had a lamp inside which would flash. This looked like a cool feature to have on the game, so I decided to install one on my own game.
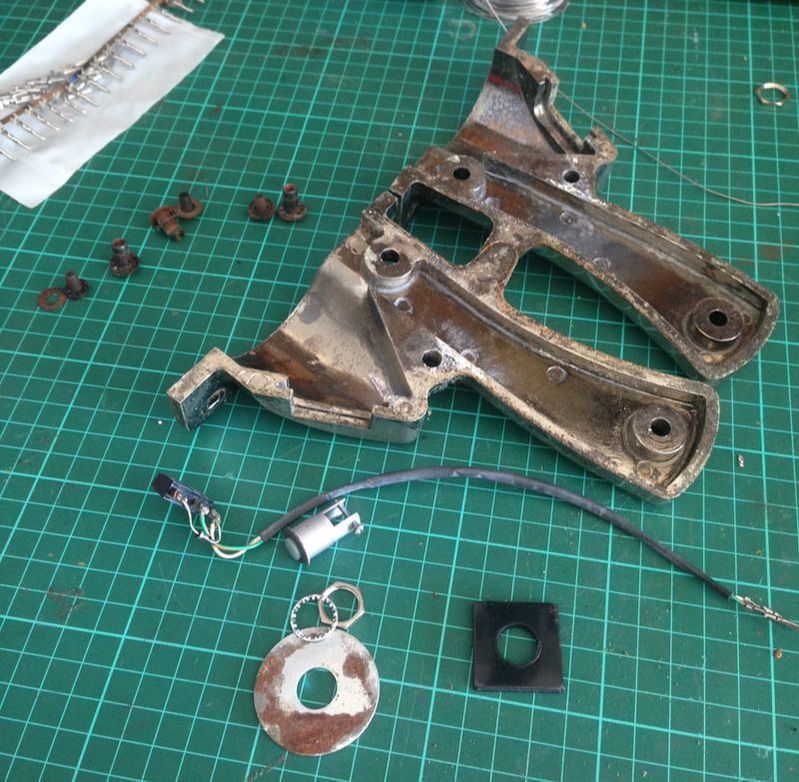
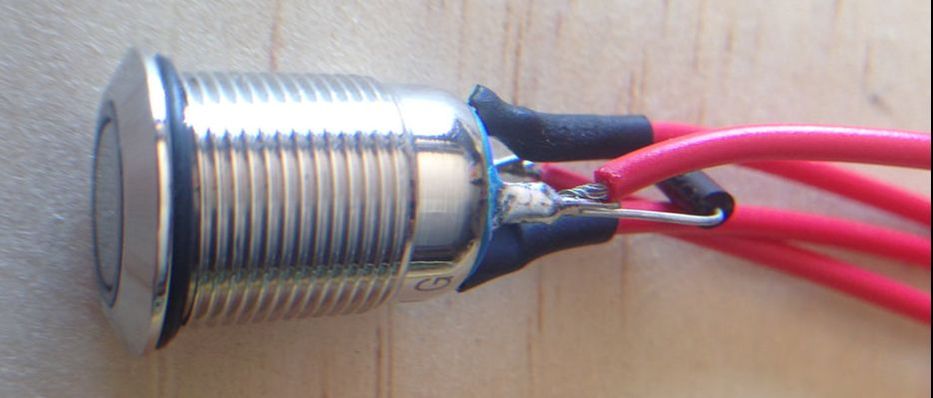
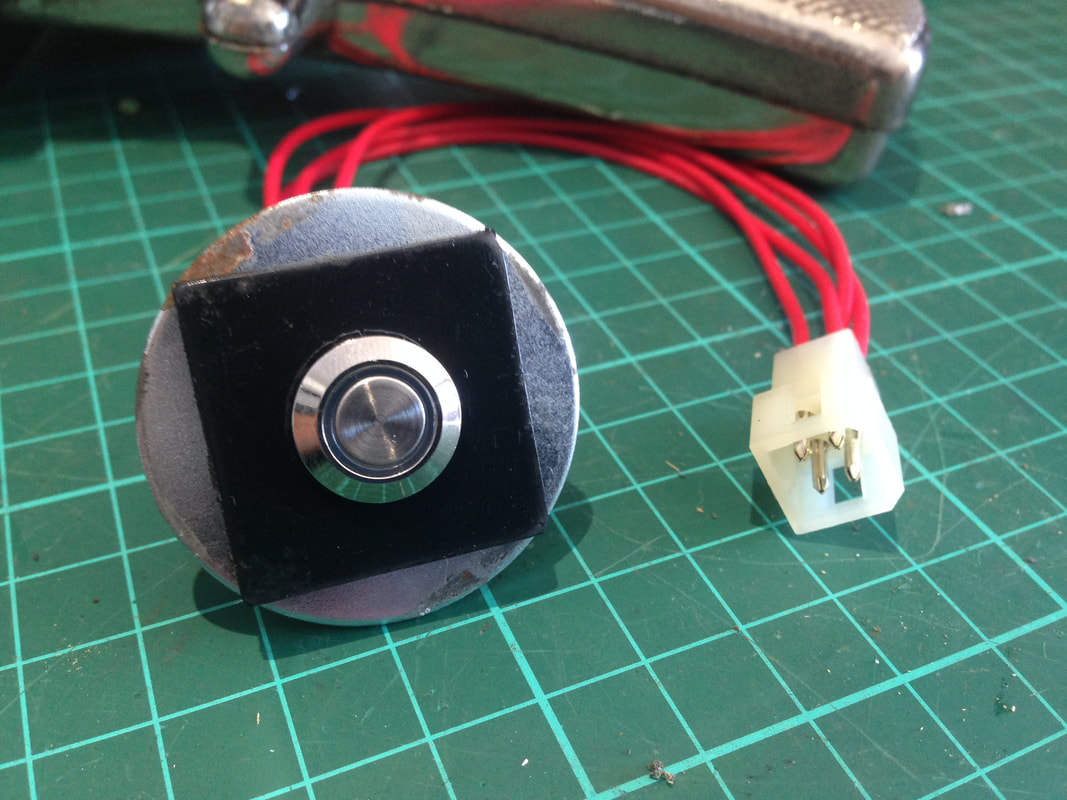
There is a fantastic write-up about the cast button by Joseph Dziedzic including pictures and instructions for how to wire up your own. However, this method was a bit full-on, and required machining of parts to get things to fit right. I was after a simpler mod, so I grabbed a simple, push button and LED assembly from eBay. There are heaps of different types of buttons similar to this, and most would probably work for this application, as long as they fit inside the reel handle assembly. So make sure you double check the button's measurements if you get a different one. I opted for green... just because. Luckily, most of the wiring is already in place for this mod. The connector that the cast button plugs into has four terminals, only two of which are used by the button. The other two supply 6 volts for the lamp which was originally designed to be in the reel handle. The voltage is still present at this connector, so all you need to do is install some Molex terminals onto wires connected to the LED, install them in the connector, and it is good to go! First, you'll need to remove and disassemble the reel handle. Just unplug the connector, and undo the four carriage bolts that hold the assembly onto the cabinet. There are thee security screws holding the reel assembly together. Once these are removed, the reel splits in half and the button assembly can be removed. Next, you need to prepare the new button for installation. The button must be narrow enough that it slots through the piece of square, black plastic and the large metal washer. As long as it clears these items, it should fit in the reel. The button I ordered had four terminals. The two marked positive and negative were for the lamp. I soldered wires onto these and added 0.062" male terminal pins to the ends of the wires (RS Components). The other two lugs on the button were for the switch. I soldered wires to each of the lugs, and installed male terminal pins of the end of the wires as well. There's one other part of the switch we need to install - the diode. Install a diode across the switch lugs and note the orientation of the diode for the next step. I extracted the male Molex terminals from the original switch connector using a perfectly-sized metal tube I had lying around. I decided to reuse this connector, but you could also replace it completely if you want. Now, the new male terminal pins could be slotted into the connector. You will need to be careful when installing the pins such that they go into the right connector slot. Compare the connector with the female end in the machine, with the white, green, red, and yellow wires feeding into it. Remember the positions that these wires feed into the male connector. Insert the male terminals so that they are in the following configuration:
This is what mine looked like after installation of the diode, wires, and terminal pins. Then it's just a matter of installing the new button in the handle assembly and plugging it back in. Make sure no metal from the button or diode contacts the metal of the handle. Otherwise, the newly pinned male connector should plug straight into the original female connector. Now, you'll have a nice and bright LED for a cast button. Similar to, but not completely original! Cabinet strengthening
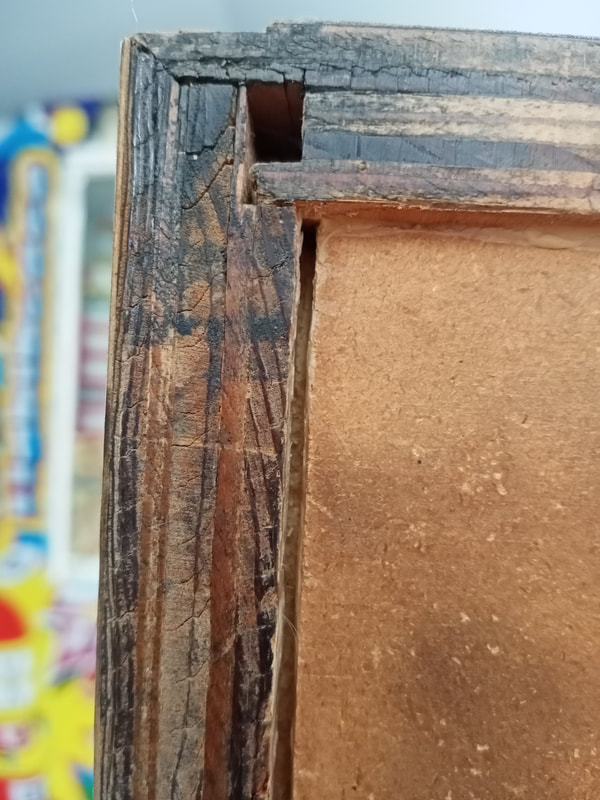
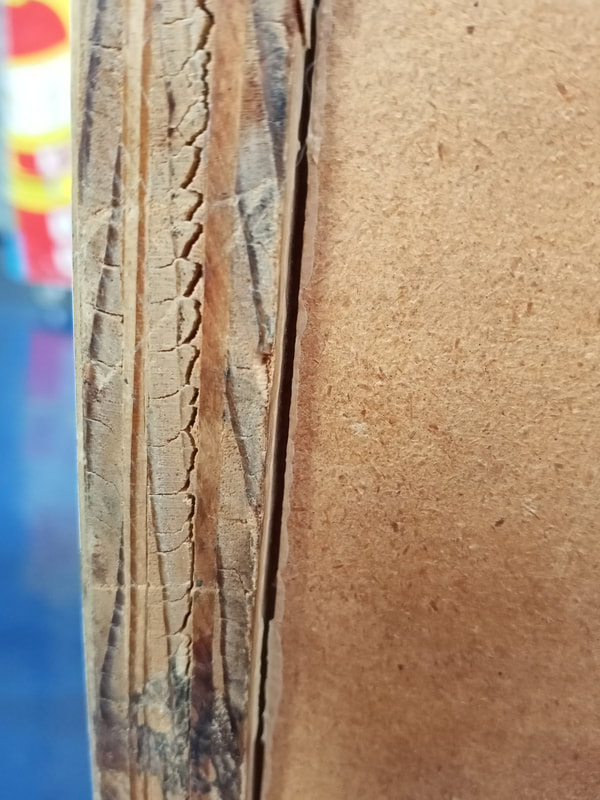
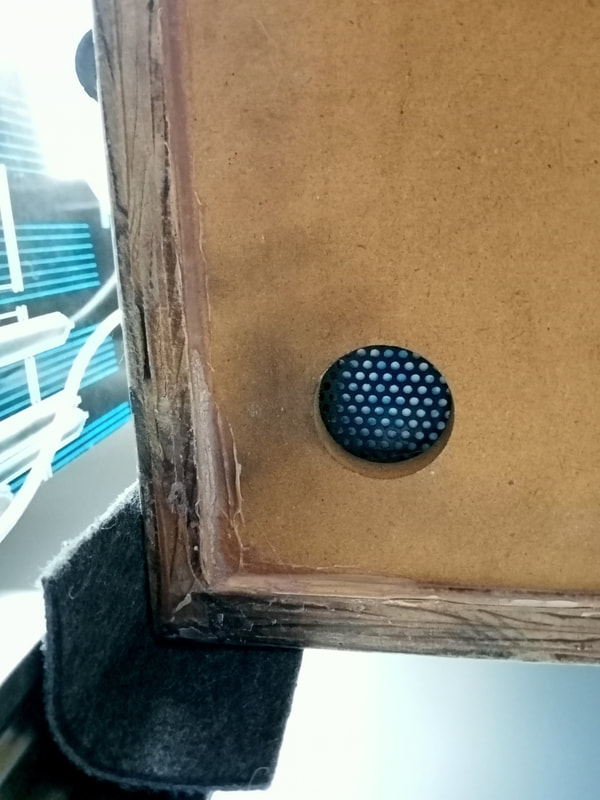
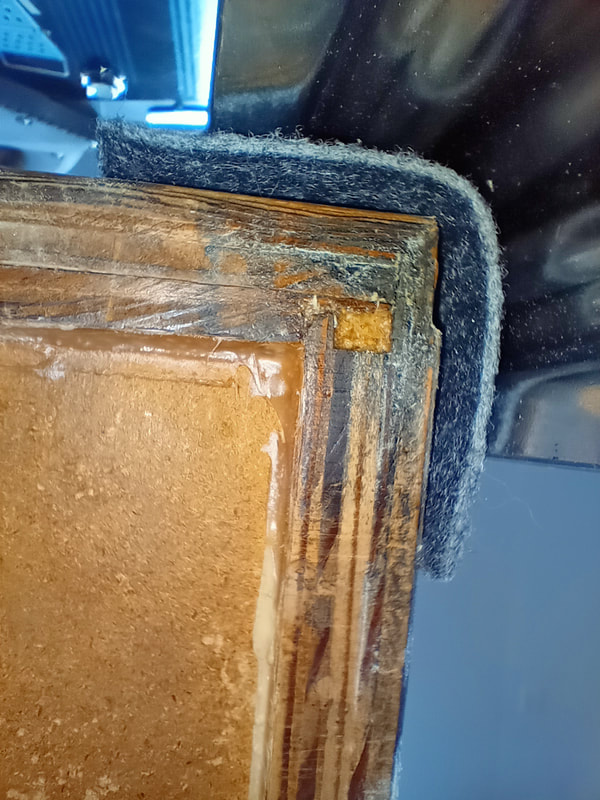
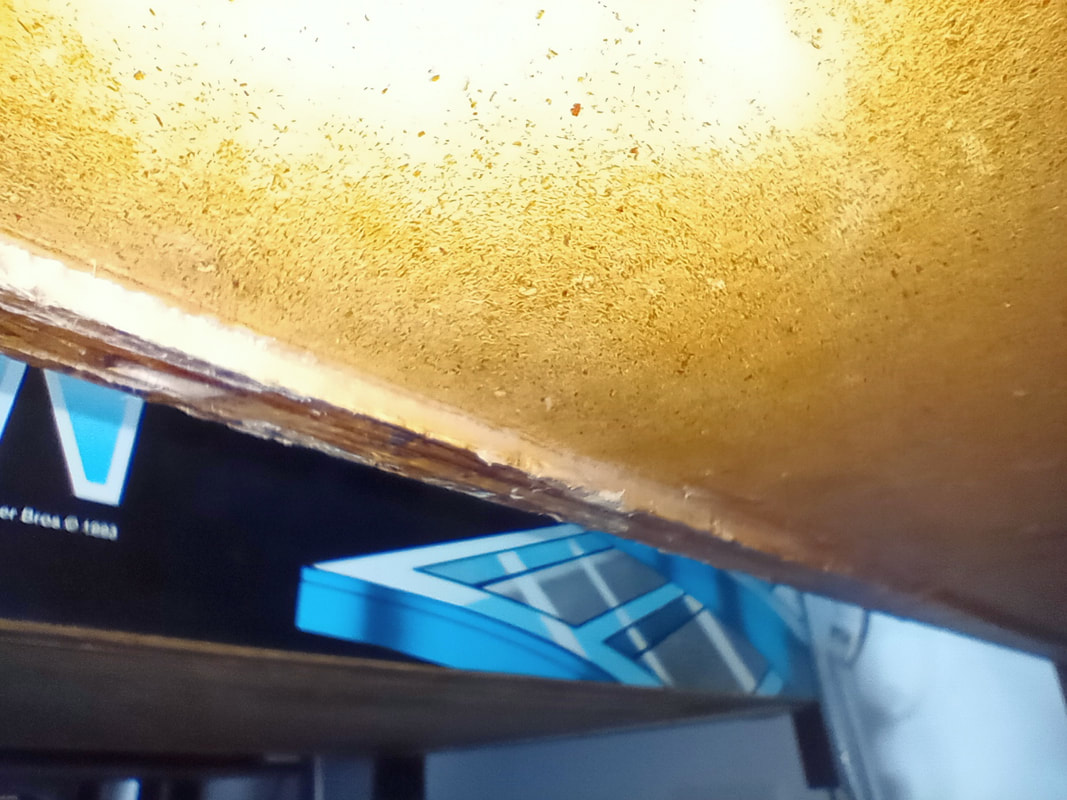
This was some additional work I did (on the game cabinet which I kept) in 2021, when we moved house. The game had been moved around a fair bit since the original restoration, and one of the things I had not yet done was attend to some broken seams and cracks in the cabinet. The wood tends to spit a little at the joins after so many decades of abuse. Most cabinets need a little patchwork or glue to keep them as strong as possible.
These splits were simple enough to fix with some liberal application of Selley's Liquid Nails Heavy Duty. I like the heavy duty stuff as the cabinet needs to be strong to withstand the shoves and tilts it usually sustains during play. The stronger the adhesive, the better! Squeeze it as far as possible into the split joins and pack it in with a craft stick as tightly as you can. You want to clear out any bubbles and air gaps to ensure the bond is strong. Then, some clamps around the cabinet to secure it in place as the glue sets. I use ratcheting straps (Bunnings) for this, as you can tighten them around the entire cabinet and clamp several joins at once. Leave the clamps in place for a day or two until the glue is set, and voila, all done! The large square hole was filled with a mixture of wood glue and sawdust. While it could have been filled with pure adhesive, the mixture of sawdust and glue helps to give it some additional structural integrity. The splits in the sides of the cabinet base also seemed to resolve well, and the clamping appeared to have pulled the base back into the correct position. Sound board errors
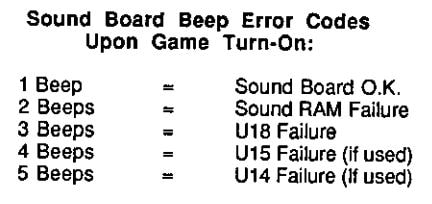
Seemingly randomly after I had finished most of the restoration, I started to get random errors relating to the sound board. These materialised as two "bong" sounds at start up instead of the typical single "bong", accompanied by an error message indicating a "U9 RAM ERROR". During game play, the game would appear to work fine for a little while, but would eventually start playing the wrong sound effects, or would stop playing any music or sound effects at all. Sometimes, there would never be any sound at all, and the speakers would just emit a humming noise.
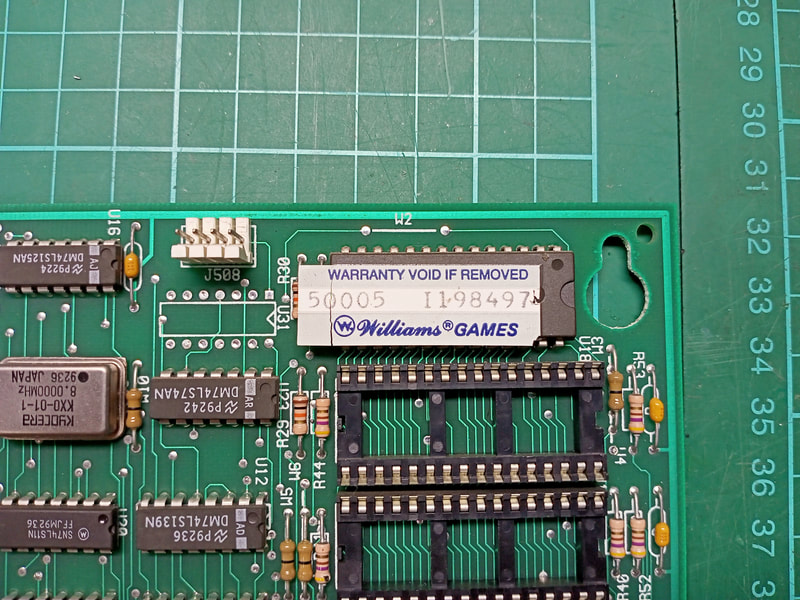
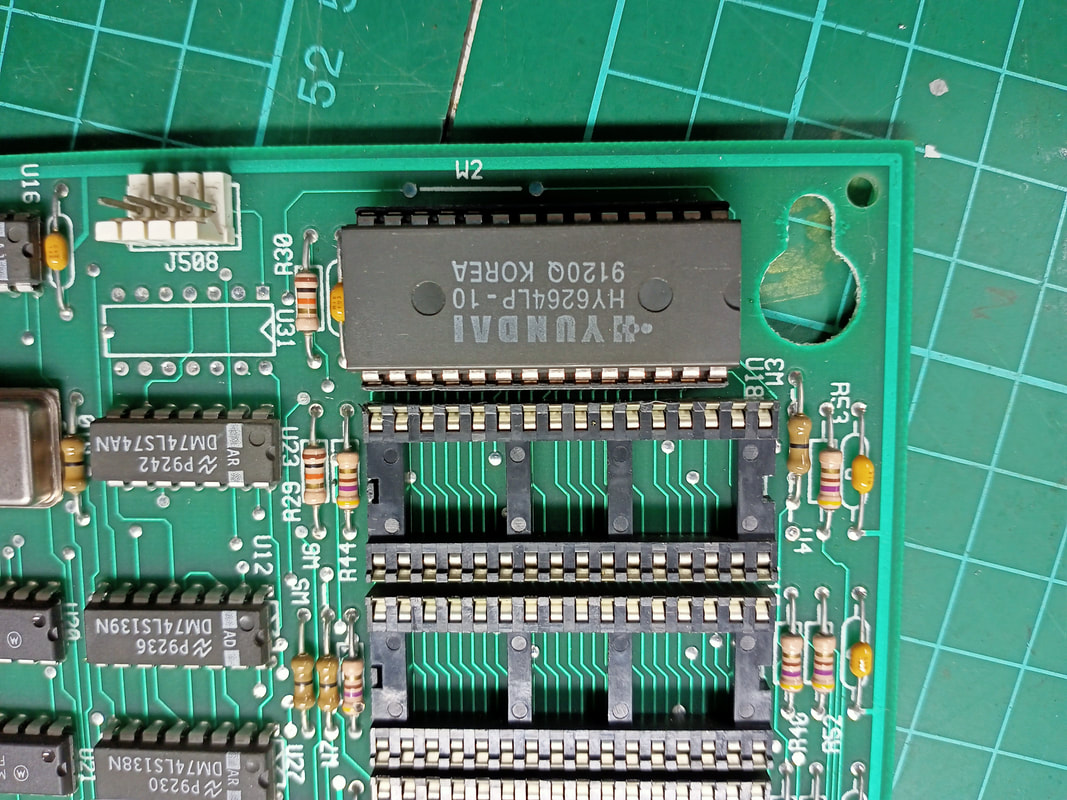
The "bong" sounds are actually diagnostic codes which indicate the status of the sound board at startup. They are explained on page 1-30 of the manual. The "Sound RAM" is the integrated circuit at position U9 of the sound board. As this error code is fairly specific to this one component, it seemed like a fairly simple affair to replace it. However, to be sure, I swapped the ribbon cable which connected the CPU, Fliptronic board, sound board, and display driver board (part no. 5795-13018-00) with a known working one. I still got the same error. Then, to be doubly sure, I swapped the sound board with a known working one. The error went away. That confirmed the problem was the sound board, so I made a beeline straight for a U9 replacement. U9 is at the top right of the sound board, typically covered by a warranty sticker with the game serial number. The U9 chip is a static RAM module. It is designated as a "2064" in the manual, however it can be replaced with the more commonly available 6264 static RAM instead (Mr Pinball, PSPA). Don't forget to add a socket to make future replacement easier as well (PSPA, Jaycar, element14). Once the new RAM module was in U9, the sound ROM was reinstalled at U18, and the board was reinstalled into the game, it worked like normal again. MPU board corrosion repairs
During the restoration I had checked all of the circuit boards for signs of corrosion from leaking batteries or capacitors. They all seemed OK. Fast forward a couple of years, and I was in the backbox to change out the batteries as I regularly do. This time, I noticed something wrong. There was some darkening of the green solder mask around one of the negative battery terminals on the MPU board. Uh-oh. This was evidence of corrosion creep from a battery which had leaked onto this board at some point in the past. I have no idea whether I just didn't catch it before, or it was simply not noticeable until it spread more recently. Either way, it was time to do something about it.
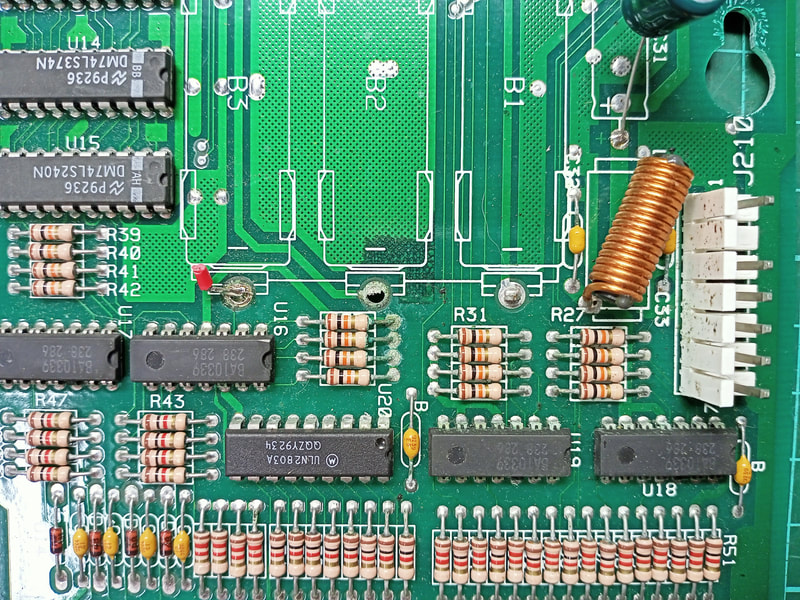
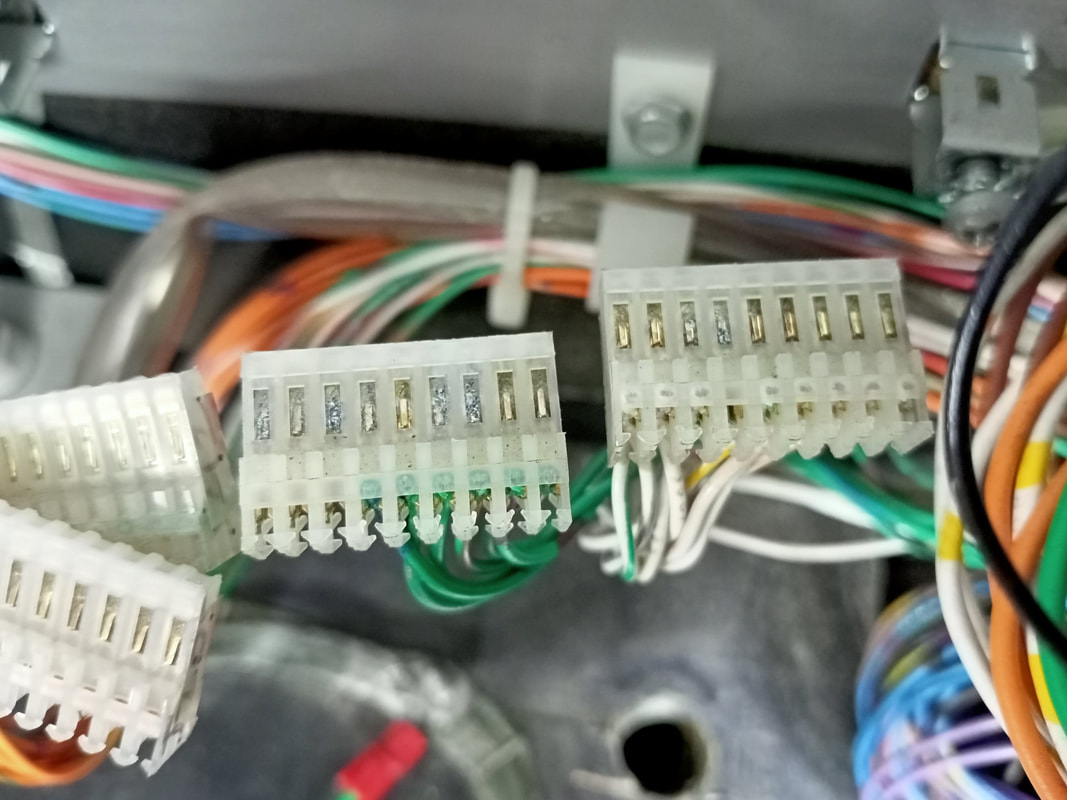
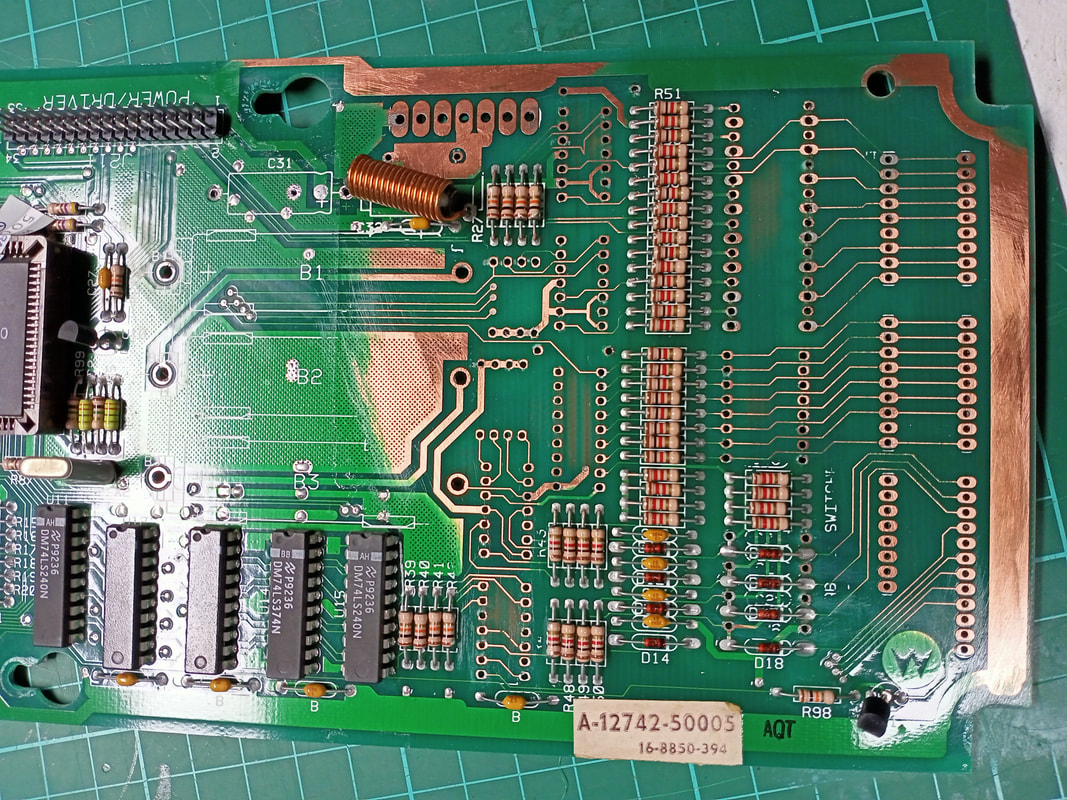
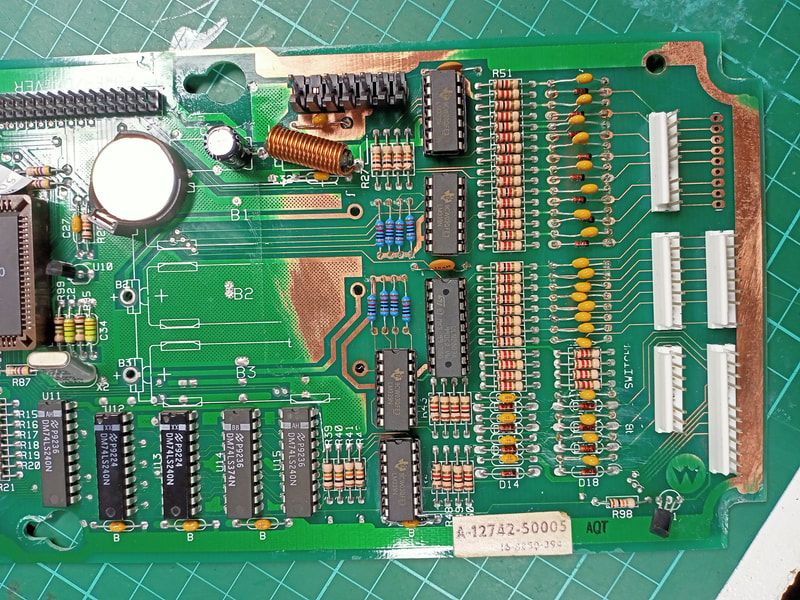
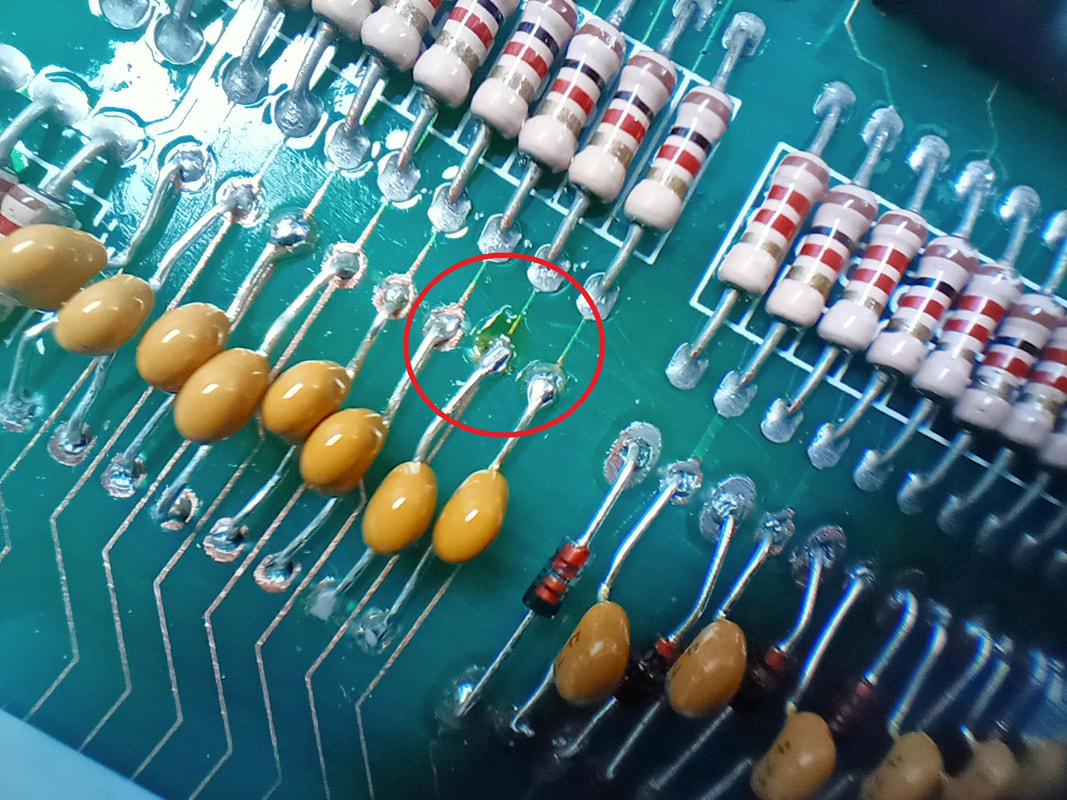
When I took the board out and inspected it more closely, I realised that the problem was a little more widespread. The resistors immediately below the middle negative battery terminal were also doused in electrolytic fluid. The LM339 chip at U19 was also affected, likely from corrosion creep through the traces on the board. The ground pins on the other LM339 chips, as well as the ULN2803 at U20, also had green fuzz on them. The corrosion appeared to be moving through the ground plane, which connects to many components on the board. Finally, the connectors at the base of the board also had some corrosion contamination at some of the pins. This was bad, as it meant the corrosion had been allowed to creep up the board from the connector positions, as well. As the corrosion had spread a little bit, I opted to take the nuclear option to getting rid of it. I removed every single component that showed any sign of being remotely affected by corrosion creep, and then a few more that looked like they were in the path. The bank of resistors remained unaffected as it was in the middle of the two problem areas (the battery terminals and the connectors). These stayed intact, but pretty much everything else was taken off. I followed the general steps in the Pinwiki procedure for alkaline abatement. After component removal, I sanded all traces down to bare copper. This process went smoothly and only a couple of through holes were damaged. Then, I applied vinegar (Woolworths) with a cotton bud to all affected areas. I did a couple of applications of this. Finally, I rinsed the area thoroughly with isopropyl alcohol (Jaycar) several times until all traces of solder mask, vinegar, and any other contaminants were gone. It is always better to remove too much than too little I say, and I think the photo above shows what I mean. Next came repopulating the board with components. Most of these components I purchased locally however they are available from component retailers as well. Here's a list of what I needed for this one:
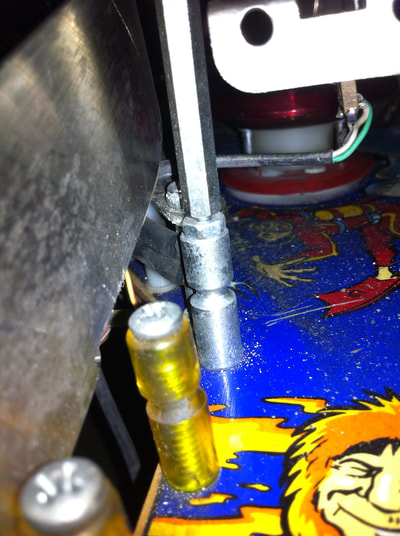
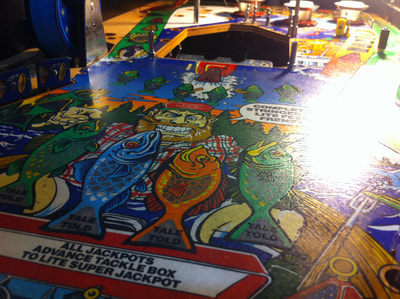
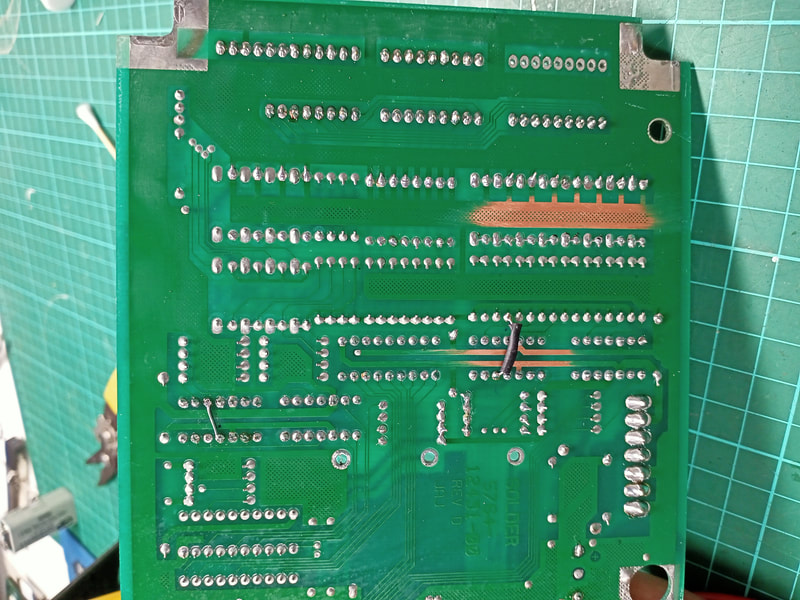
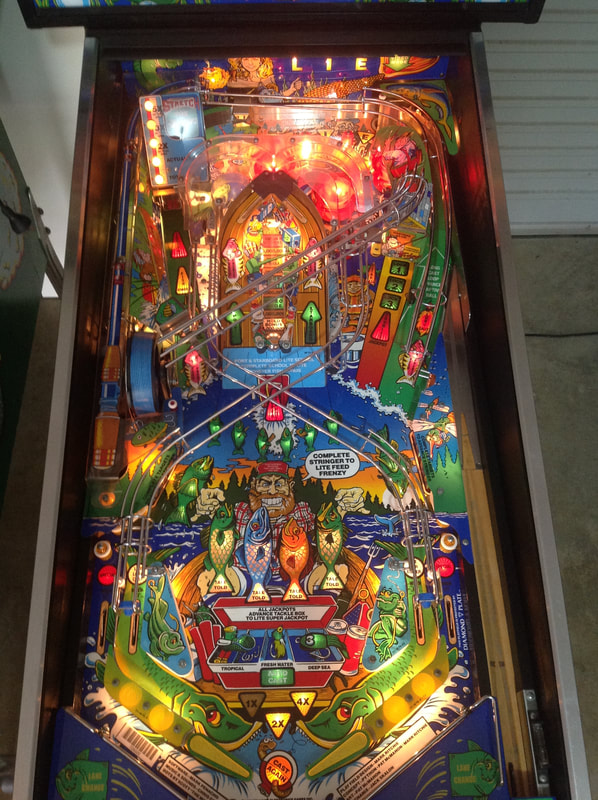
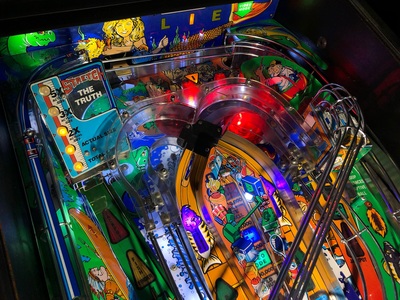
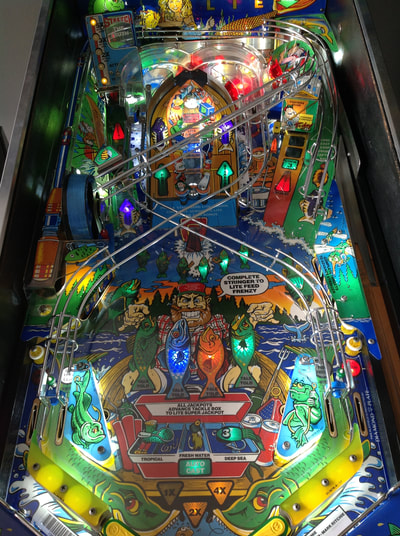
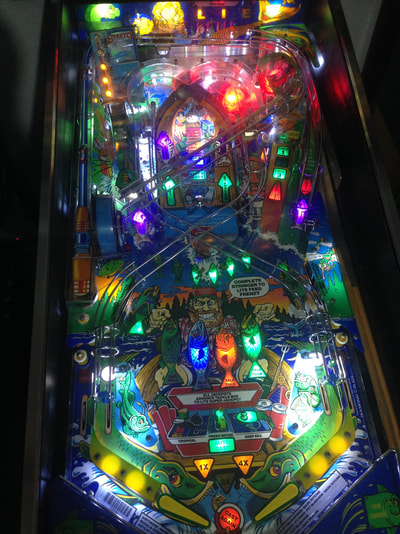
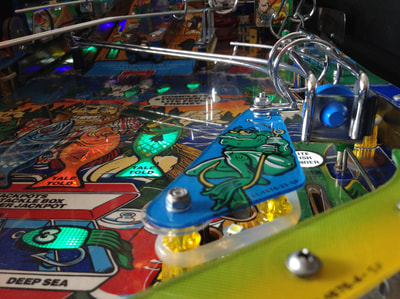
Once everything was soldered back in, I coated everything with a conformal coating (Jaycar) to seal everything in. I reinstalled the board, but noticed some issues. I was getting no switch closure at switch 24 (should be always closed) and the right coin chute switch was showing closed when it should not be. I rechecked all of my work and continuity of traces on the board. I found a couple of issues. I had lost continuity in two spots. The first was a resistor and one of the pins of U19. The second took me a little longer to find as it initially did not appear to be a break at all, until I inspected it with a magnifying glass. This was a break in the trace between C12 and R68. These components are responsible for column 2 of the switch matrix, and were no doubt causing the error in detecting switch 24. The problem of the right coin chute switch (dedicated switch) being stuck on was also due to a severed trace. This was a trace connecting two pins of U17 together. The trace was obscured by the socket I had installed over it, but I realised the problem when I compared U17 on a working to board to this one. A simple jumper got it back to working order, and the coin chute registered properly after that. Those were the only issues with this repair, and the board worked well after they were addressed. This was a lot of effort to go through to fix a "working" board, but I can now relax knowing that I won't have to worry about corrosion rearing it's ugly head again here. Reassembly Playfield reassembly on Fish Tales is pretty simple; reinstalling the boat is probably the trickiest thing to do. I found it easiest to put the playfield in the fully upright (vertical) position and thread the boat ramp through the hole from the playfield topside, securing it with screws while holding it in position. I replaced the rubber post sleeves with Cliffy post sleeves but I used a mixture of colours. For the two posts holding the captive ball in place, I used light blue sleeves to match the ramp flap decal. For the two posts on either side of the ramp flap, I used dark blue sleeves to match the water artwork on the playfield. Finally, I installed a green sleeve on the post just below the Caster's Club as the playfield is green in this area. I don't like to mix and match colours much on a game, but I think they work really nicely on Fish Tales, which is a colourful game. To match the colours of the fish by the flippers, the yellow flipper bats were cleaned up and then fitted with green Super-Bands. One of the Fish Tales machines received the LED treatment, while the other was left with incandescent globes. Some people prefer the incandescent look, so it is easier to sell a machine without LEDs and the new owner can upgrade to LEDs later. For the LED machine, a bunch of colour-matched LEDs Luke's Pinballs really brought out the colours of the playfield and artwork. I used frosted cool white LEDs for the general illumination and colour-matched the inserts and flashers under the playfield. The only modification I made to the colour scheme was to use orange, green and blue LEDs under the orange, green and blue fish in the centre of the playfield. Having the inserts match the colour of the fish seemed to make more sense than leaving them white. Frosted cool white LEDs went behind the Translite. I also replaced the lamp in the fish topper's eye with an orange LED - you can actually see the fish looking at you now! The spreadsheet below contains a list of LEDs that I used; feel free to use it for your own machine.
One of the machines was keeping the original look and feel, and other than a clean, polish, and wax, the playfield was left alone. The other machine got the full protective treatment consisting of a Makrolon playfield protector overlay from Precision Gas Springs. This went on the machine with the playfield damage near the flippers and pop bumpers. The playfield protector is a great idea on Fish Tales because of the fish inserts that so often get worn and damaged. With a playfield protector, there's nothing to worry about anymore, and the game plays nice and slick. I came across some equally awesome cards by Pinside user Soulrider911. These ones are great as they capture the brightness and colours of the playfield. I've installed this set and really like the look of it. Conclusion Remember at the start of this post, when I said that the Fish Tales theme did nothing for me, and I planned to sell both machines on after restoring them? Well, a funny thing happened in between restoring the first and second game. I had a chance to actually play it and found out that it was one hell of an awesome game! There are a lot of great shots in the game and the elusive super jackpot is a very difficult goal to reach. I even warmed up to the theme! I still don't care much for fishing, but the music and the backbox topper integrate very well into the gameplay. It's kitsch, but it's fun. So Fish Tales went from being nothing to one of my favourite games, just like that! I love it because it's a challenging game (especially with the lightning flippers) that punishes you for not making accurate shots. I have decided that I will be selling one of the games and keeping the other. I think it will stay in the collection for a long time to come. From a restoration perspective, Fish Tales was also a joy. It has a relatively simple playfield with only the reel as the major playfield toy. It's a simple mechanism with not much on it to break. Fish Tales has easily been my least troublesome machine thus far.
20 Comments
Beth
17/2/2021 07:33:29 am
How do I fix my enter button on the back of door? It is not letting me change settings
Reply
Hi Beth
Reply
Kent DK
23/3/2021 05:19:43 am
Wery nice site i use it a lot.
Reply
Daniel
24/4/2021 06:46:38 am
None of my lights work, backboard and playfield. Game starts, but ball doesn't launch. Right Flipper super weak, Left Flipper works normal. When you press the Fire Button, the game thinks the ball went up the right boat ramp... the playfield pieces work, but the solenoids don't. Someone told me to replace the WPC89 and WPC-S Driver Board. I did that, board cost $416, same result. Any suggestions?
Reply
Hi Daniel!
Reply
Joe Greiser
31/7/2021 10:28:49 am
How would I go about tightening up the second boat trigger since it doesnt use screws? Its the second trigger when the ball is coming from the right side of the boat. Since its loose it isnt pointing straight so it doesn’t trigger correctly which makes the game think you only hit the first trigger. The weird thing is that it will work going around that way if the ball is going slow around it. Any thoughts would be greatly appreciated!
Reply
Joe
2/8/2021 01:28:23 am
The rivets are loose and idk how I tighten those.
Tom Herman
20/2/2022 03:50:38 am
Hi, love your site, my fish tales pin ball machine fires up fine, I can enter the credits and change volume using the buttons inside the door, all lights are on and looks good to go, problem is when I push the start button nothing happens, game won't start even though have credits. Do you know an easy fix for this? If so, I'd love to hear it before I call an expensive repair service. Thanks!
Reply
Hi Tom,
Reply
Tom Herman
28/2/2022 03:08:03 am
Thanks, I appreciate the advice
Nigel Dixon
7/11/2022 11:18:50 pm
Hi, where did you get the switch for the caster handle? Love the project, just started mine and trying to source the parts needed. great write up thanks
Reply
Nigel Dixon
14/11/2022 08:27:25 pm
hello, is it possible to advise how you got into the reel motor mechanism? have removed pozzi screws the only 4 connections left just seem to turn, the unit looks like it was sealed as it does not budge. thanks in advance
Reply
Hi Nigel
Reply
Jamie
7/1/2024 03:46:17 pm
I just received this Fish Tails unit, I know about it, left flipper does not work and the text is in German and I can’t figure out how to get into English.
Reply
Hi Jamie
Reply
Echcelon1024
28/5/2024 12:22:27 pm
When my family and I visited the arcade for the first time, we walked past this machine and called ourselves a dumb fish. We were captivated by High Speed, which I bought 14 days later and started renovating. After another month, we were driving by and remembered the stupid fish that was for sale. After the experience with High Speed, we went to see her condition and since then we have her at home too and we can't get enough of her. Stupid fish, became the best game for a long time.
Reply
Your comment will be posted after it is approved.
Leave a Reply. |
About
Here you will find logs of our pinball and arcade machine restorations, repairs, discussion about general pinball and arcade topics, as well as recounts of our random pinball adventures.
Check back regularly for updates! Blog updates
Archives
May 2024
Categories
All
Donate

Running this website is a hobby for me (just like pinball!). I like being able to show off my restoration work so everyone can learn from it and potentially fix their own machines. If you enjoy reading the site's content or it has been helpful to you, please consider donating to offset some of the website's operating costs. |
||||||||||||||










 RSS Feed