- Published on
Demolition Man
- Author
-
-
- Name
- Posts
- Posts
-
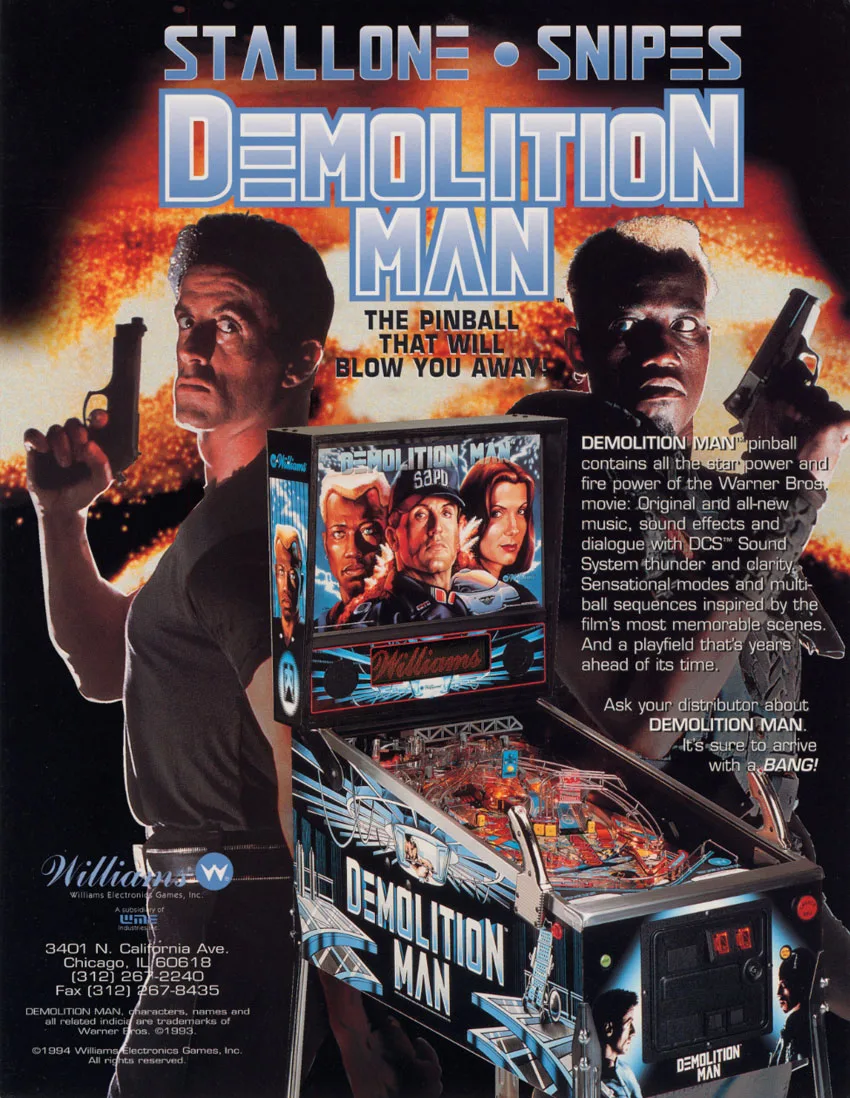
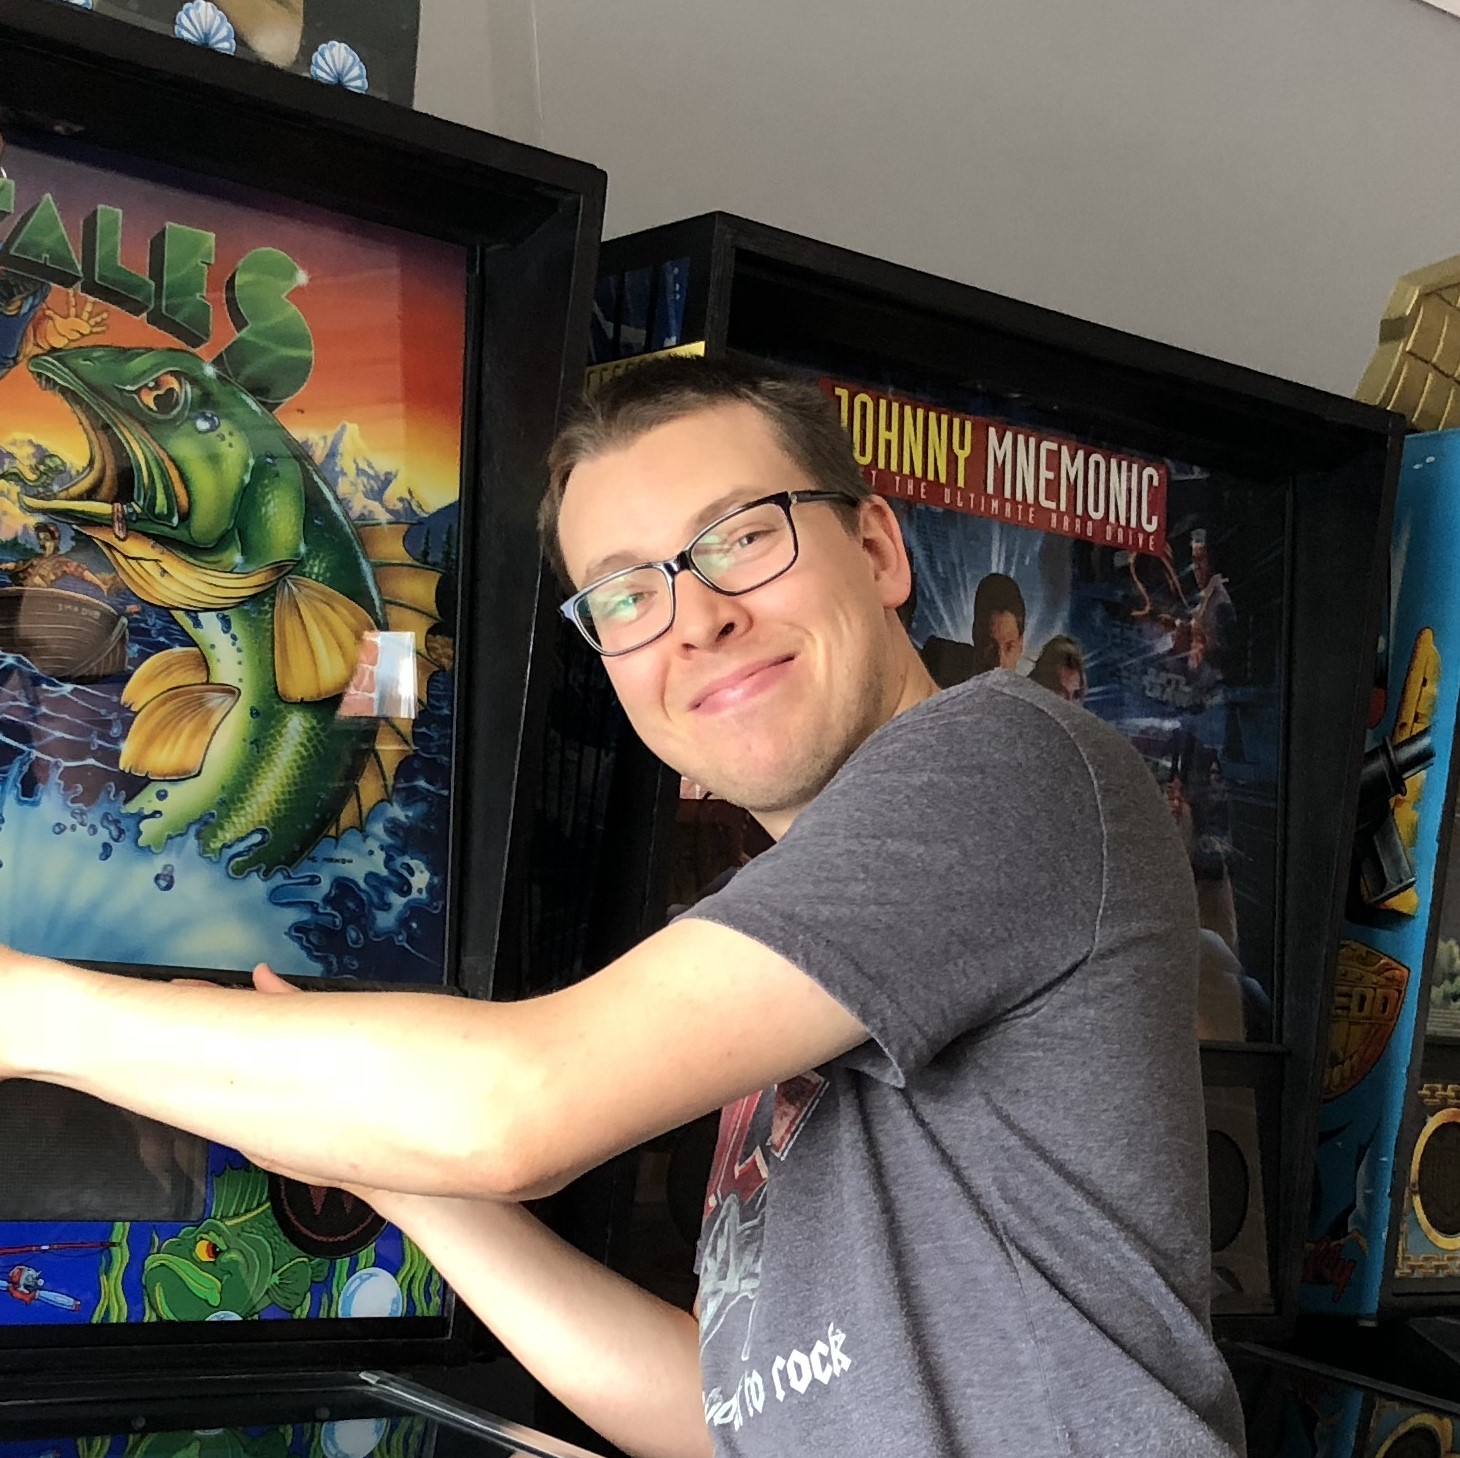
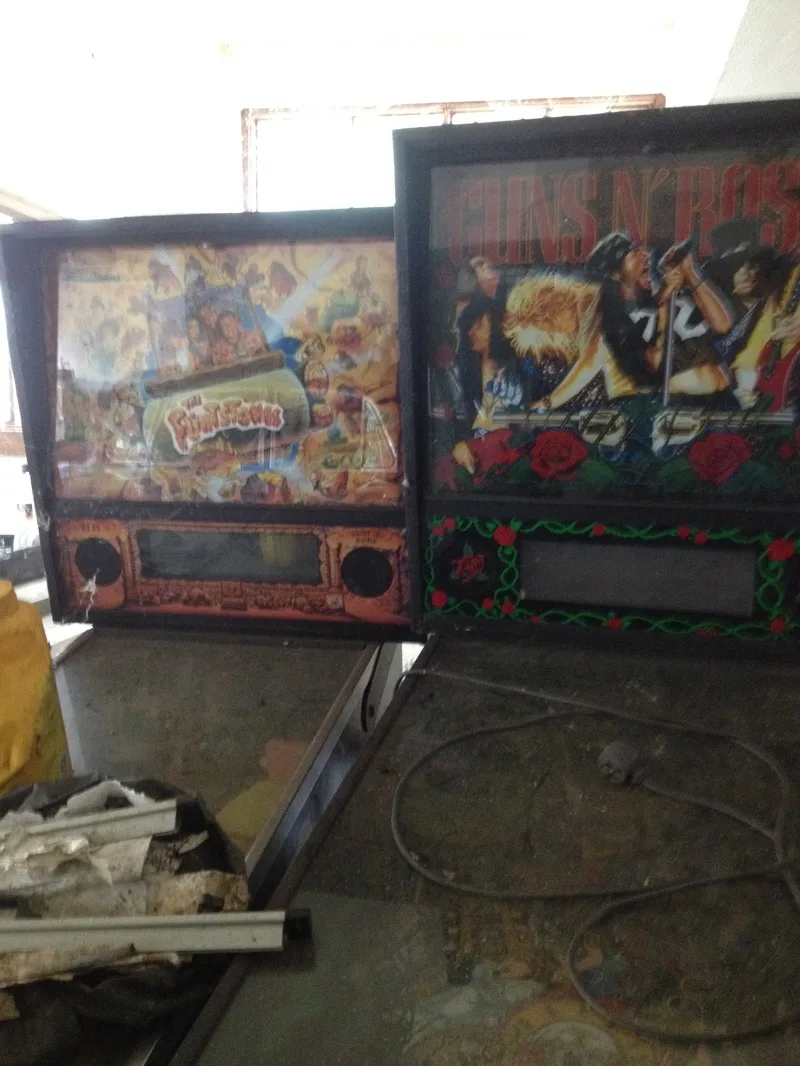
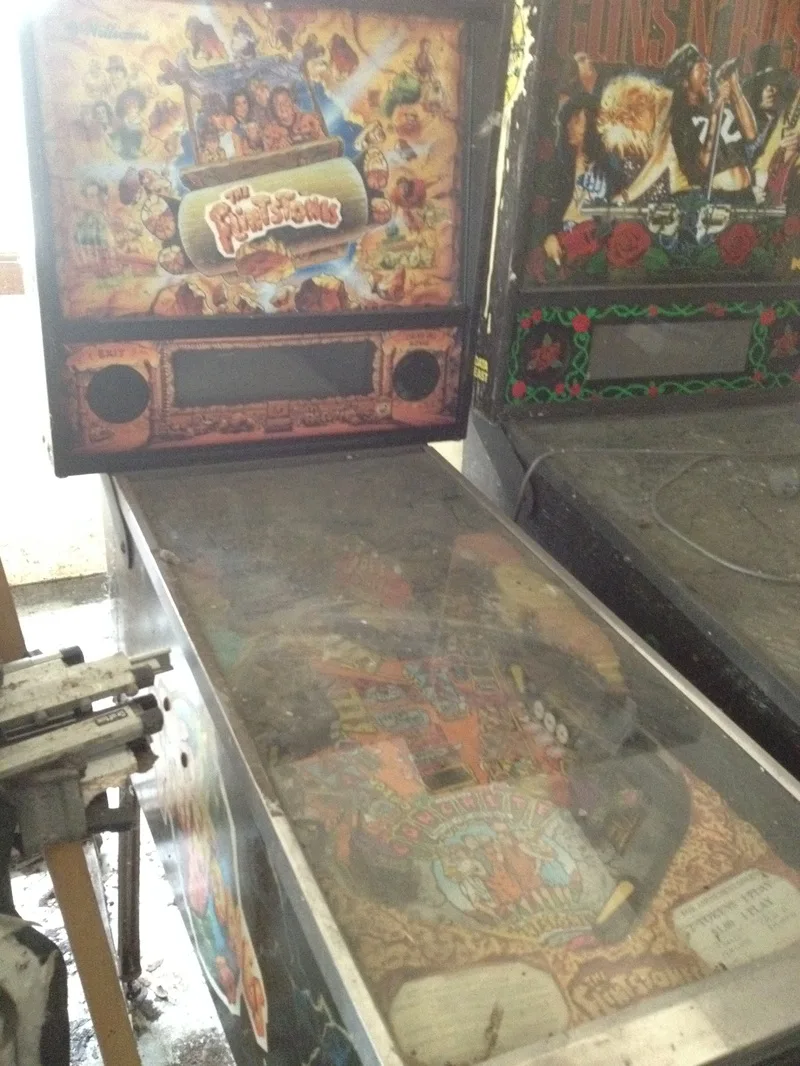
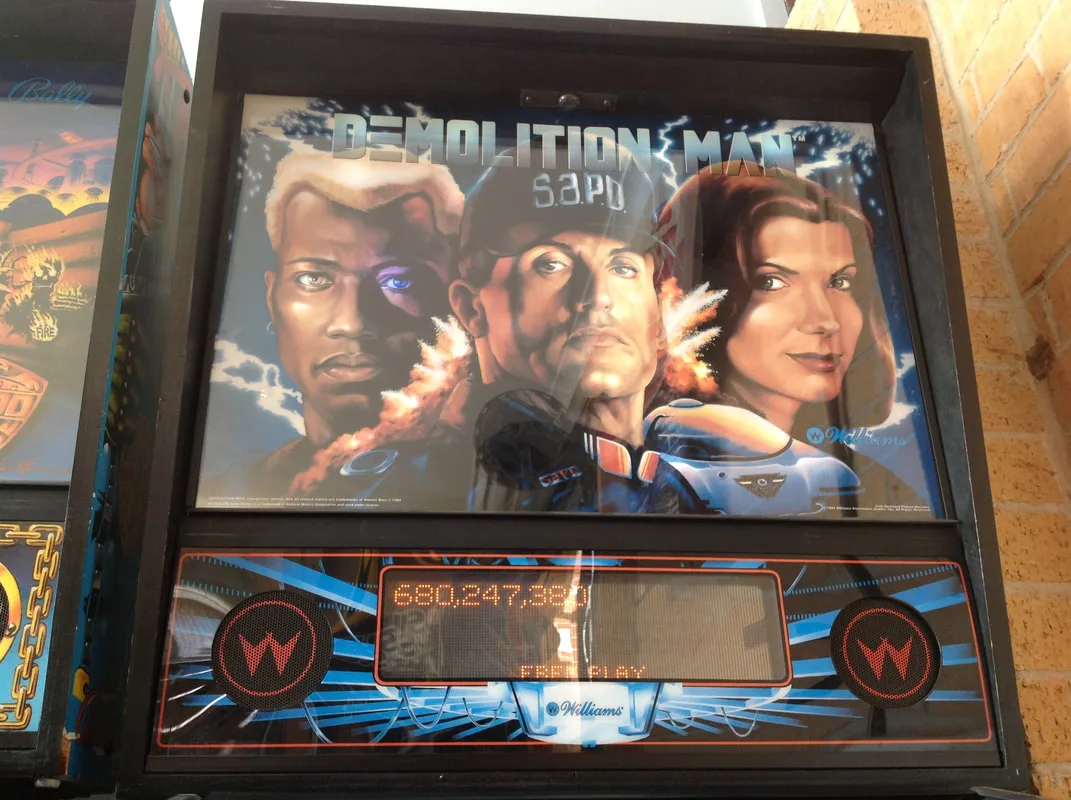
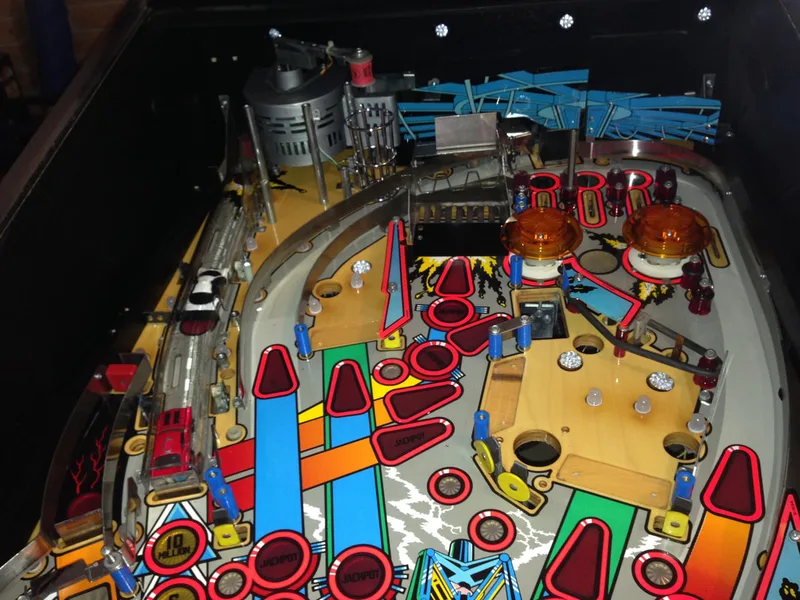
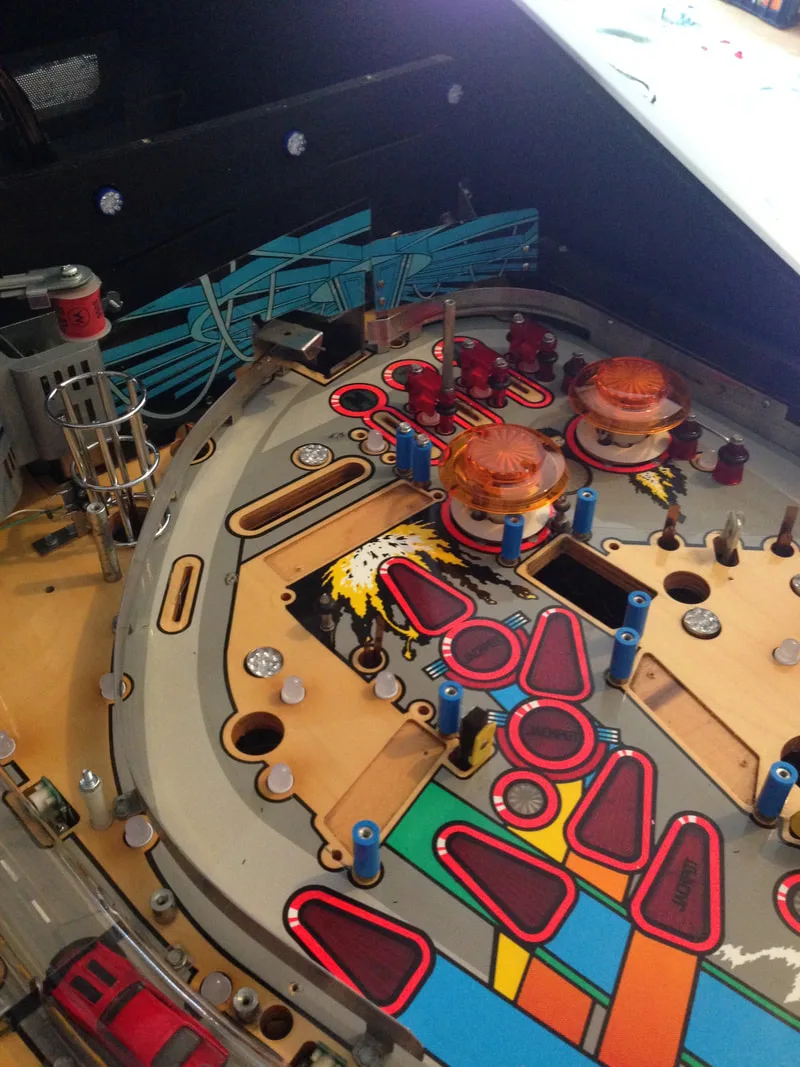
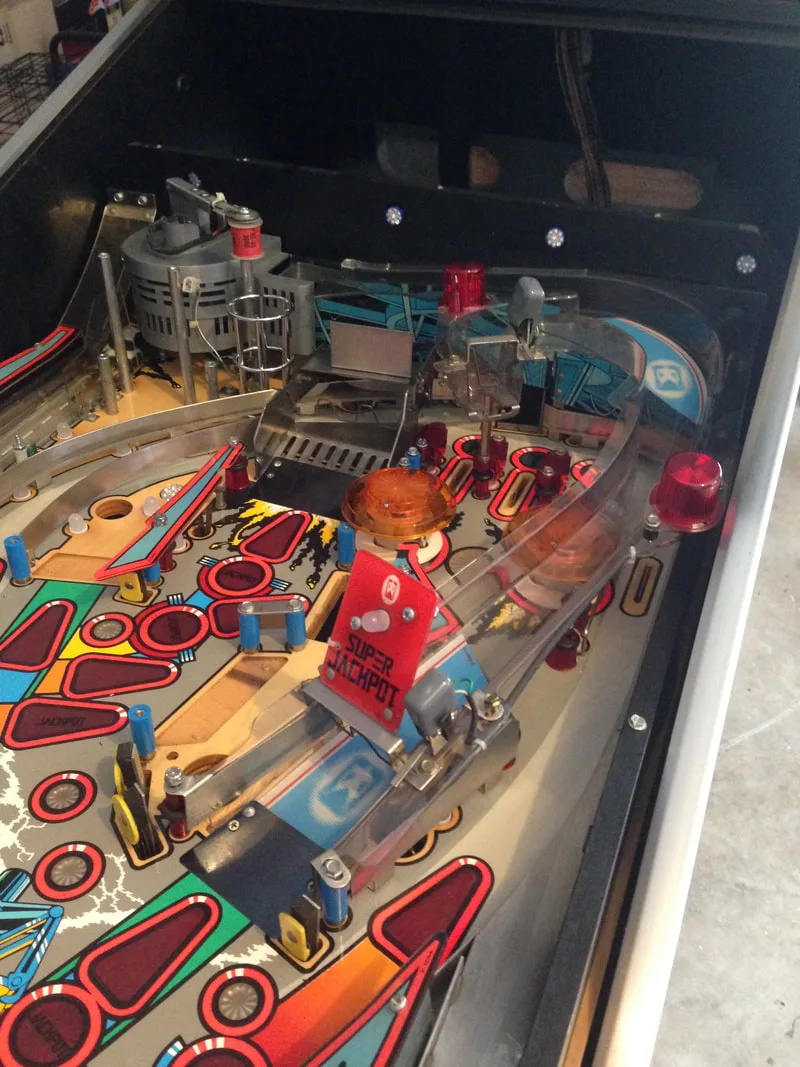
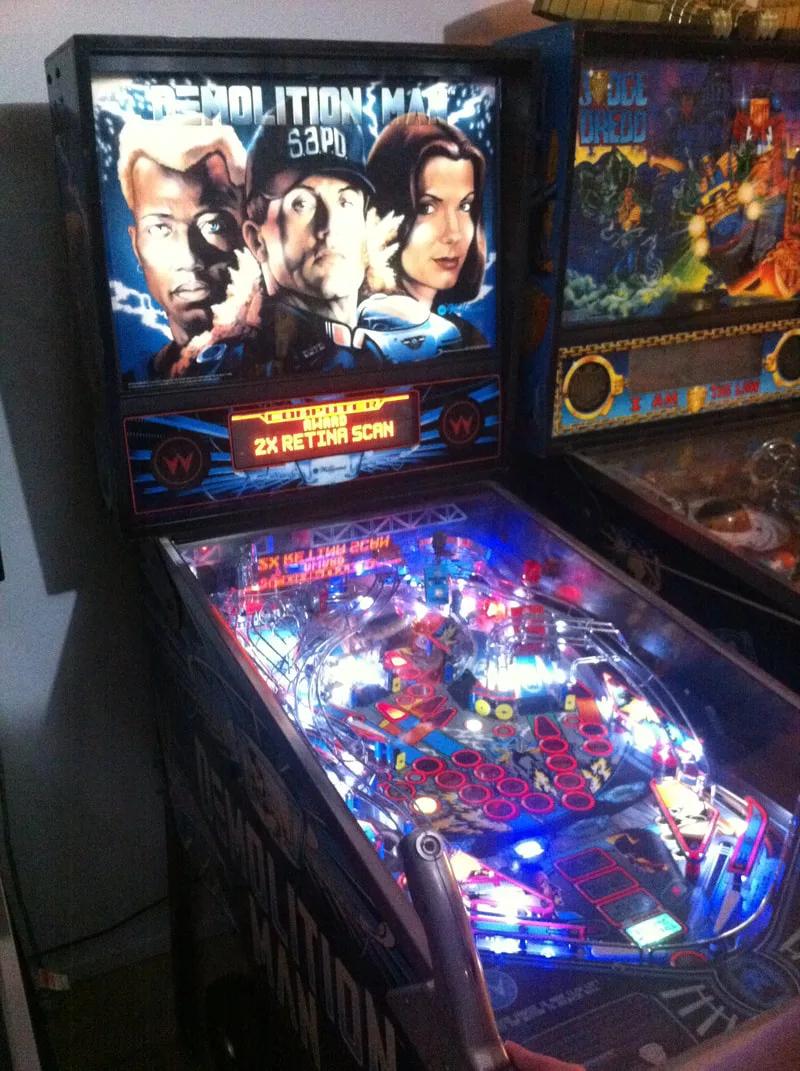
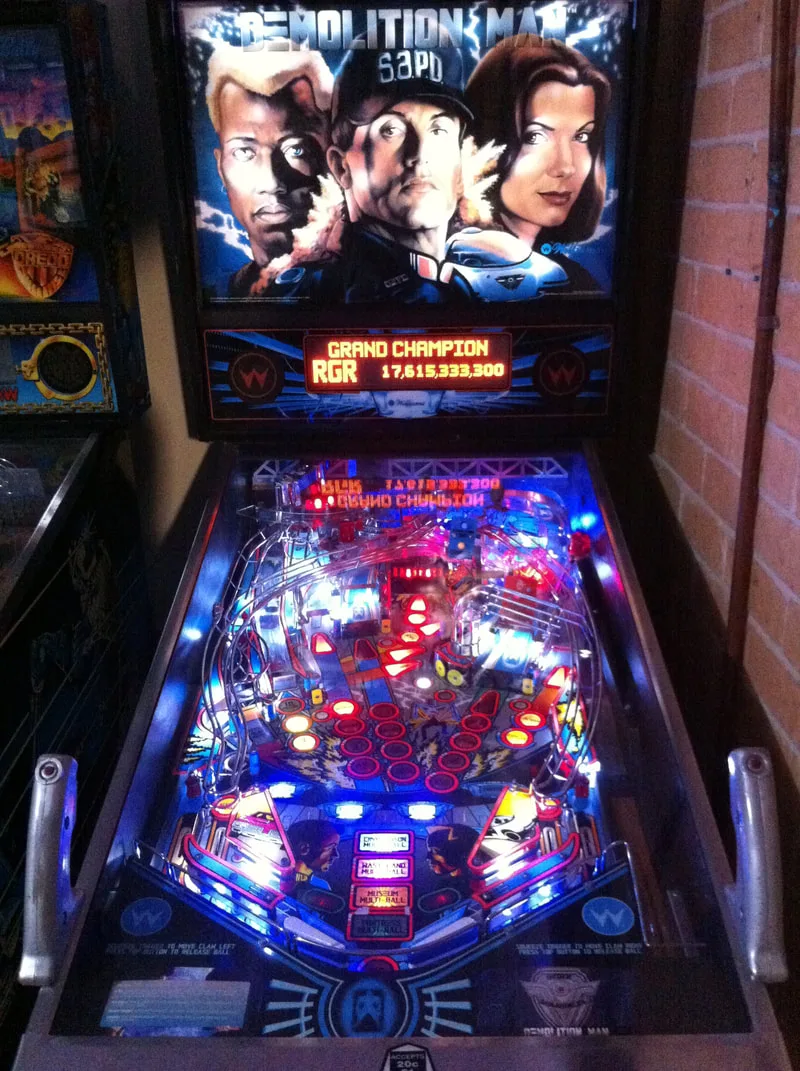
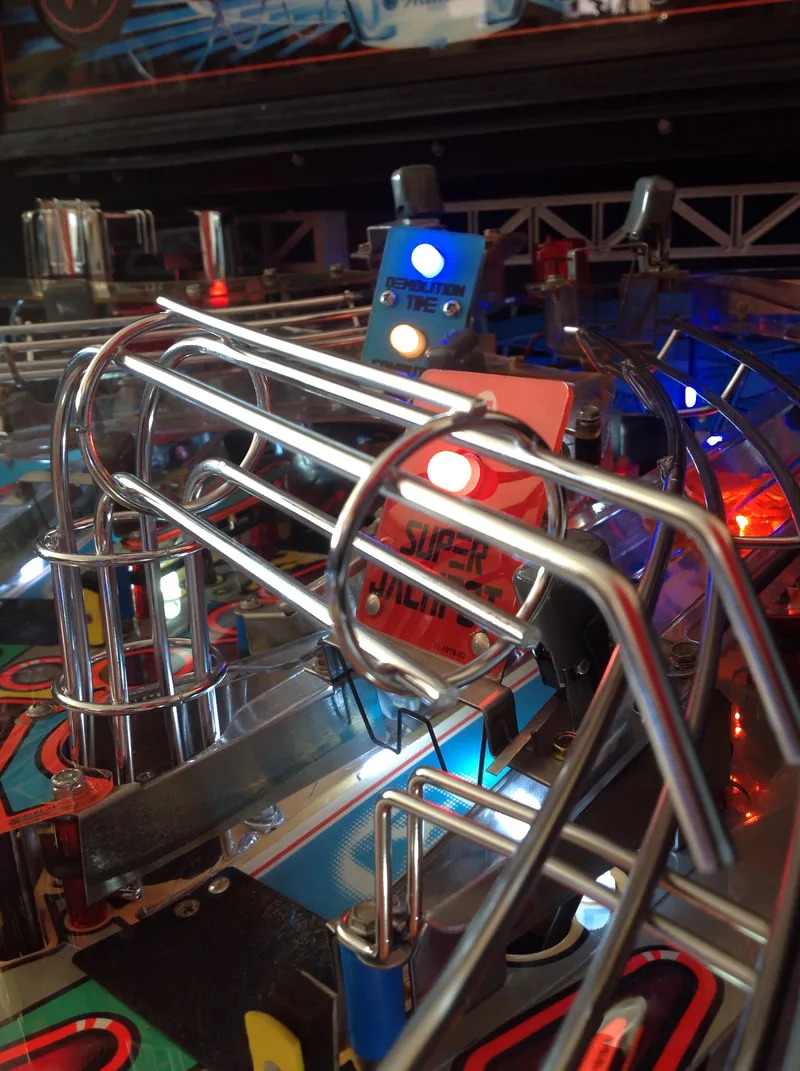
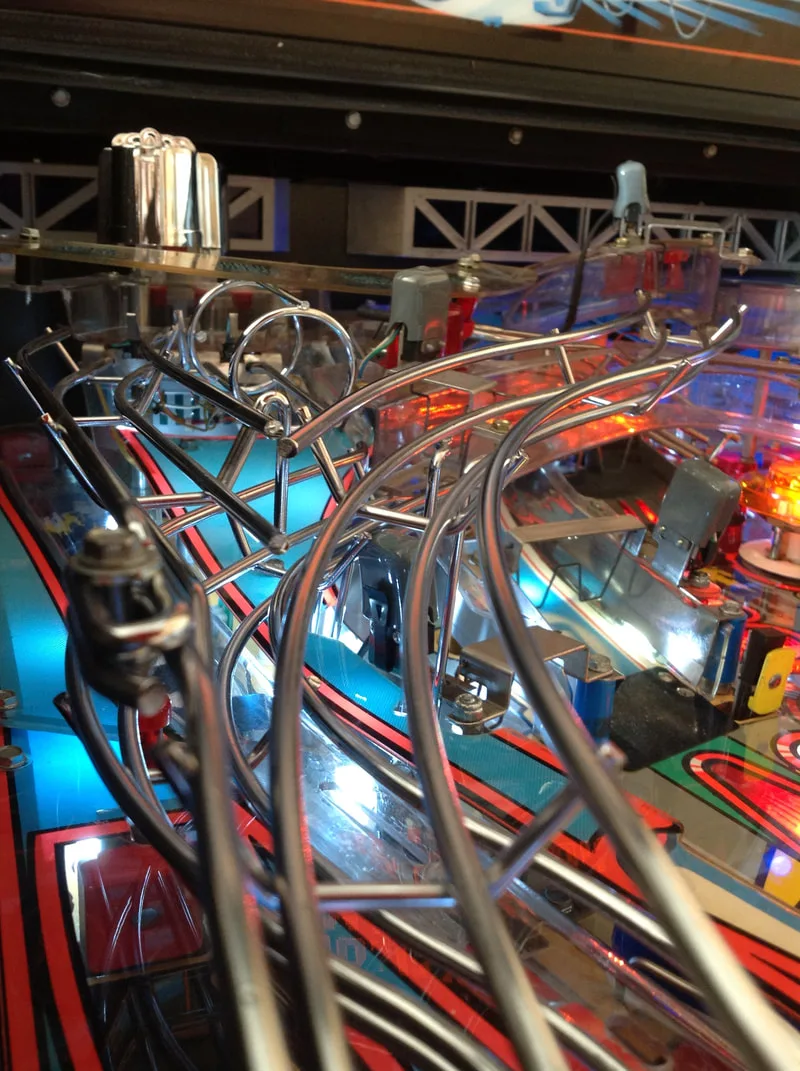
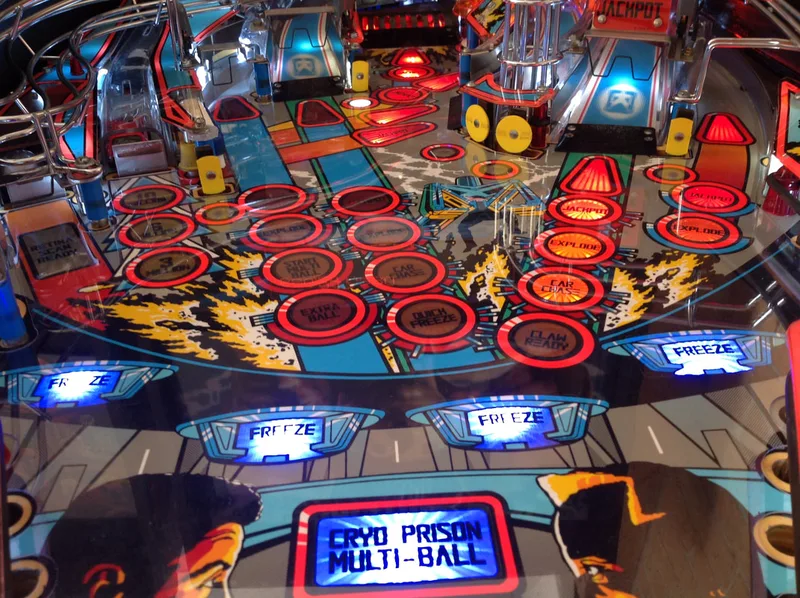
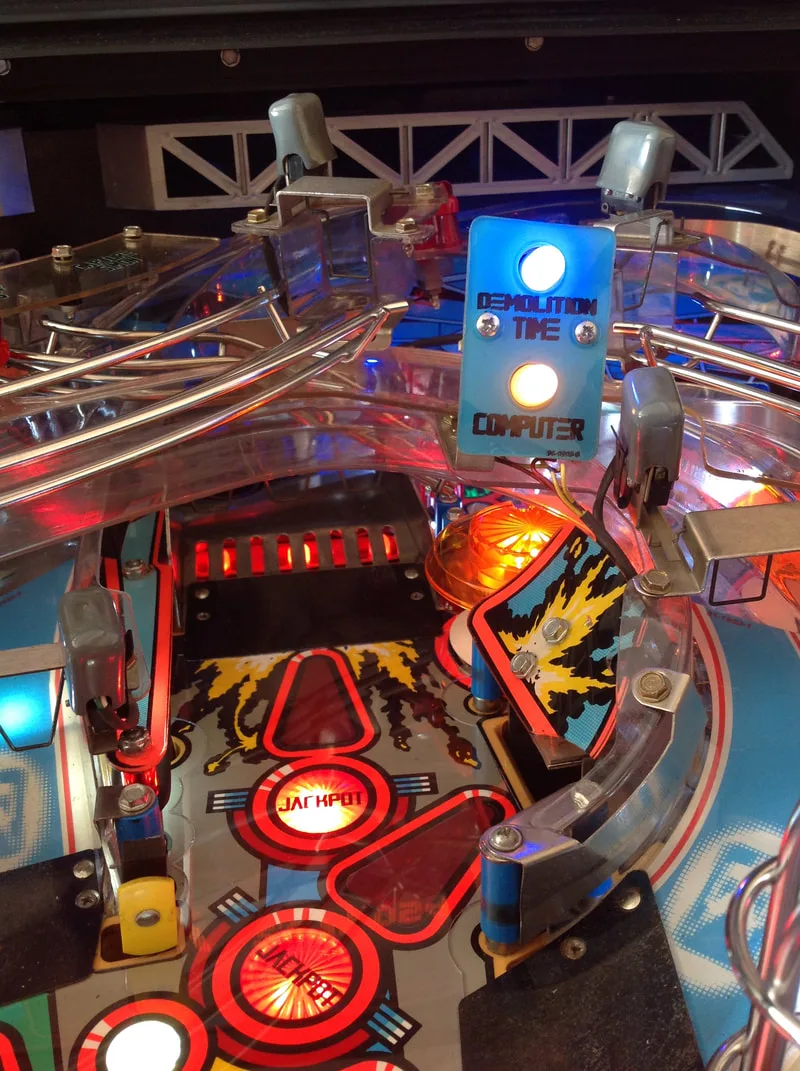
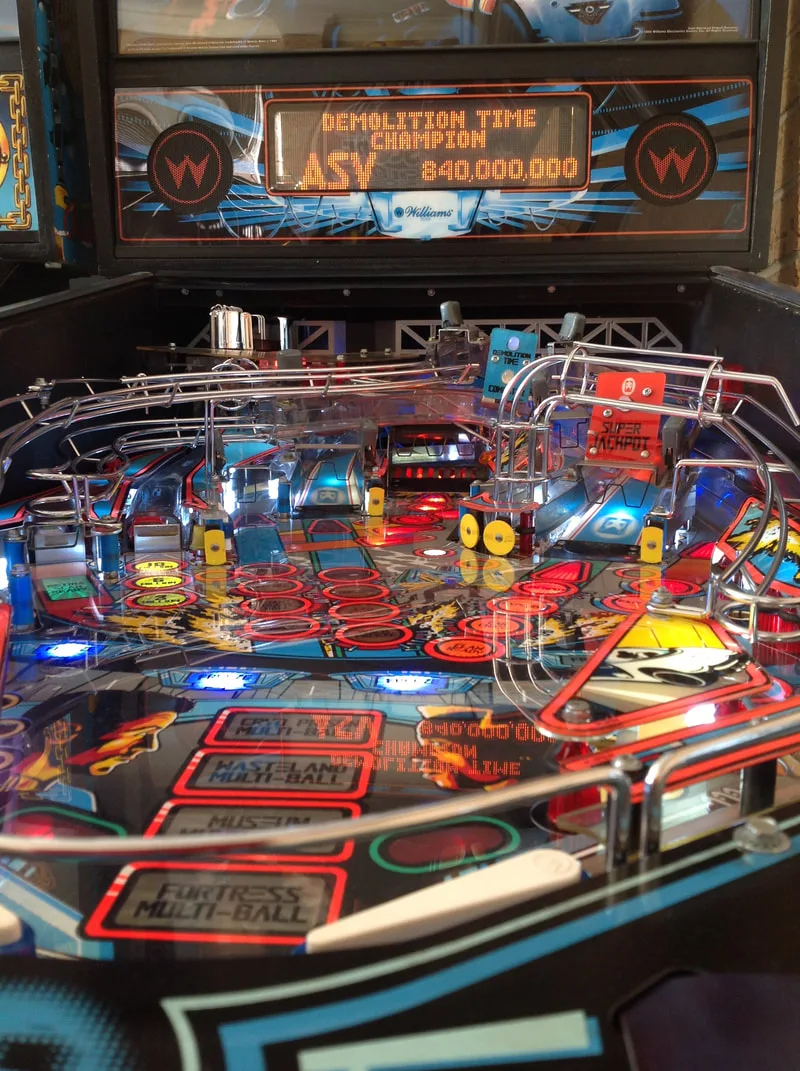
I recently got in touch with a pinball machine collector in Glenhaven who wanted to sell his collection. He was moving house and was planning on selling his machines instead of moving them. He had a number of machines for sale, including The Addams Family (Bally, 1992), Demolition Man (Williams, 1994), The Flintstones (Williams, 1994), Rescue 911 (Gottlieb, 1994) and Guns N' Roses (Data East, 1994). This was obviously a guy who had an obsession with the year 1994. He sent me a few images of his machines and I spent some time thinking about which one I wanted to buy.
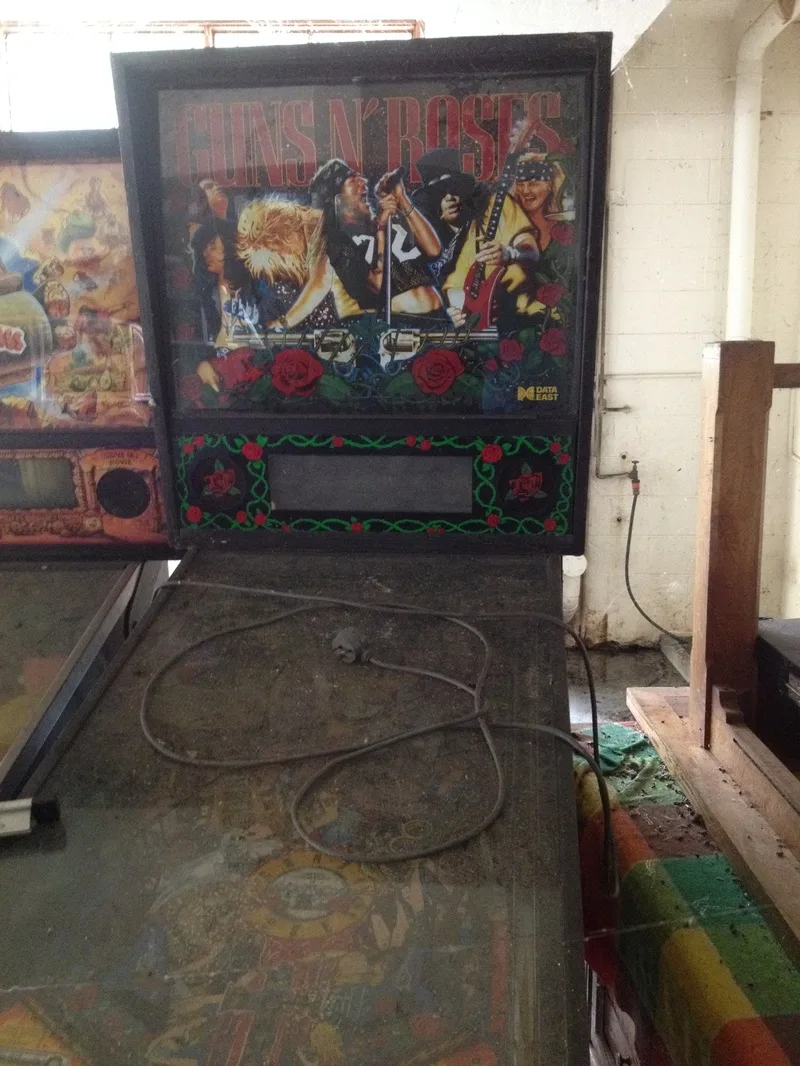
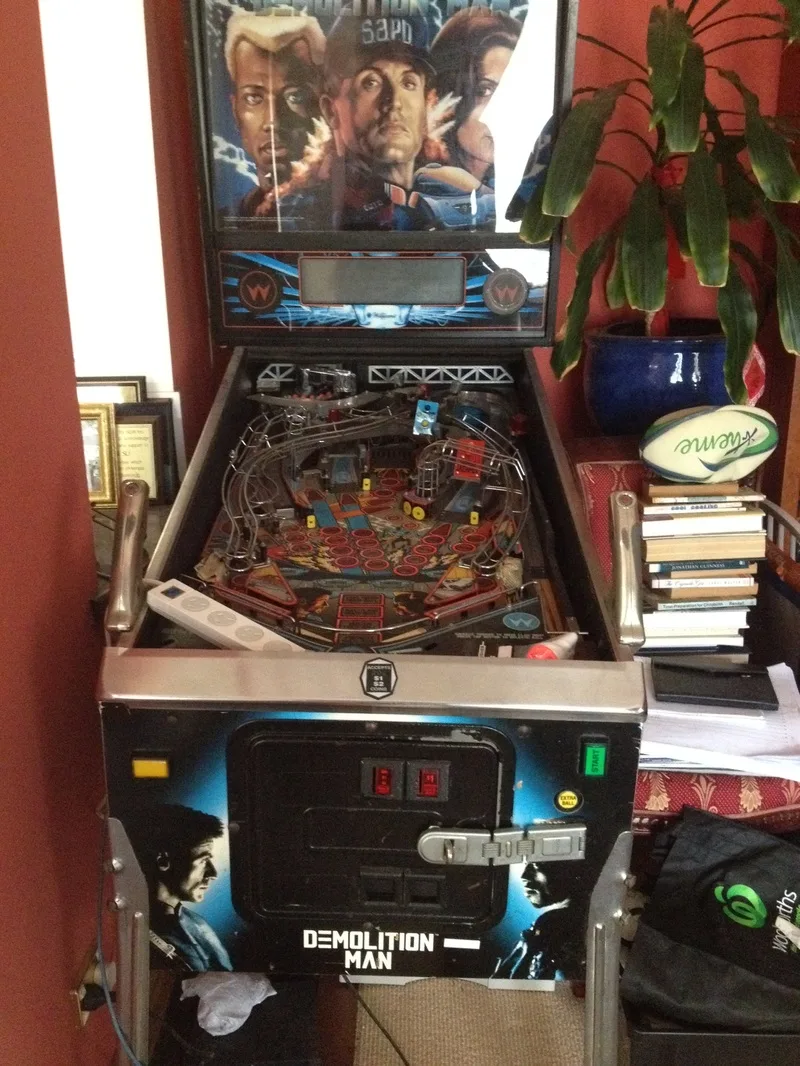

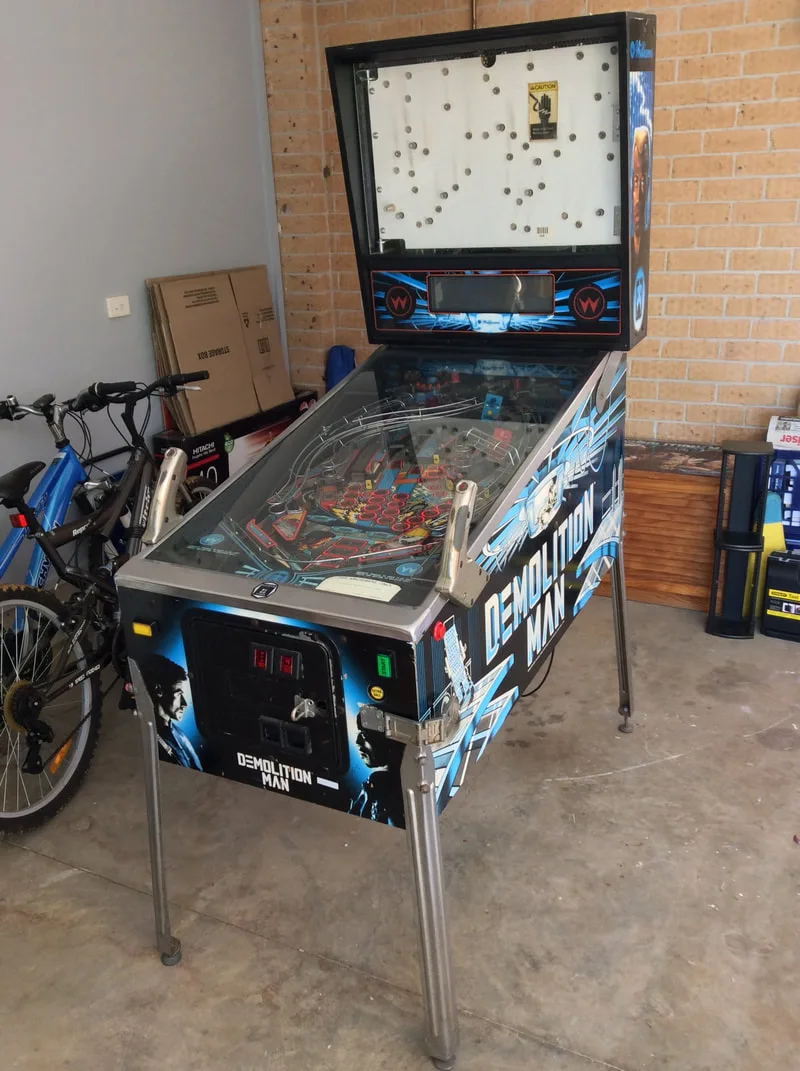
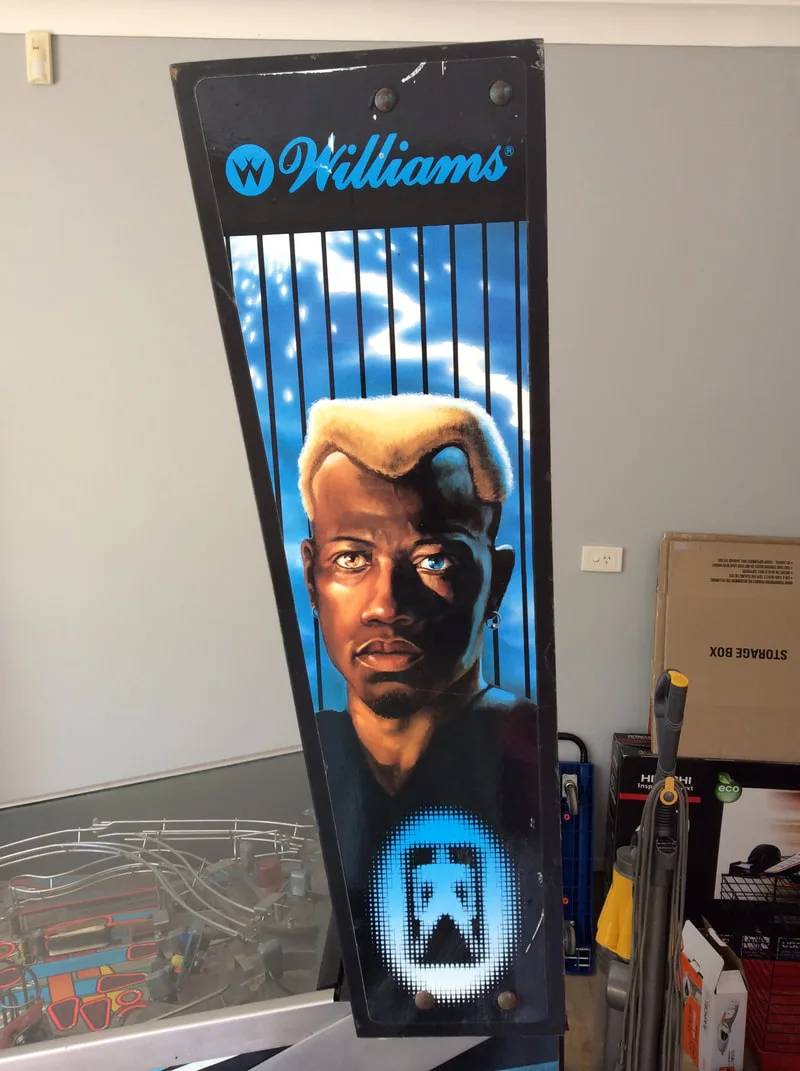
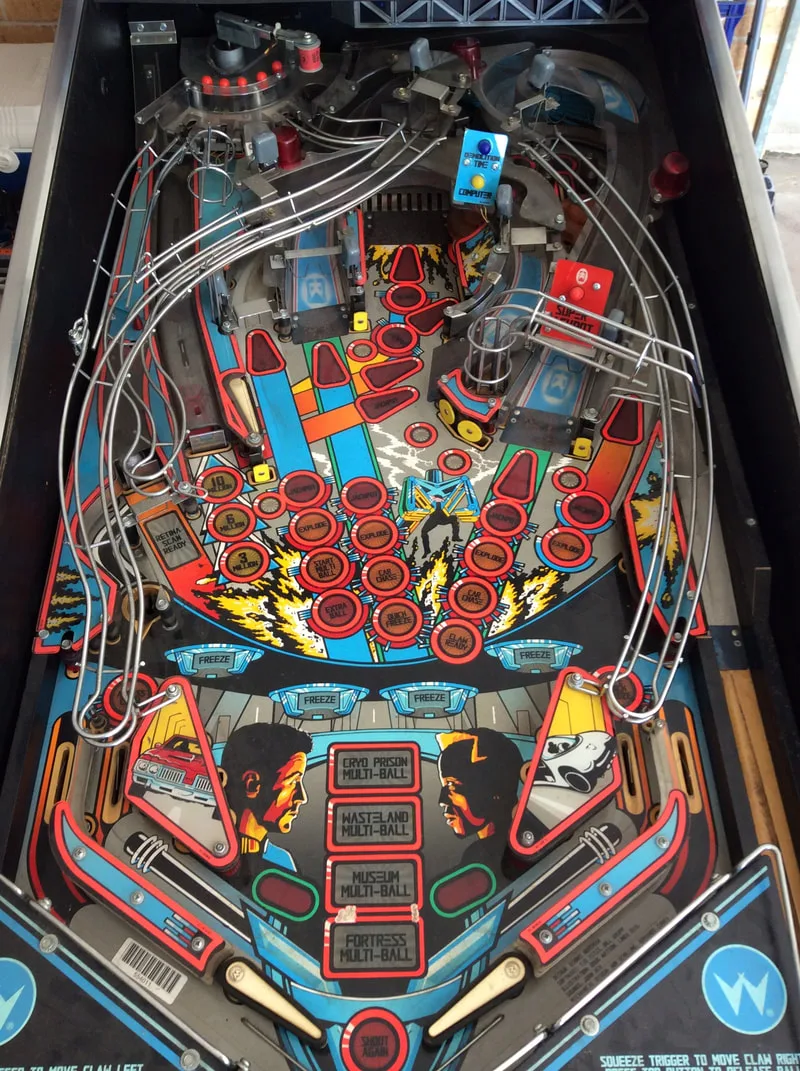
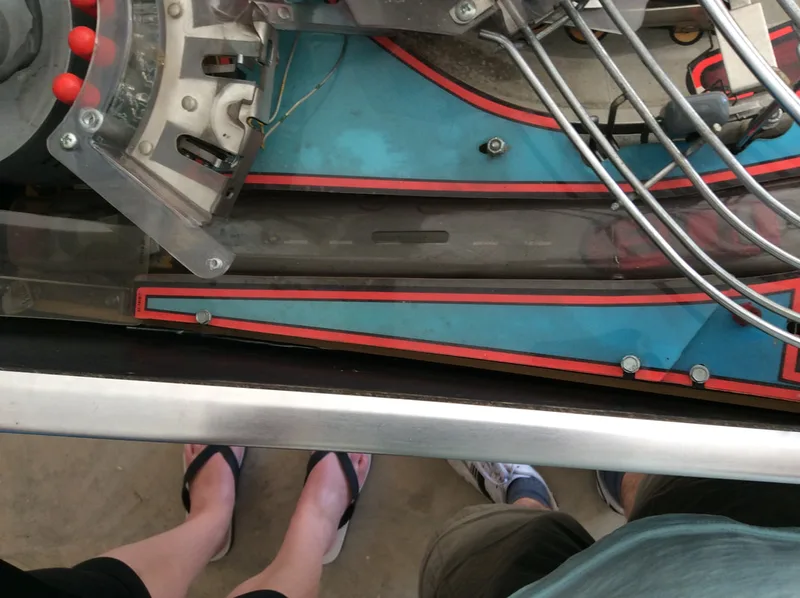
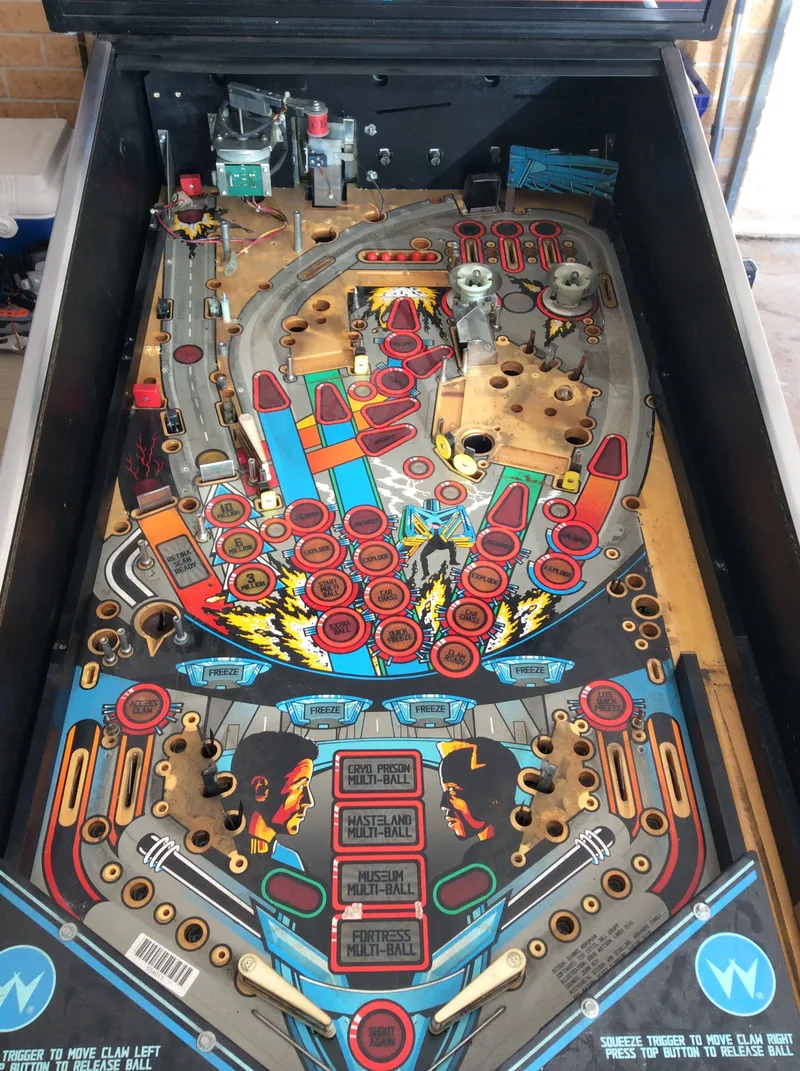
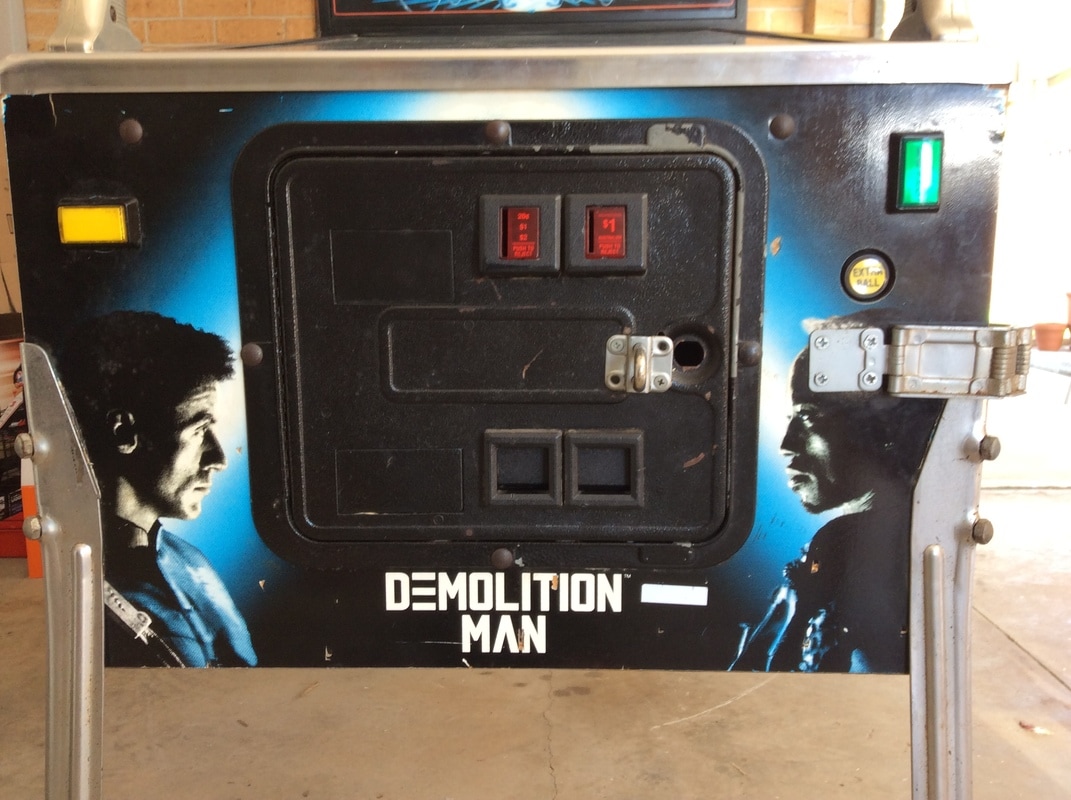
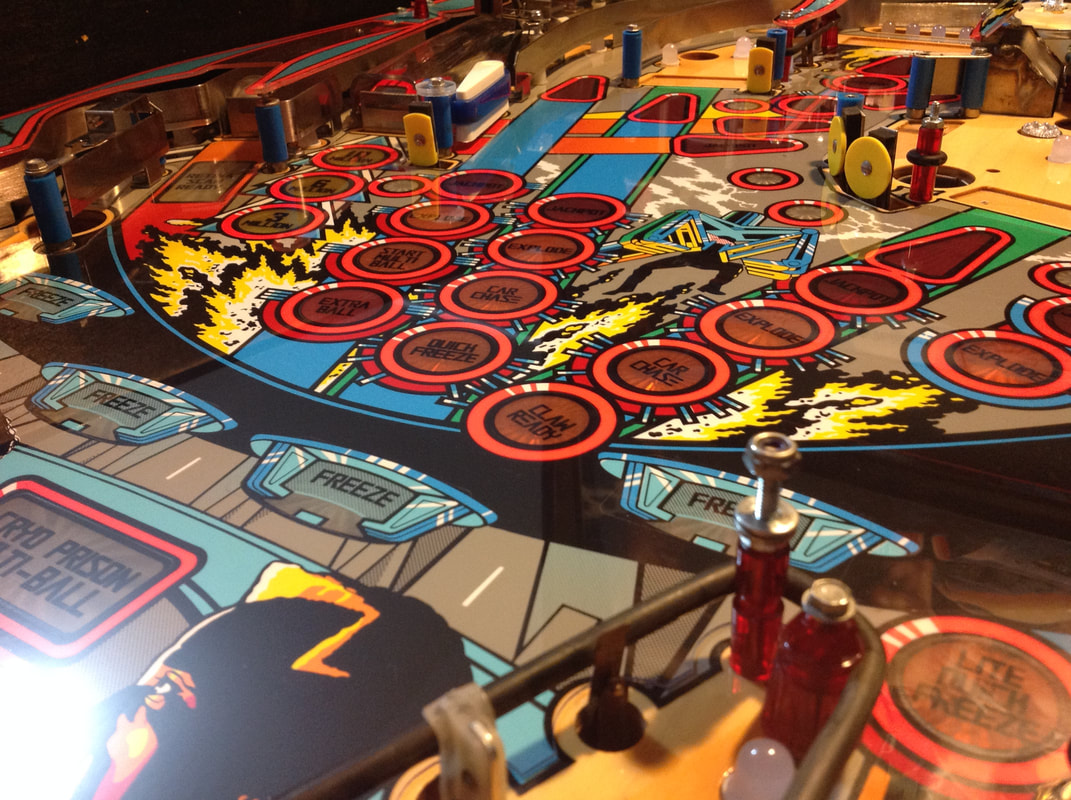
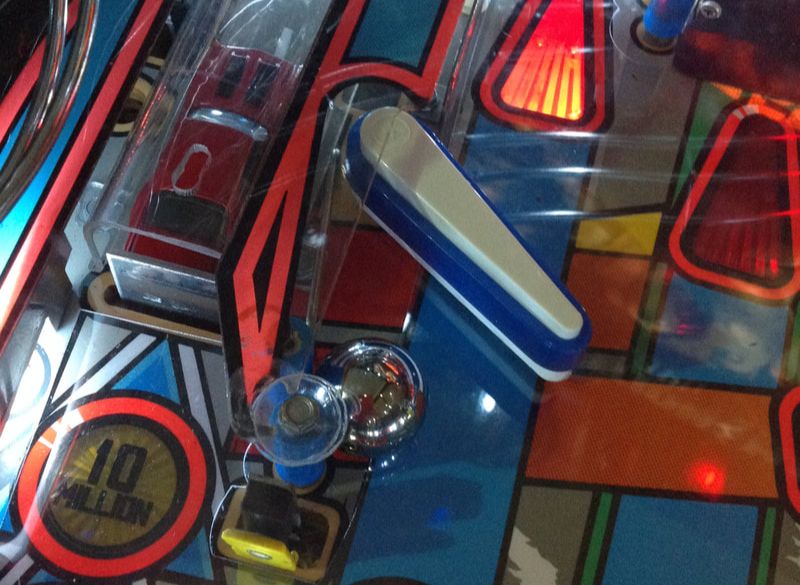
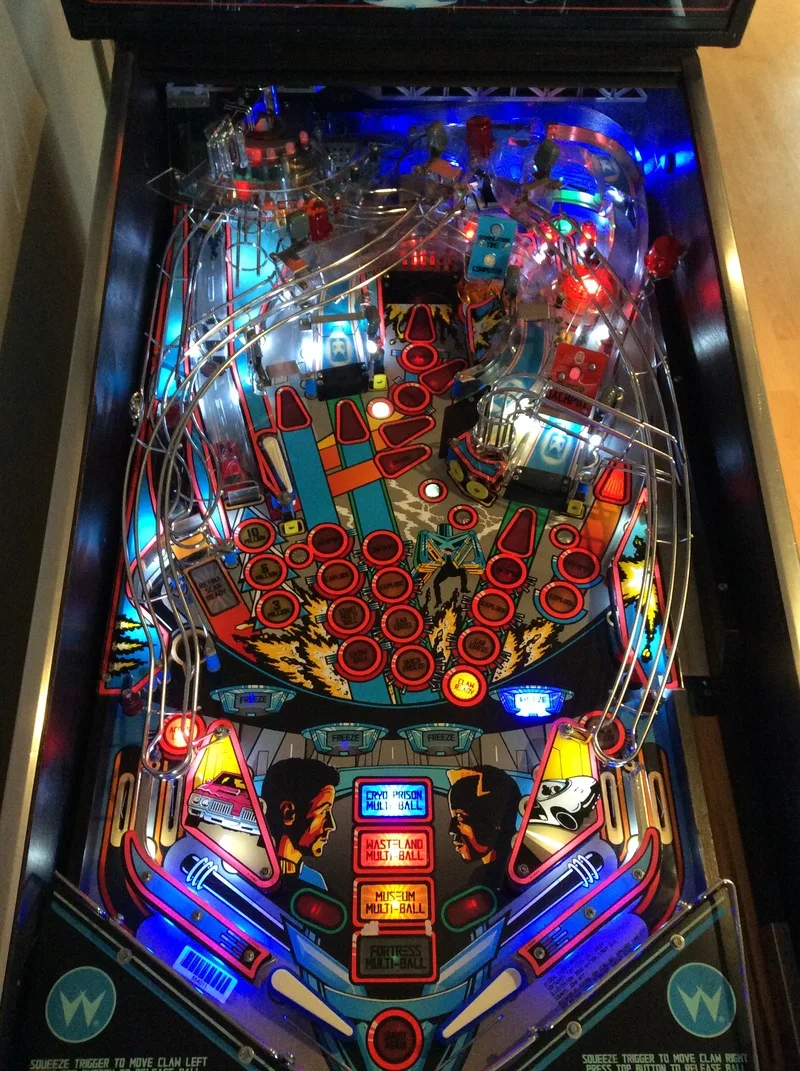
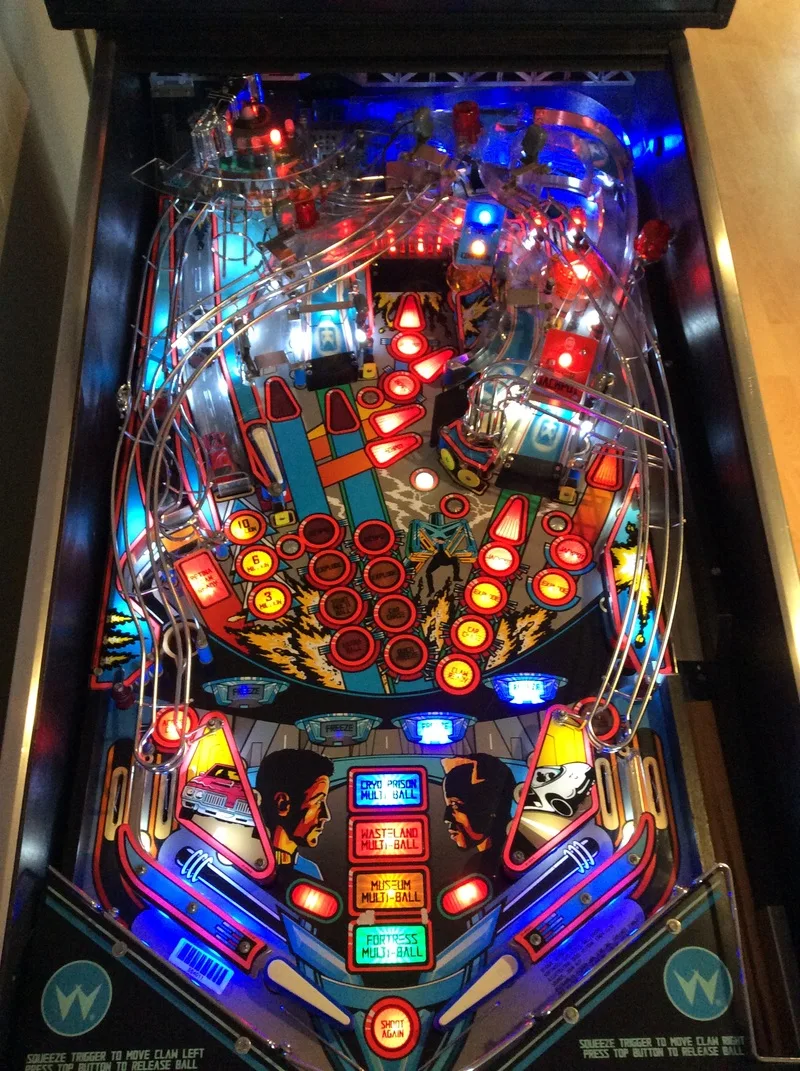
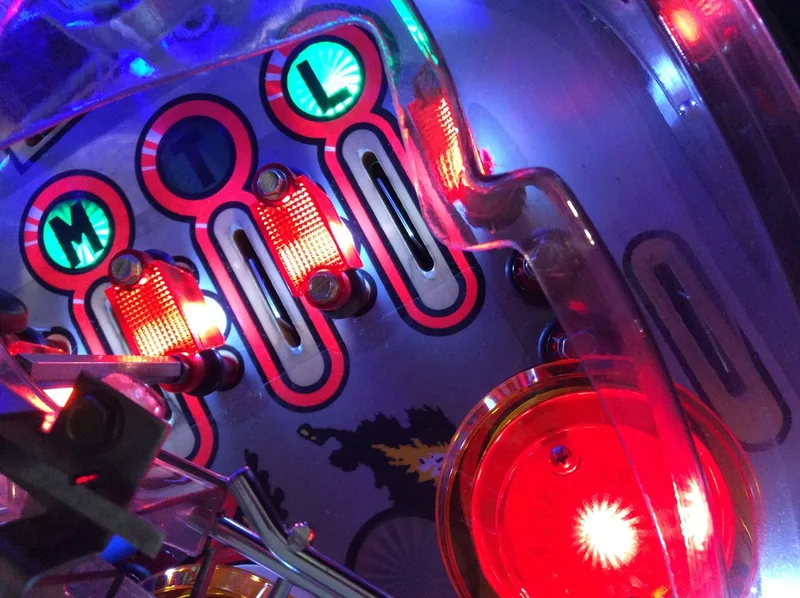
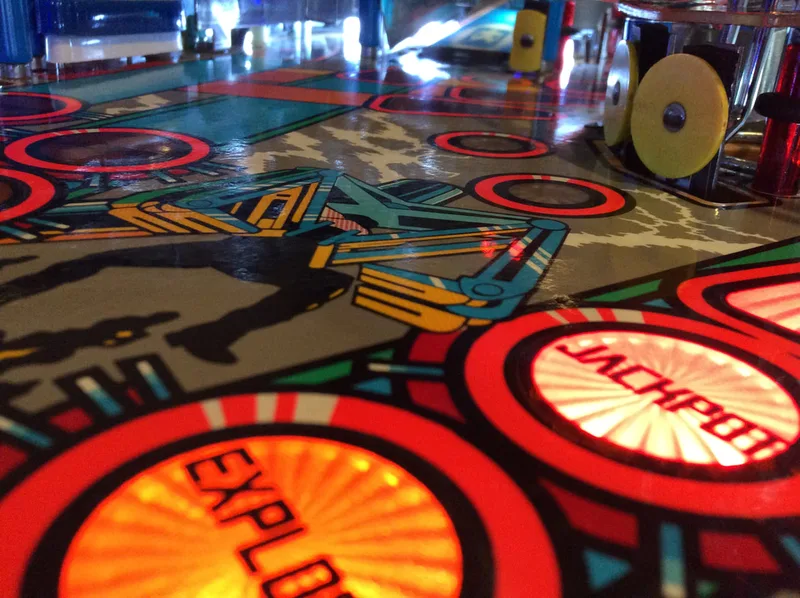
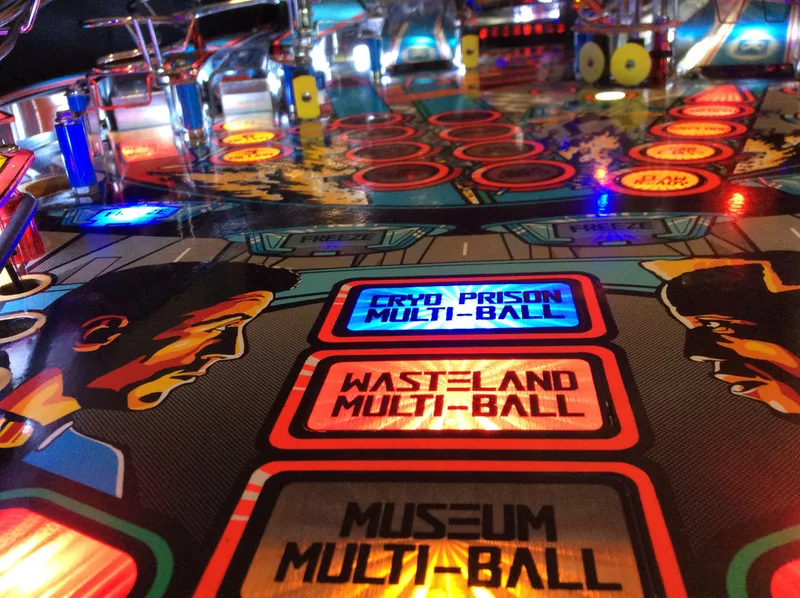
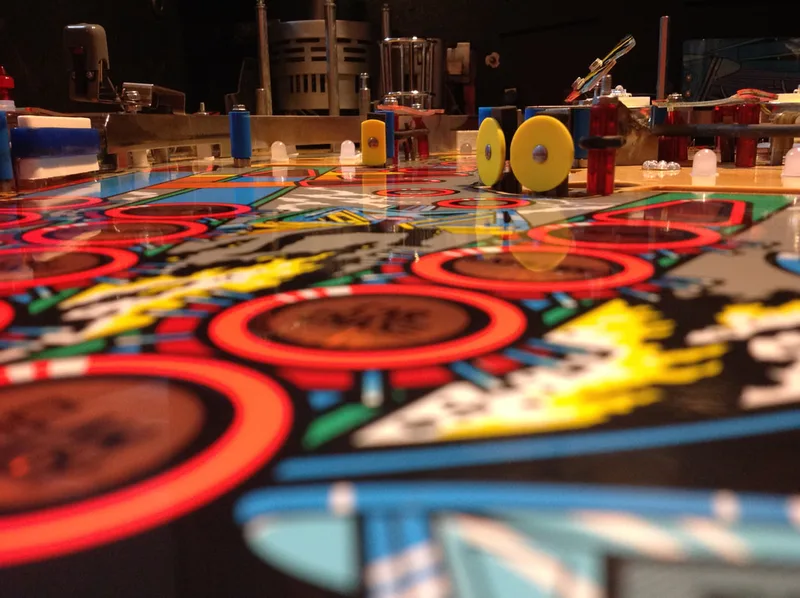
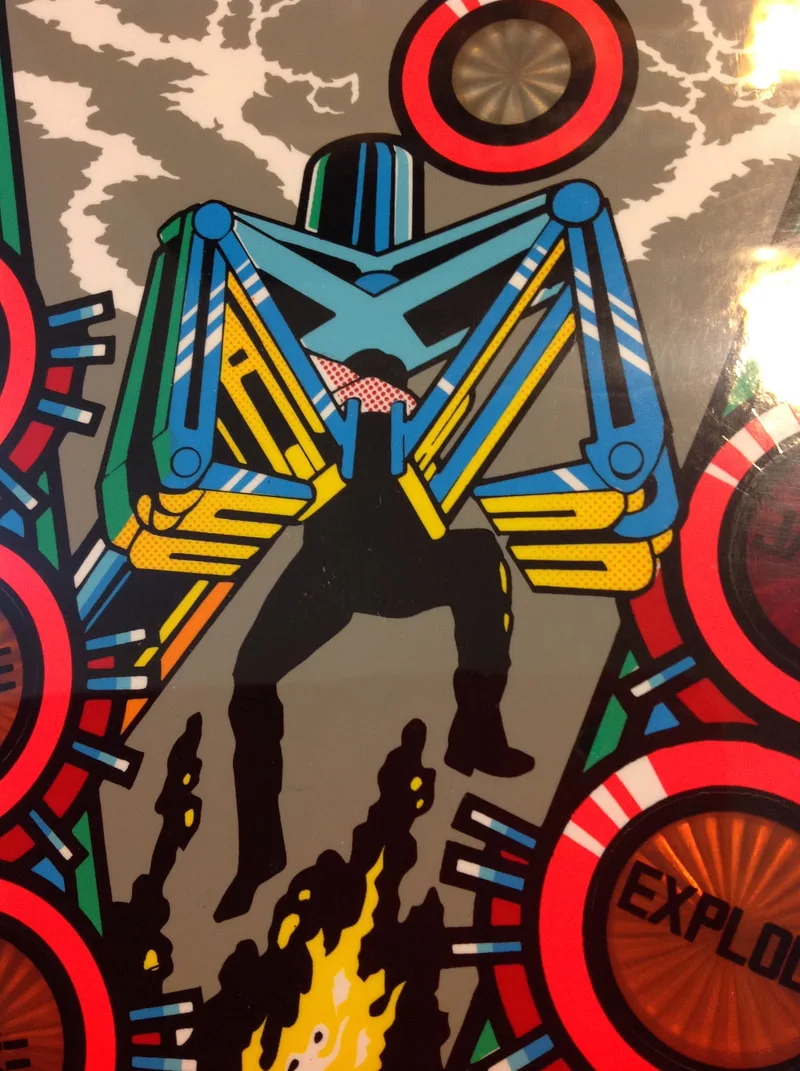
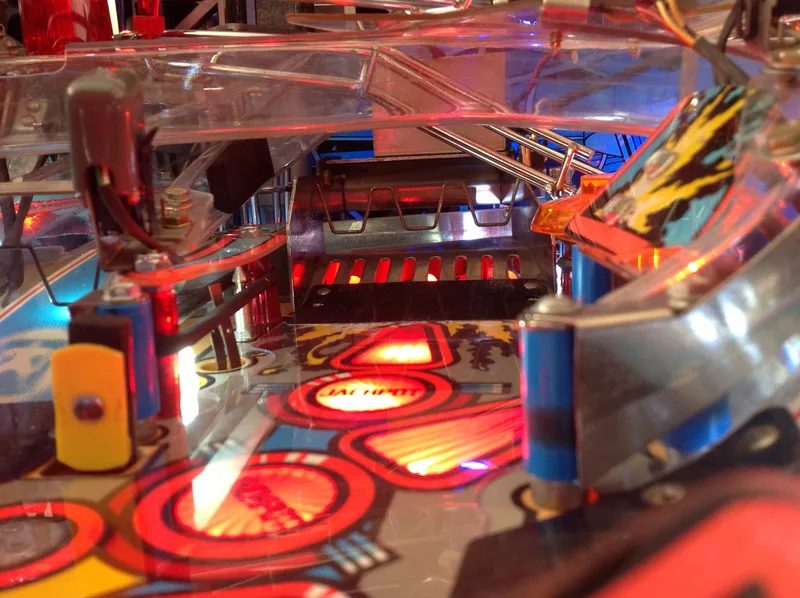
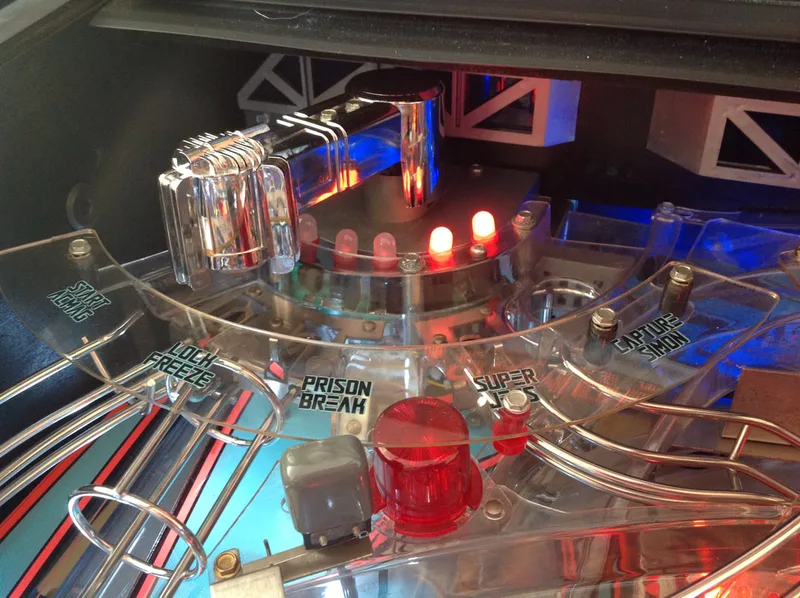
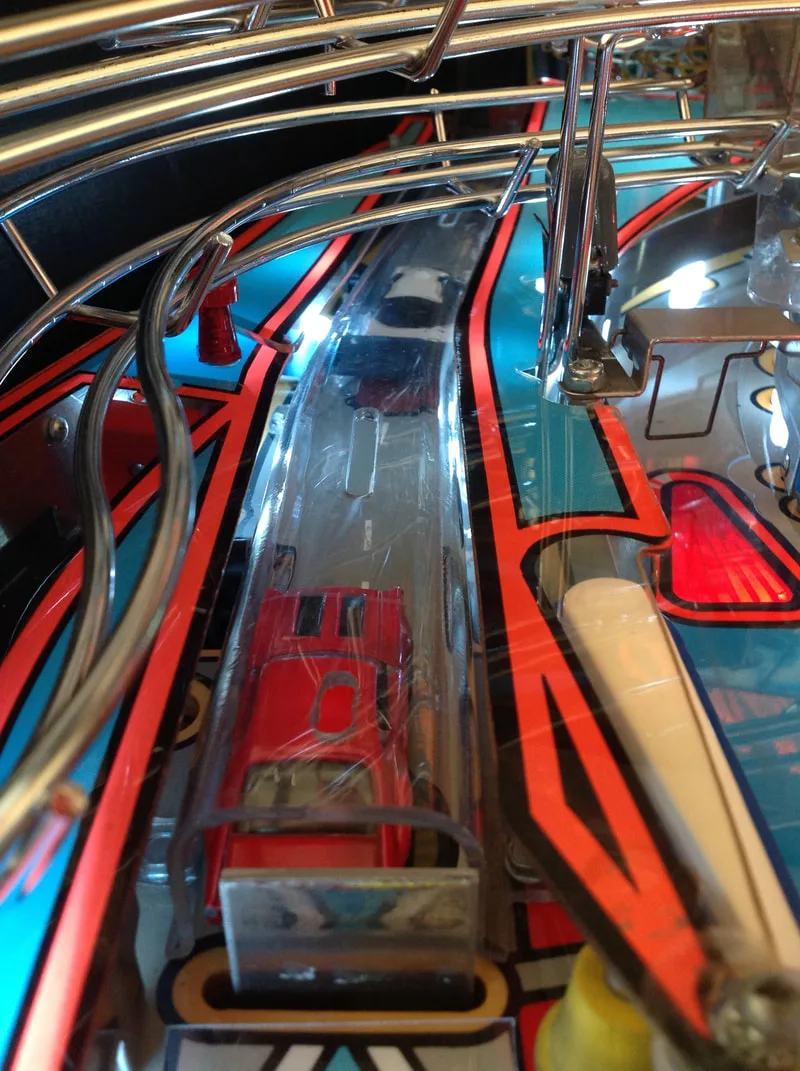
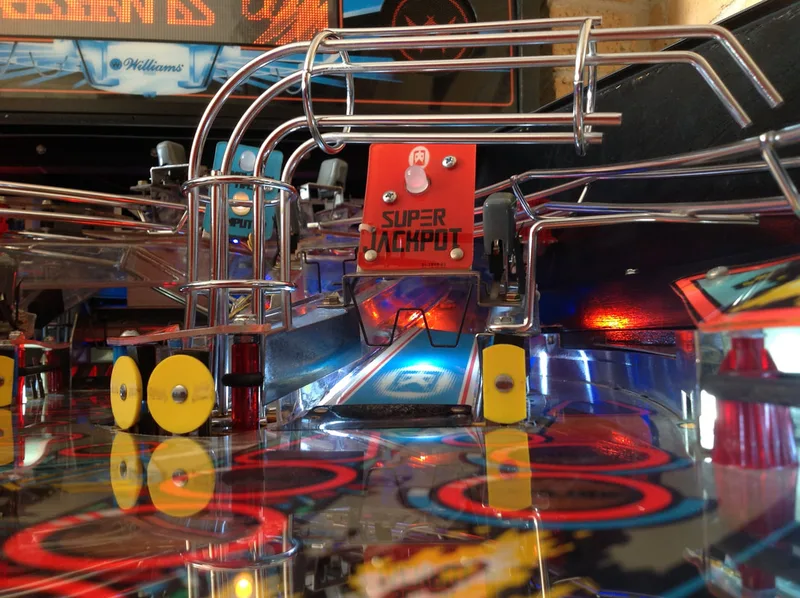
I explained to the seller that I was new to the hobby and was looking for my first machine to repair and play. He recommended Demolition Man. The pictures above were the first images I saw of the machine. By the time I was able to arrange a time to visit and inspect the machines, he only had Demolition Man left for sale. He didn't know much about the history of the machine, apart from the fact that it had been sited at a pub in Sydney for some time.
Initial condition report (click on sections below to view details)
- Timber in average condition. Some small scuffs and marks. Screw holes in front of cabinet.
- Decals in good condition. Minor fading.
- Translite in good condition. Small tear on Wesley Snipes's chin.
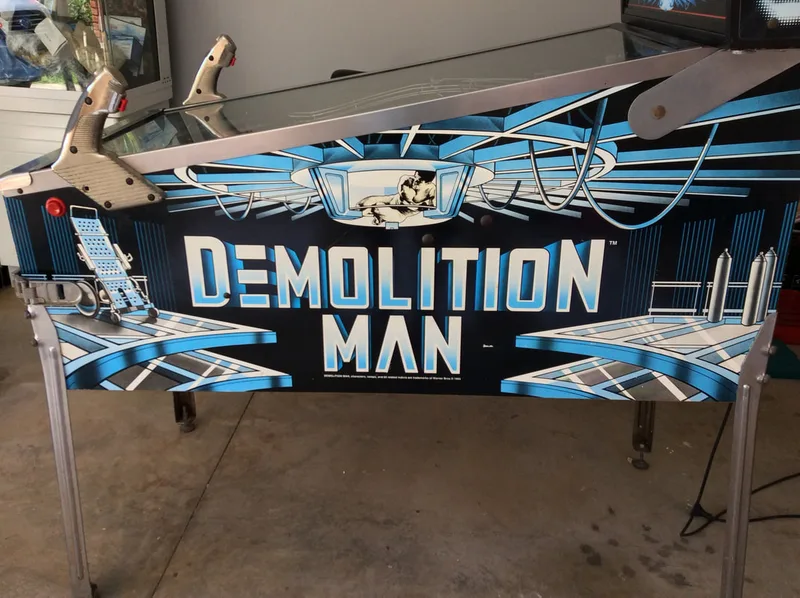
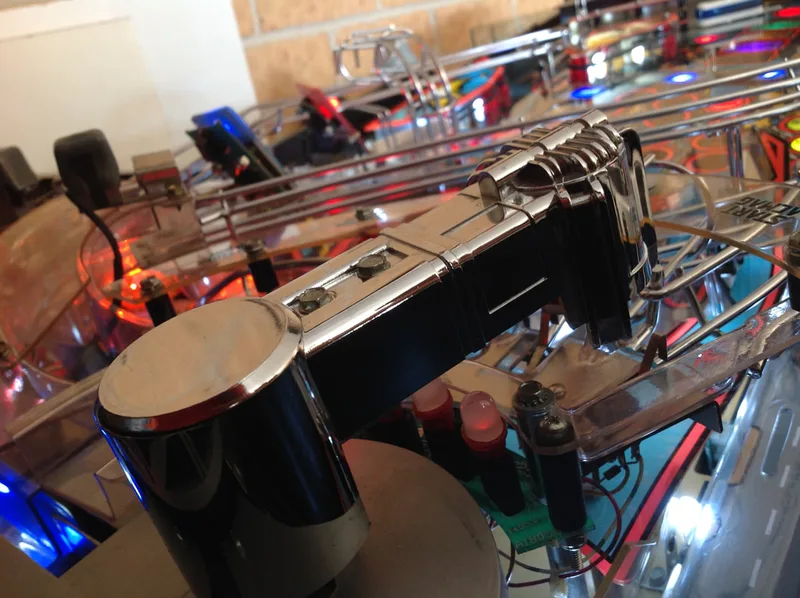
- Trigger handles worn.
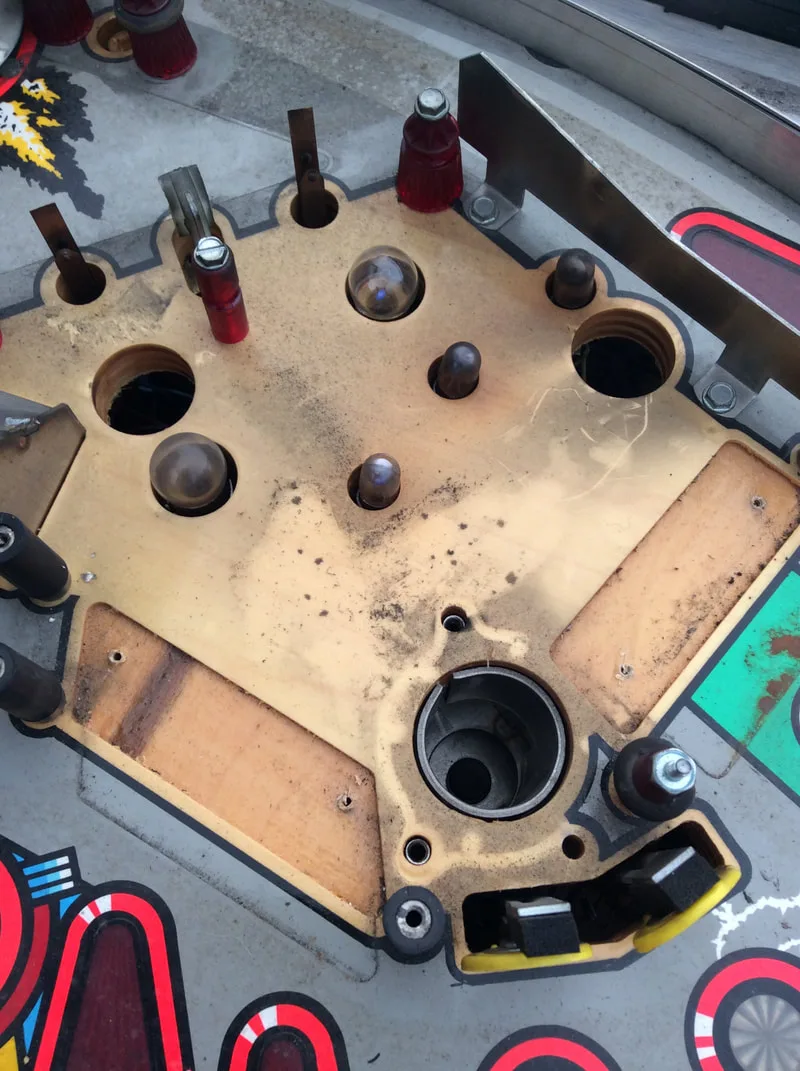
- Playfield was very dirty.
- Consumables (rubbers and lamps) dirty and in poor condition.
- Playfield artwork in poor condition. Wear above flippers.
- Plastics in average condition. Some broken.
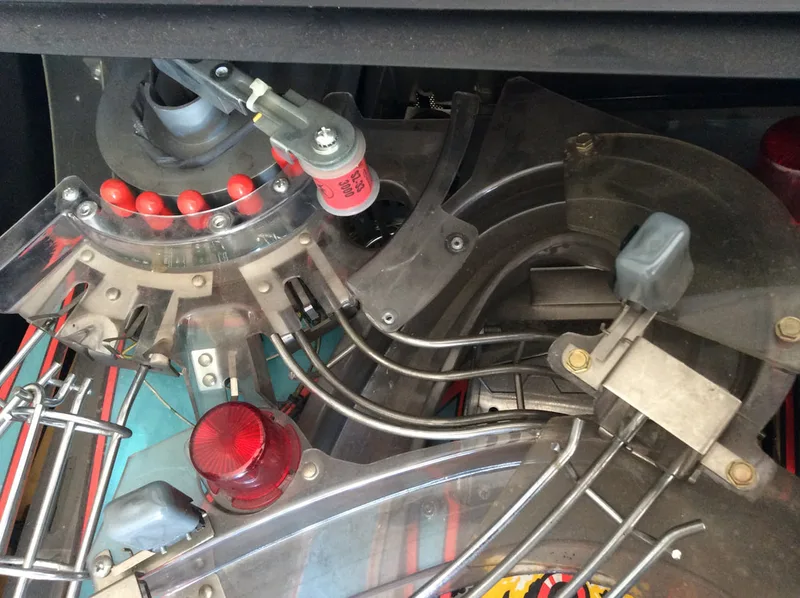
- Playfield mechanisms/toys in poor condition. Cryo Claw did not work. Subway chute assembly coming apart.
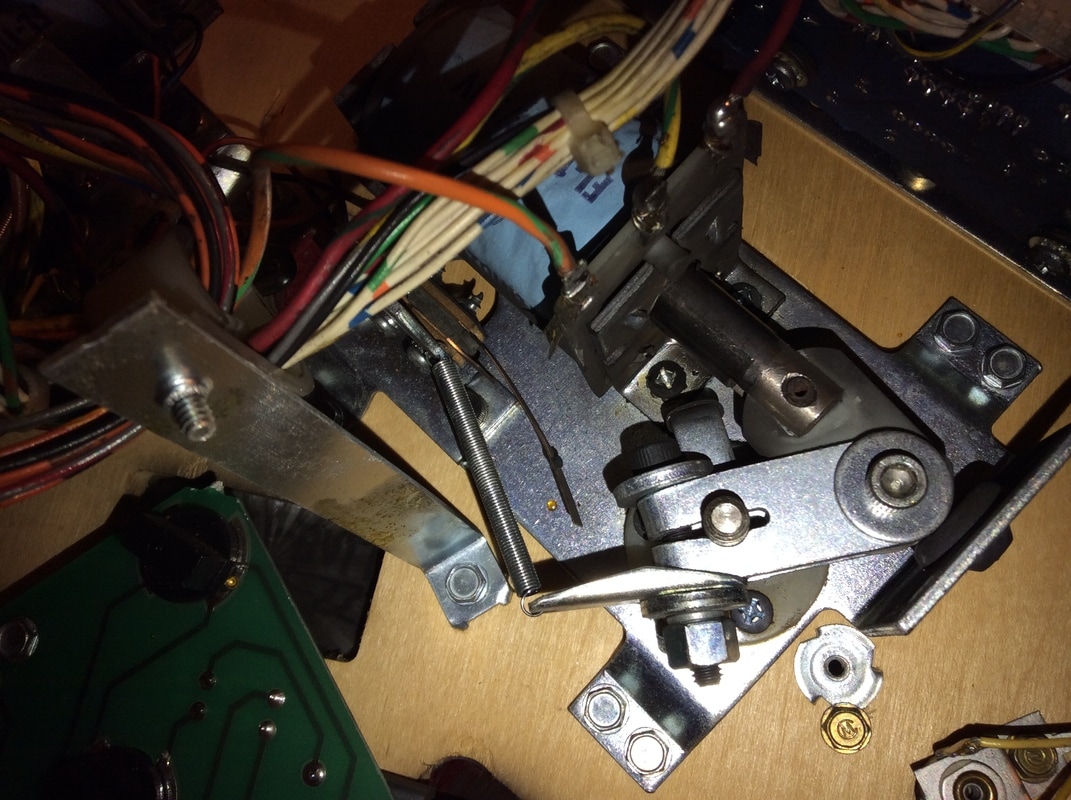
- All mechanisms and assemblies very dirty. Some missing parts (motor driver board, tilt assembly) or had incorrect parts installed.
- Consumables (coil sleeves, flipper parts) dirty and in poor condition.
- Machine booted and could start a game.
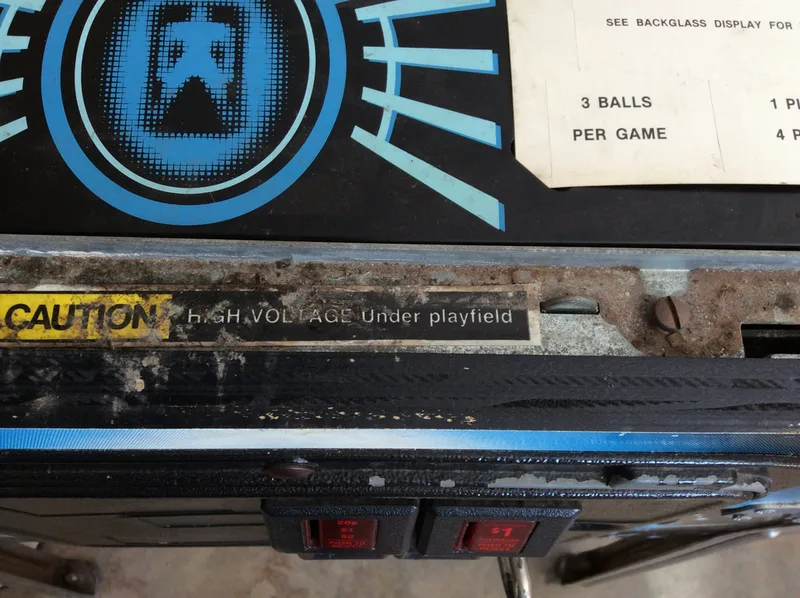
- Playfield and backbox wiring in good condition. Service switch assembly broken.
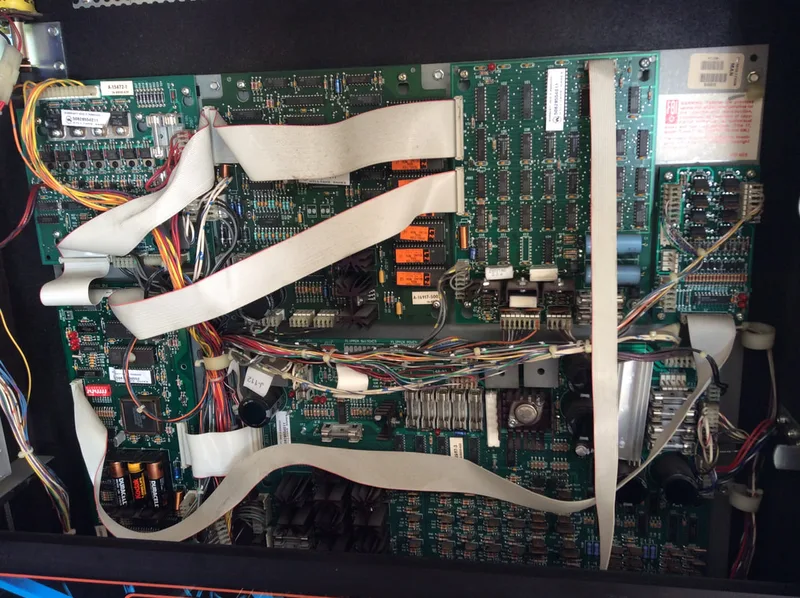
- Printed circuit boards in good condition.
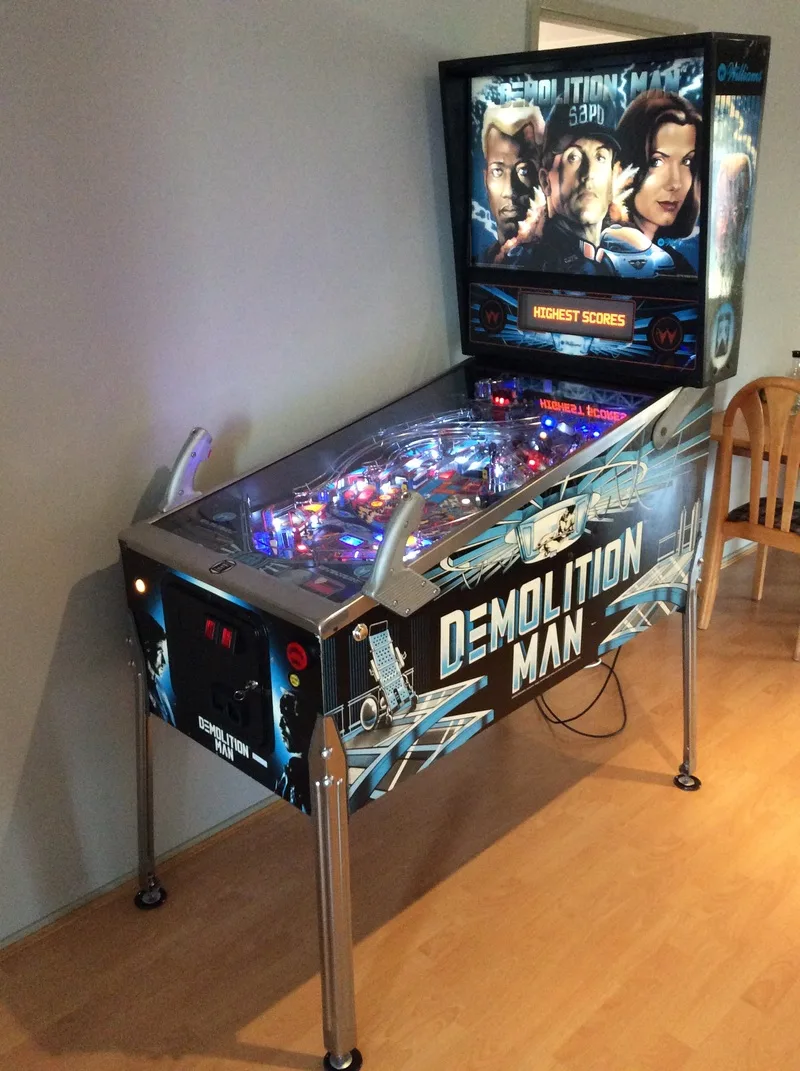
So, I bit the bullet. This was the first time I had bought any kind of arcade equipment of my own. A little while after I bought the machine, I had a moment when I realised how cool it was that I actually owned a pinball machine that I could keep in my house and play. So, like an eager kid on Christmas Day, I loaded the machine into my car and brought her home.
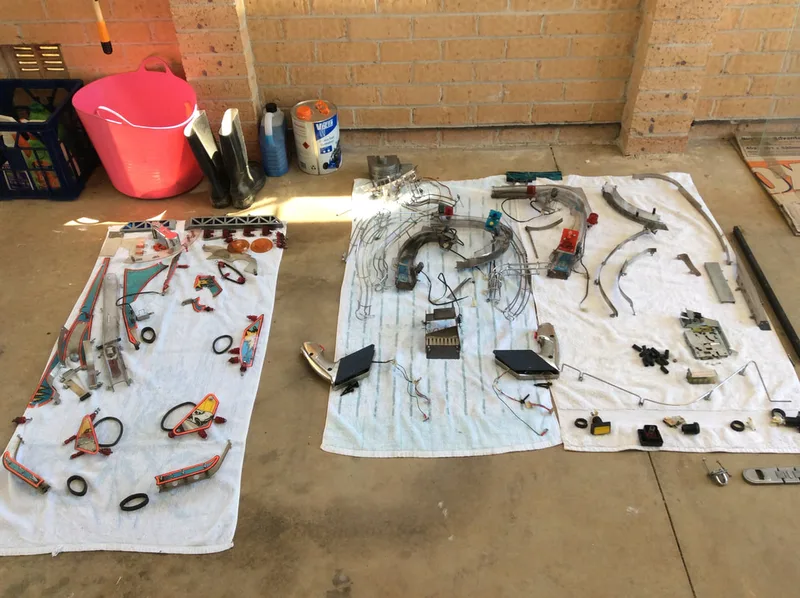
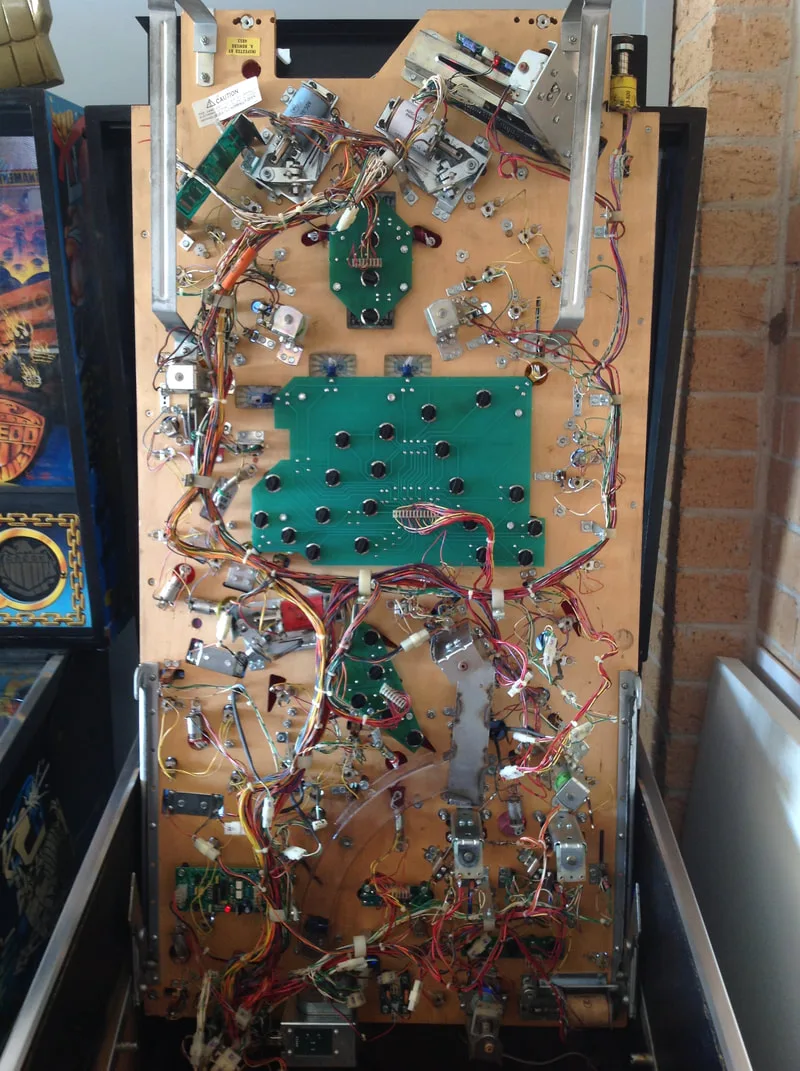
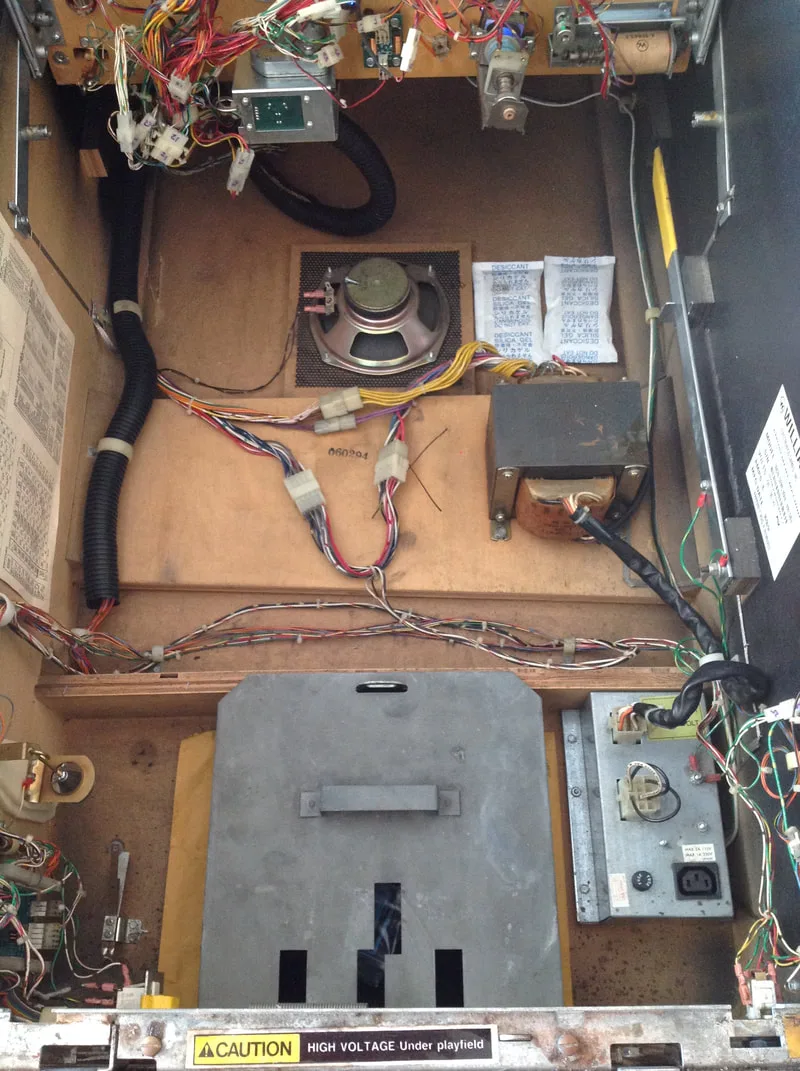
Disassembly
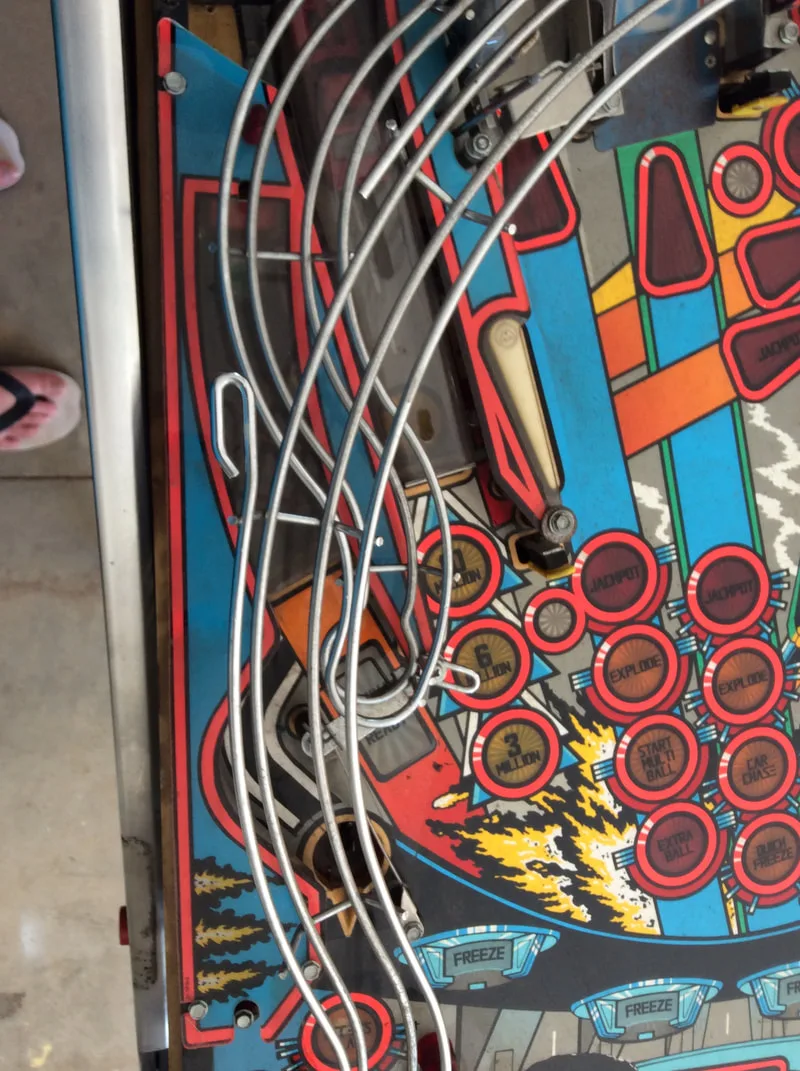
The disassembly process was a lengthy one for Demolition Man, mainly because of the mess of ramps over the top half of the playfield. Demolition Man has a lot of ramps. You need to take them out of the machine in a specific order, or you'll get stuck trying to take a ramp out when it doesn't have enough space (been there, done that).
Unlike plastic ramps, which sometimes have a little flexibility, Demolition Man ramps are mostly wireforms, which won't bend. There is actually a guide in the manual (page 1-44) which tells you the order in which you need to take the ramps out. I found that it was actually difficult to follow the instructions because they advised taking the ramps out in a way that was not possible. So refer to the instructions and see if they help; I ended up ignoring them and taking the ramps apart in a different order. Your mileage may vary.
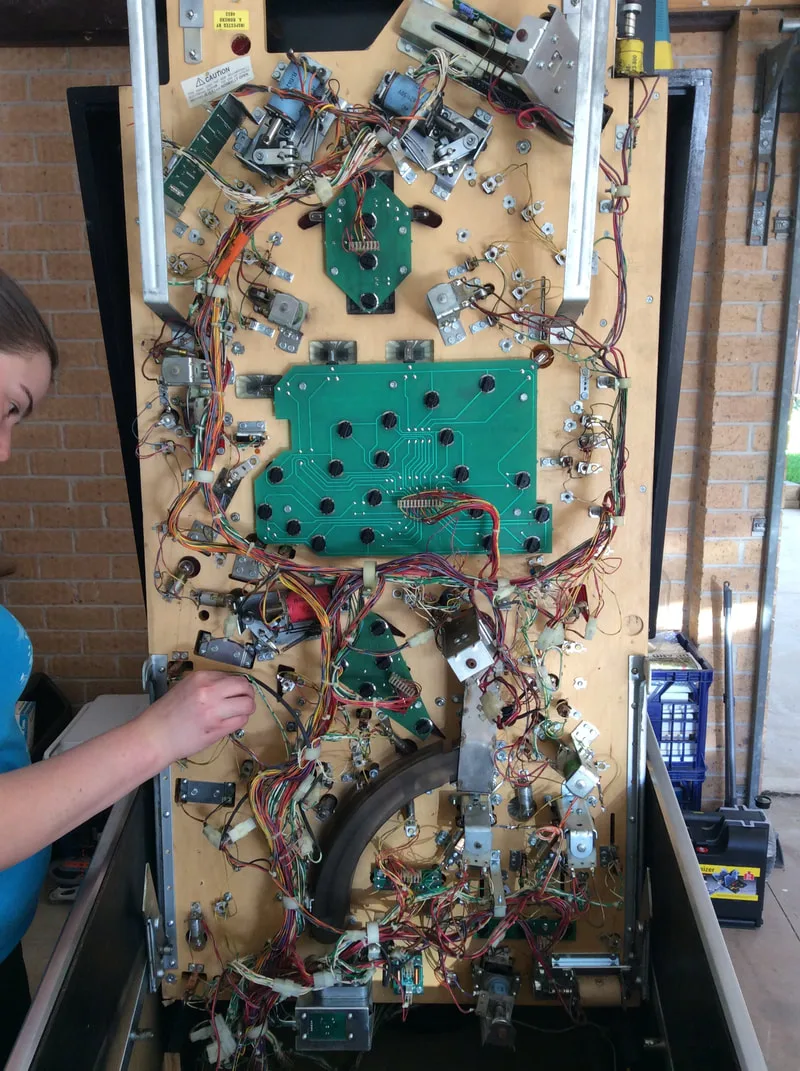
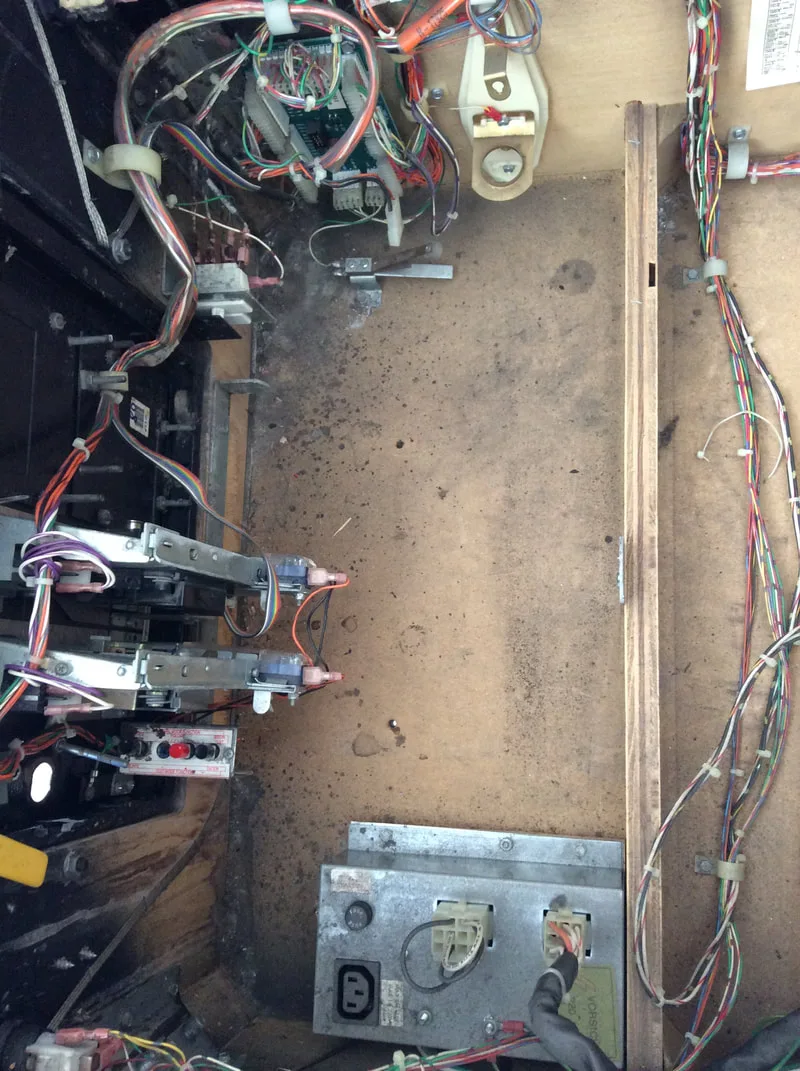
Other than that, there isn't anything specific that makes Demolition Man a difficult machine to disassemble and restore. Like with any machine, take your time and take plenty of photos along the way. Below are some progress images showing playfield disassembly.


Tips & Troubleshooting (click on sections below to view details)
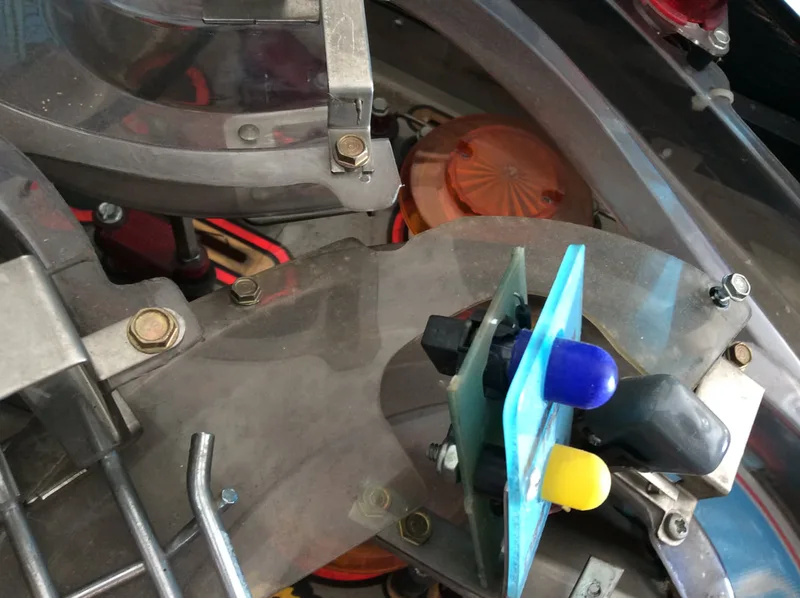
The start and launch ball buttons had been replaced by generic arcade buttons. The launch ball button actually said 'start'! This was easy enough to fix with new start (part no. 20-9663-1, RTBB, PSPA, Mr Pinball) and launch buttons (part no. 20-9663-B-4, RTBB, PSPA, Mr Pinball).
There were also four screw holes drilled through Wesley Snipes's head to the right of the coin door to secure the eye latch. One day I will get around to patching up the holes in the cabinet but for now I have just left them be.
Front of cabinet and coin door when received.
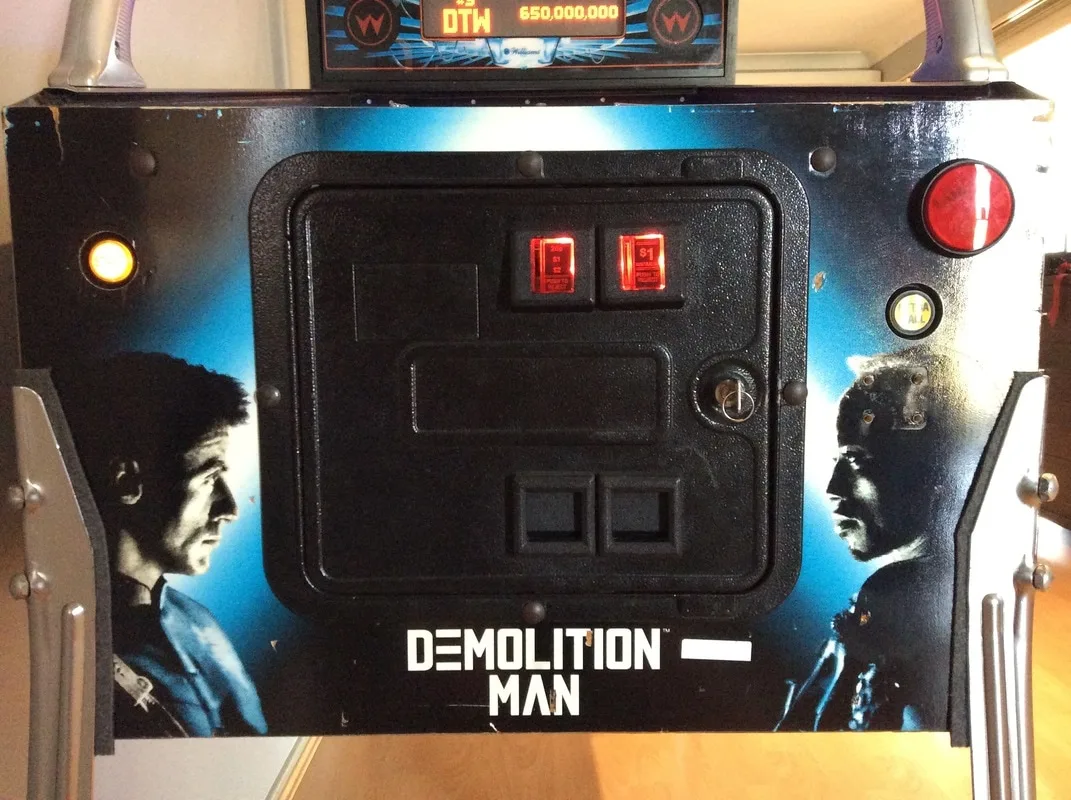
Old parts removed and correct parts installed.

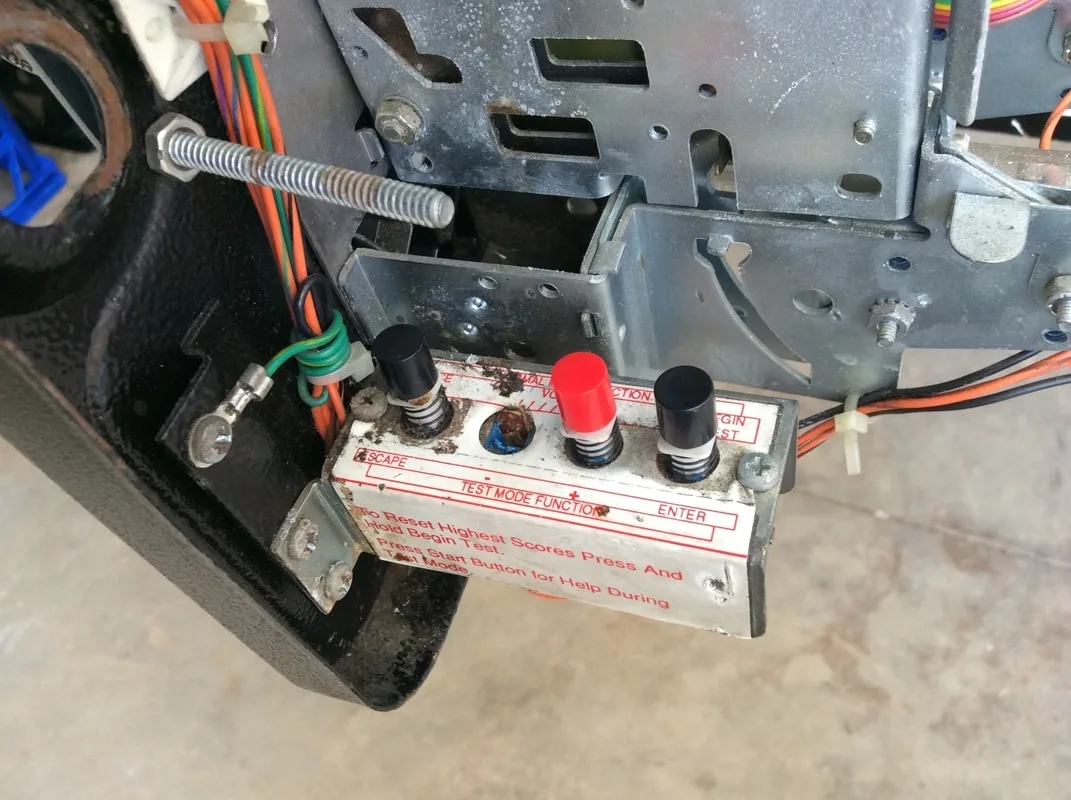
Missing button on coin door service switch assembly.

Missing plumb bob and wire.

The EOS switch on the right flipper (part no. SW-1A-194) had been destroyed and was missing one of the switch leaves. At some point, the flipper probably came loose and snapped it off. I removed the old switch and soldered a brand new one in. Fixed!

Incorrect flipper return spring installed and damaged EOS switch.
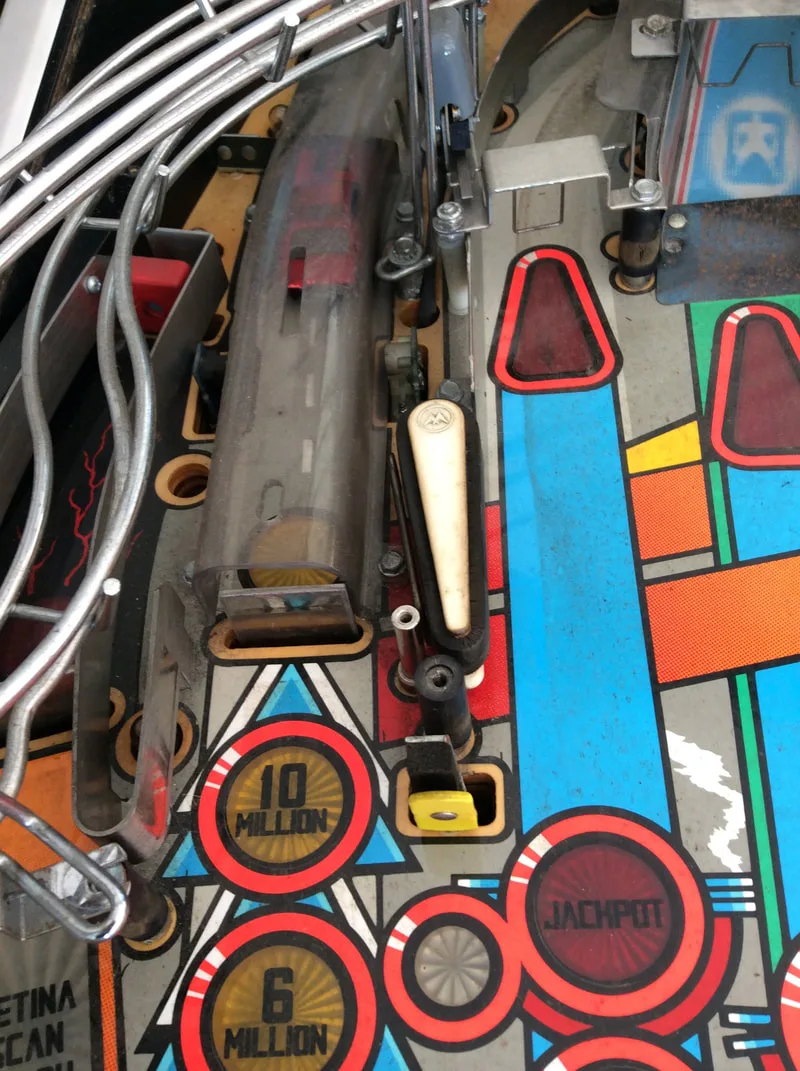
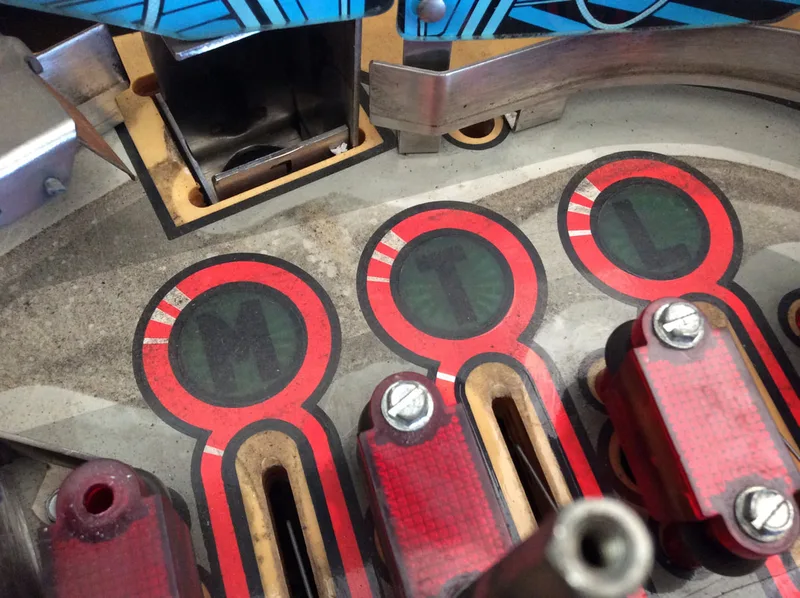
The plastic above the subway chute entrance (part no. 31-1919-14) was also broken. This was only a small chip that didn't bother me, so I didn't look into replacing it.

Broken plastic by the upper left flipper reinforced with washers.
Broken plastic above the subway entrance chute.

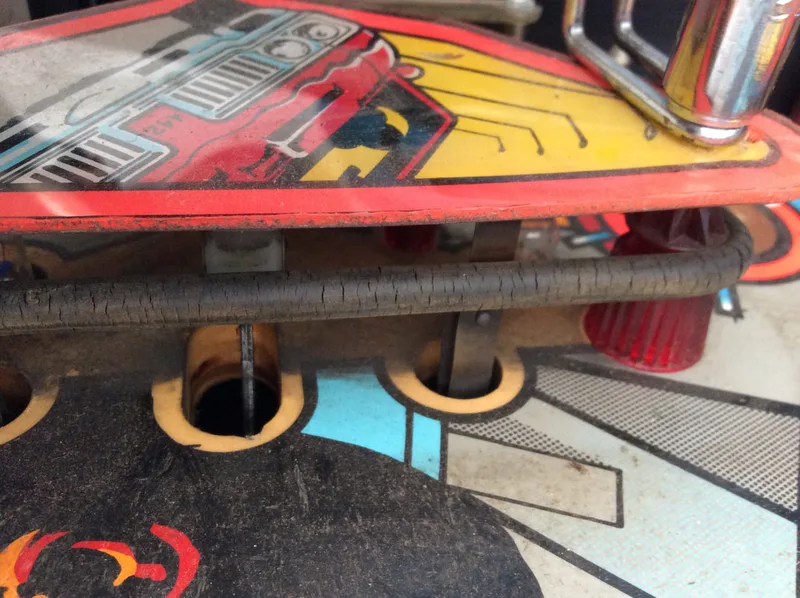
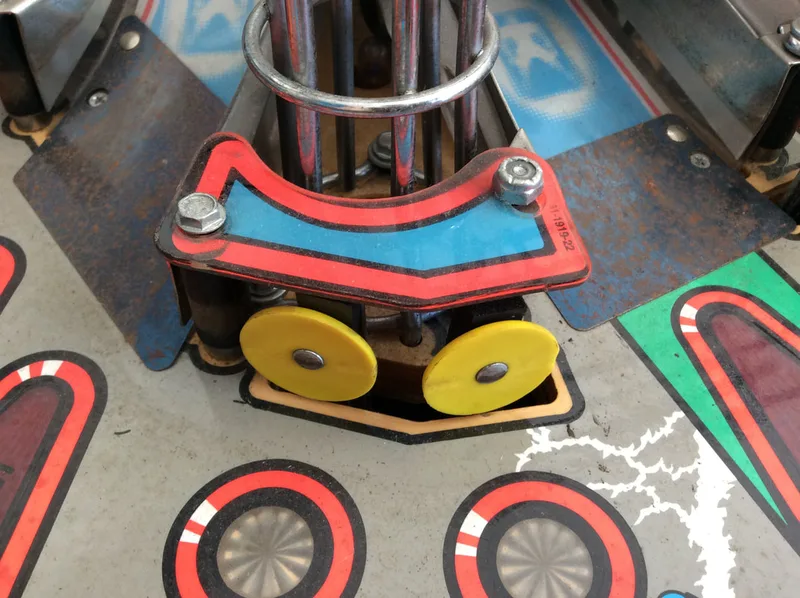
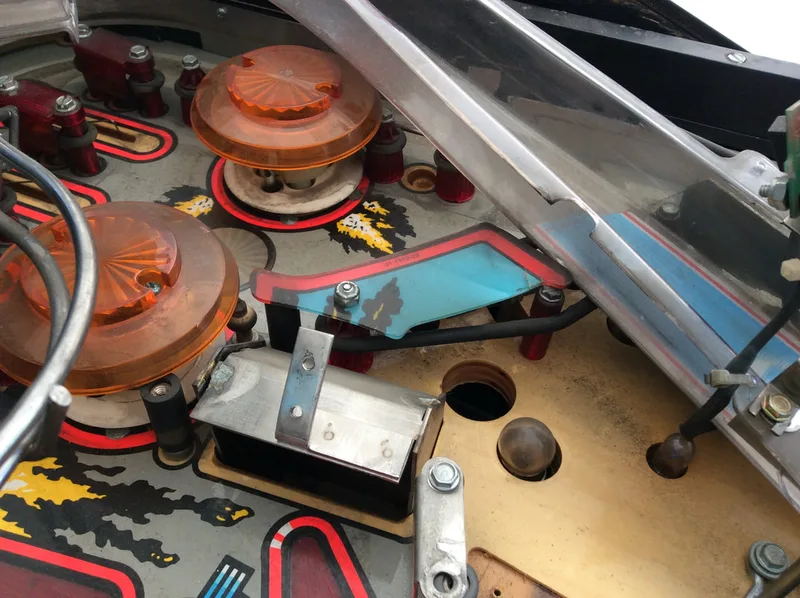
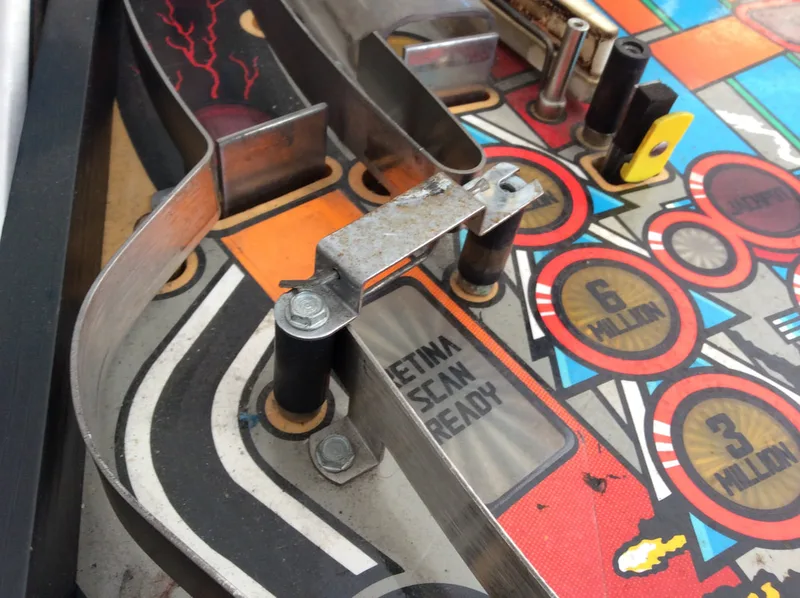
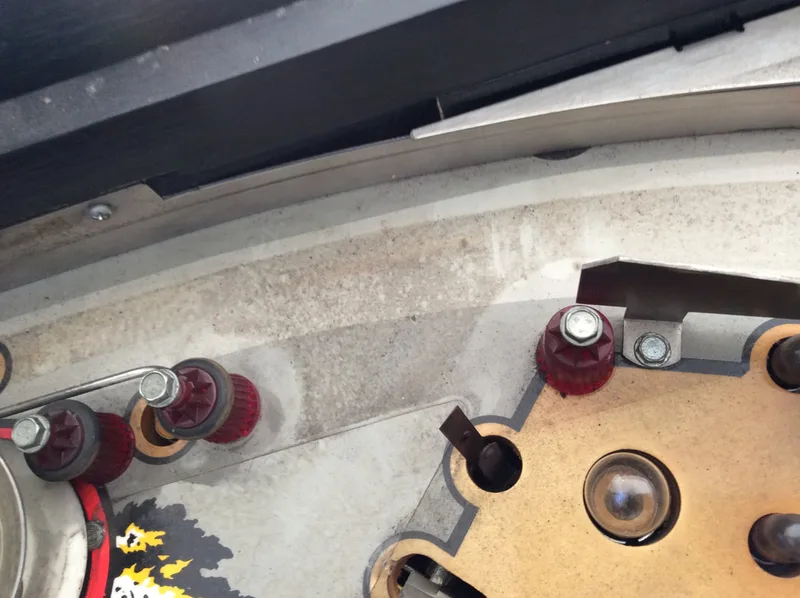
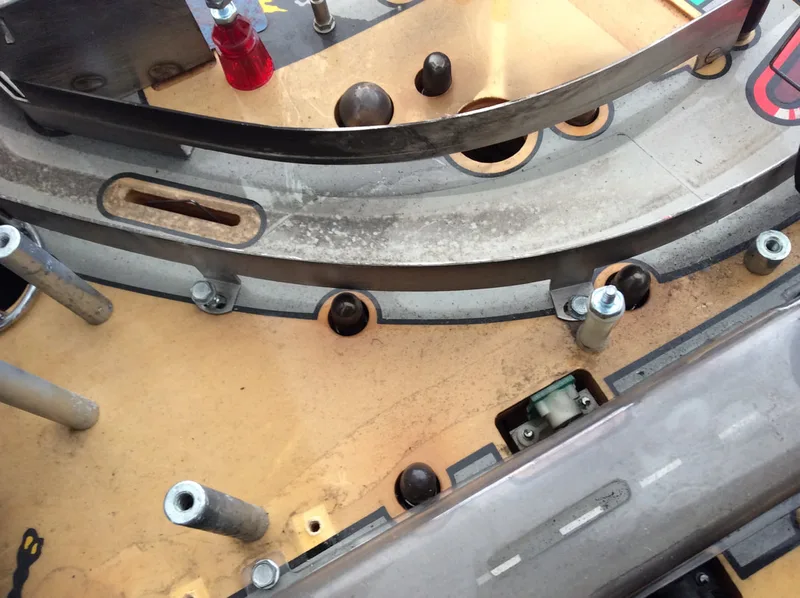
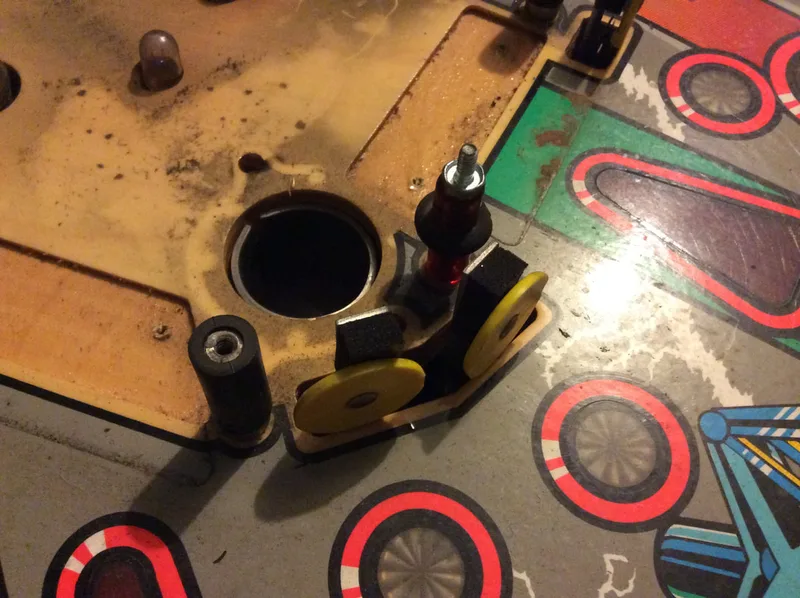
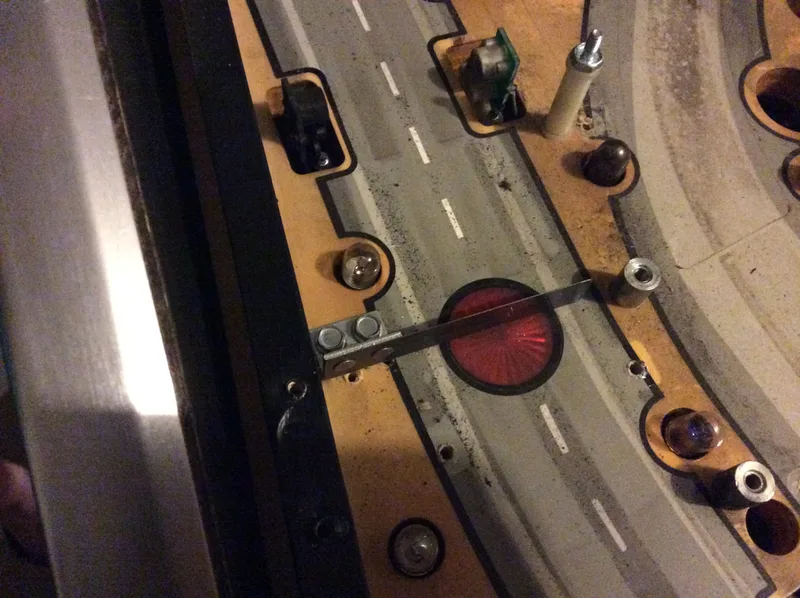
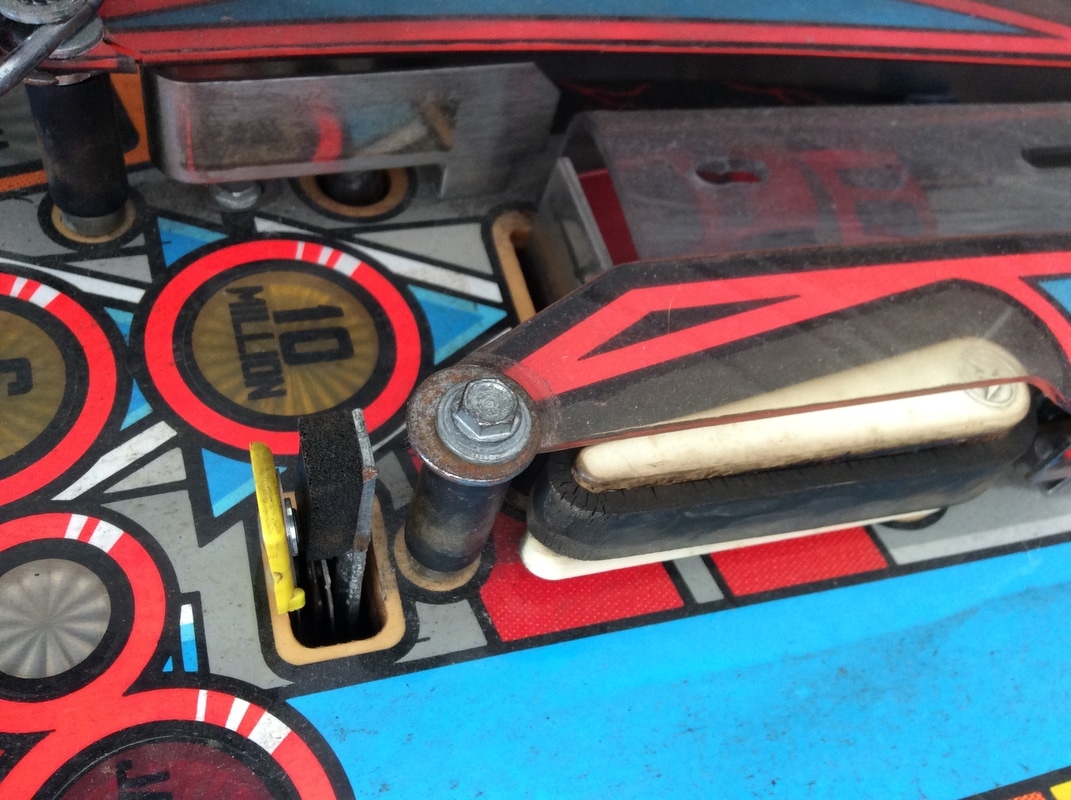
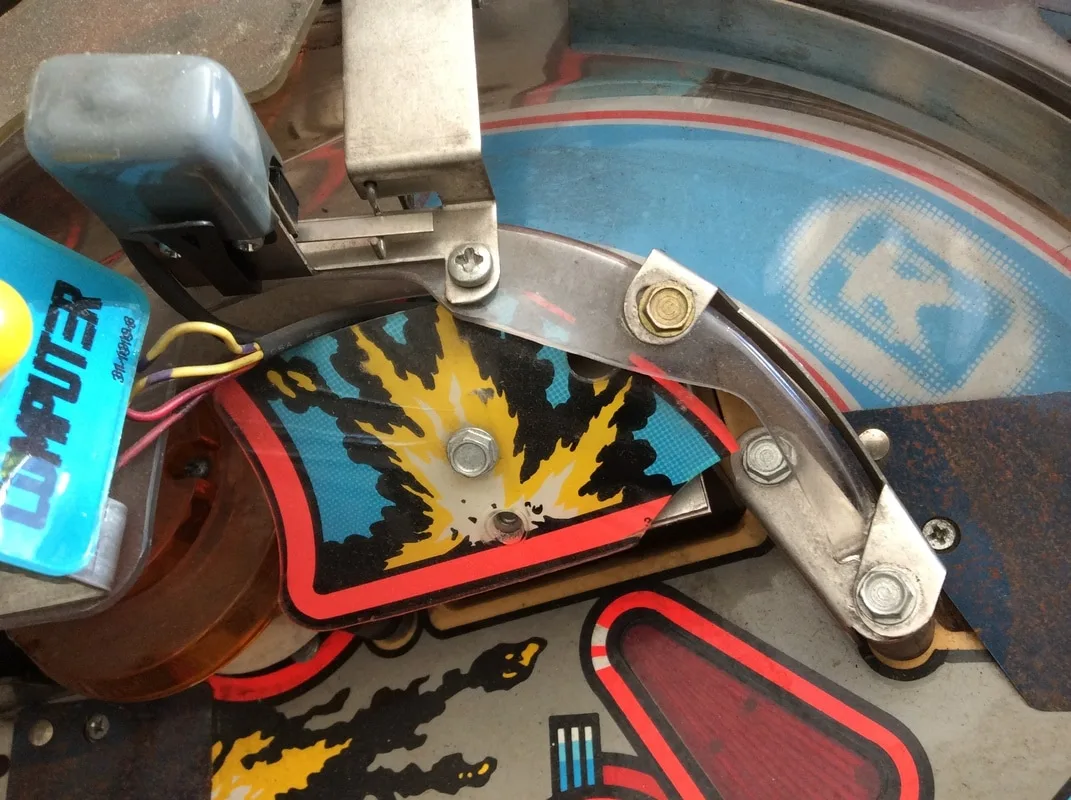
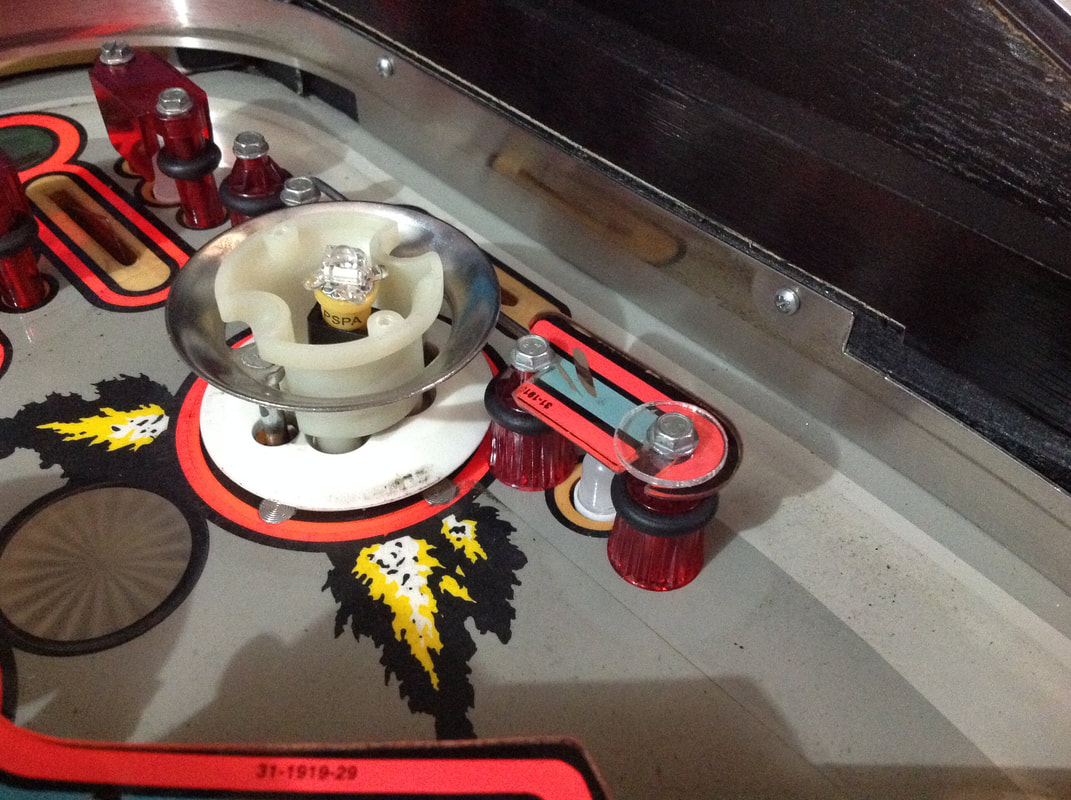
One thing to look out for is the plastic that sits just below the right pop bumper (part no. 31-1919-17). This plastic is tiny and is often broken or completely missing. My plastic was slightly chipped and I misplaced it a couple of times during this restoration so I'm not surprised that it often gets lost. The plastic usually gets knocked off from balls being plunged onto he playfield and straying from the shooter lane. I used a plastic washer to absorb any stray ball hits and lock the plastic down.

Plastic below the pop bumpers that is often broken or missing.
Broken plastic piece from the ramp entrance. Bugger.


Glued together and (almost) good as new.

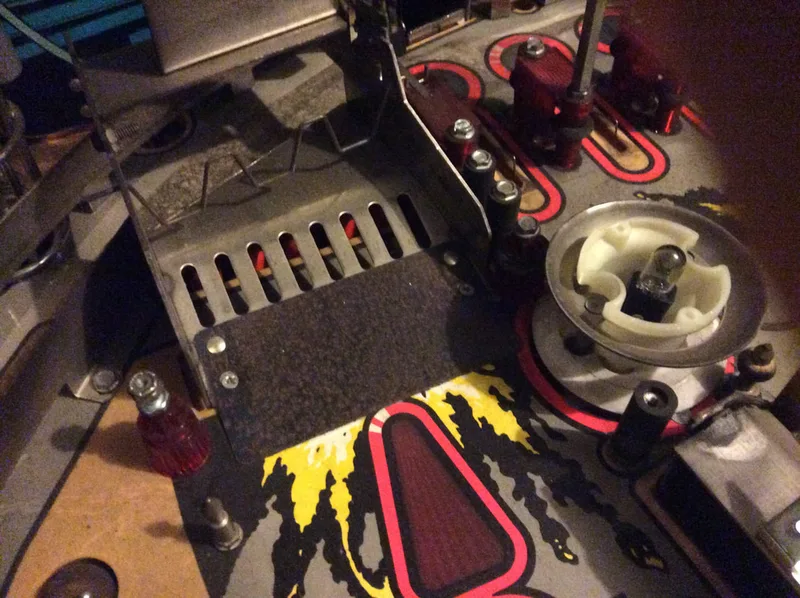
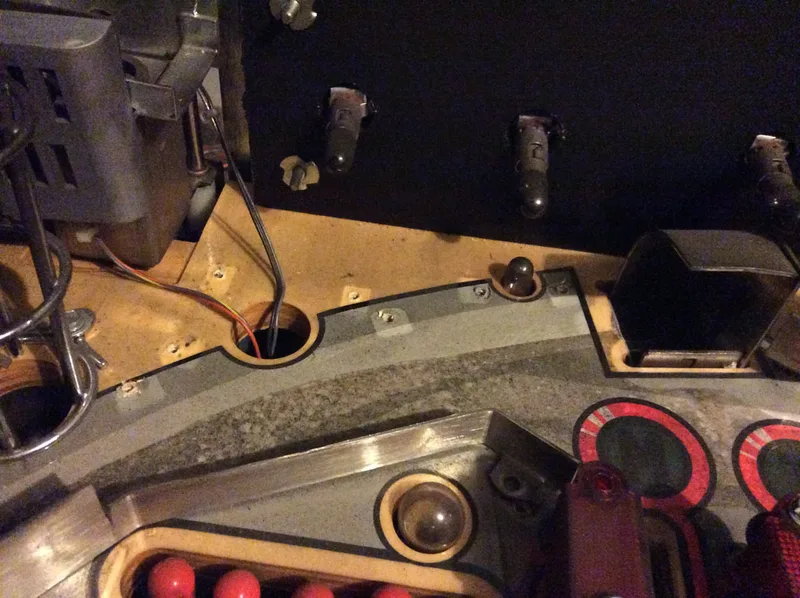
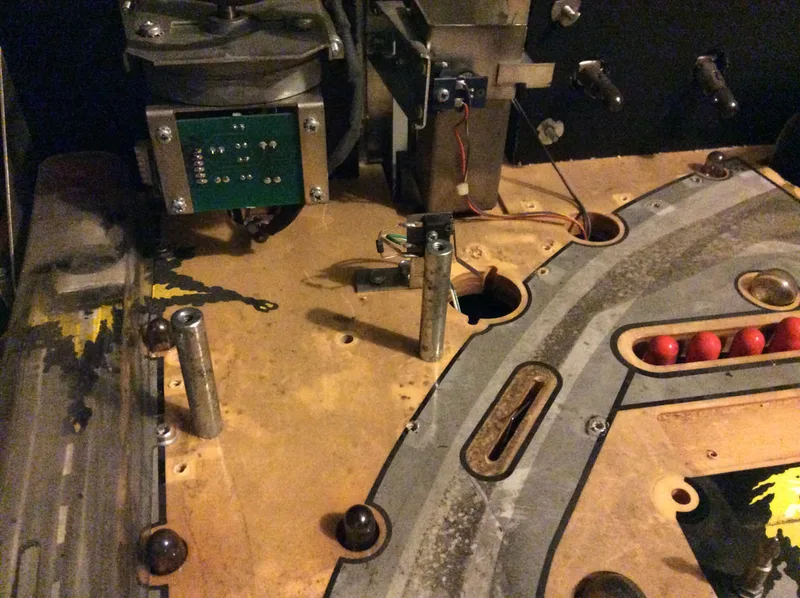
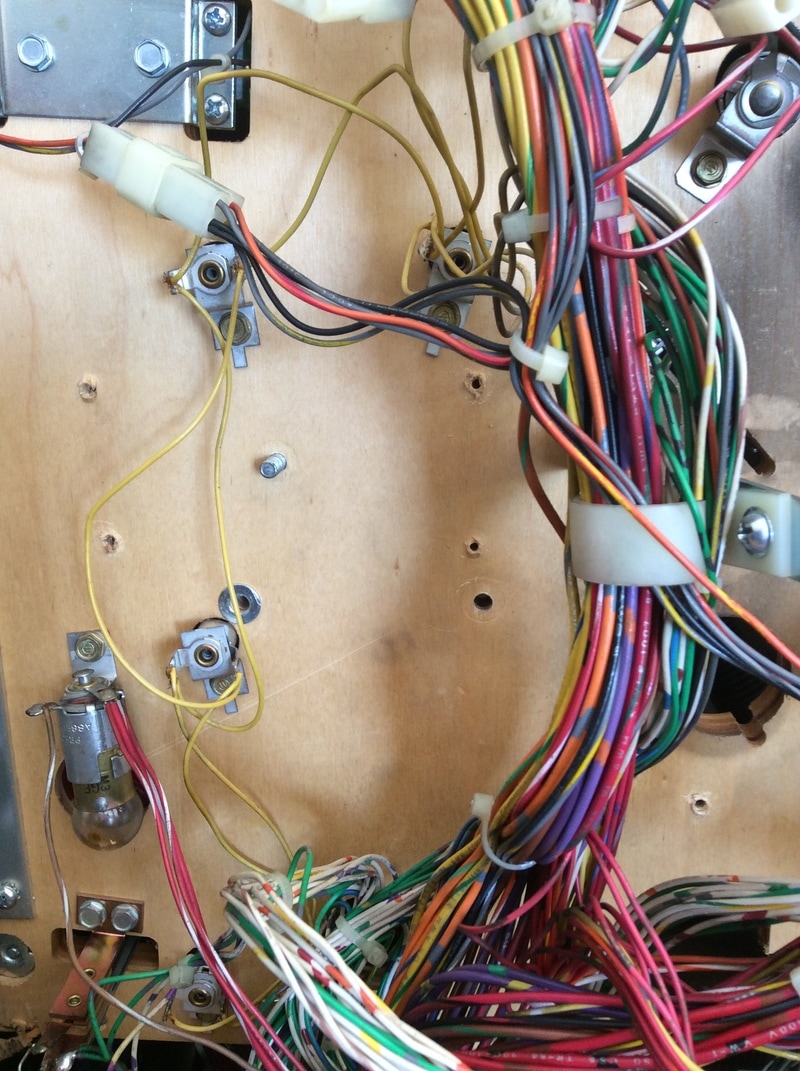
Loose connector for the motor driver board.
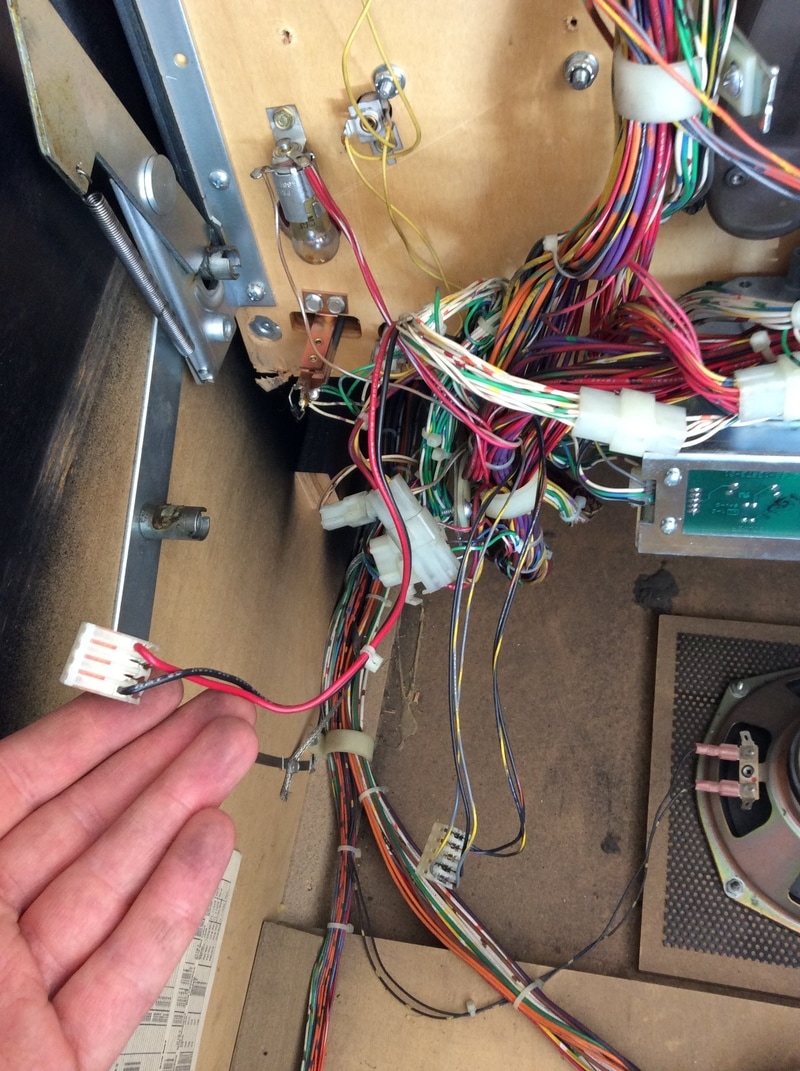

Empty space where the motor driver board is supposed to be.
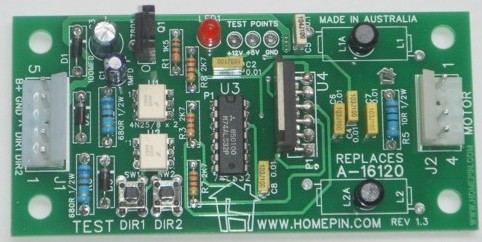
Homepin makes replacement boards which are a direct plug-and-play replacement for the motor driver board (PSPA, Pinball Haus). I ordered a new one and installed it; the Cryoclaw then came back to life! An easy (but expensive) fix.
Homepin A-16120 motor driver board replacement.
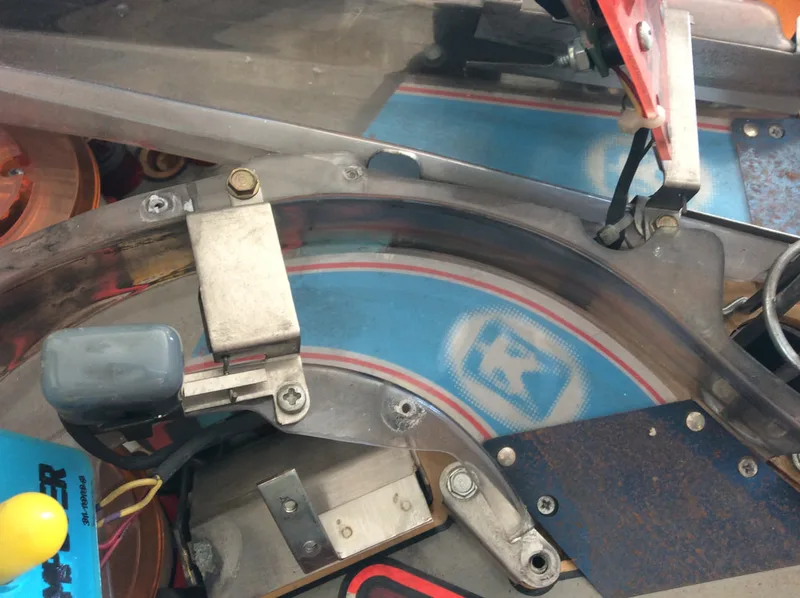
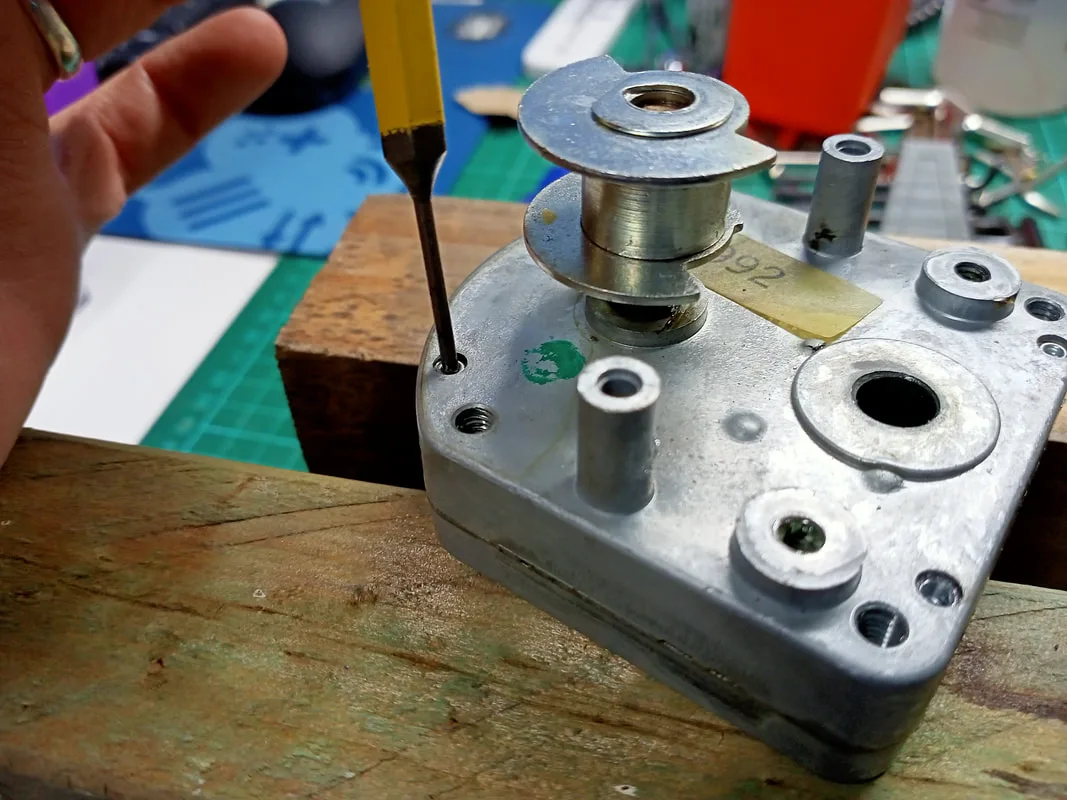
However, it didn't end there. While the claw was working and moving left to right as it should, it was very, very noisy. I put up with this for a little while until it got to the point that it began to make a slight grinding sound, which I'm sure isn't good for a gearbox. So, I decided to refurbish the gearbox. Removing it is quite easy and you don't need to remove many playfield components. Instructions for this are on page 1-43 of the manual.

Cryoclaw removal instructions as per the game manual.
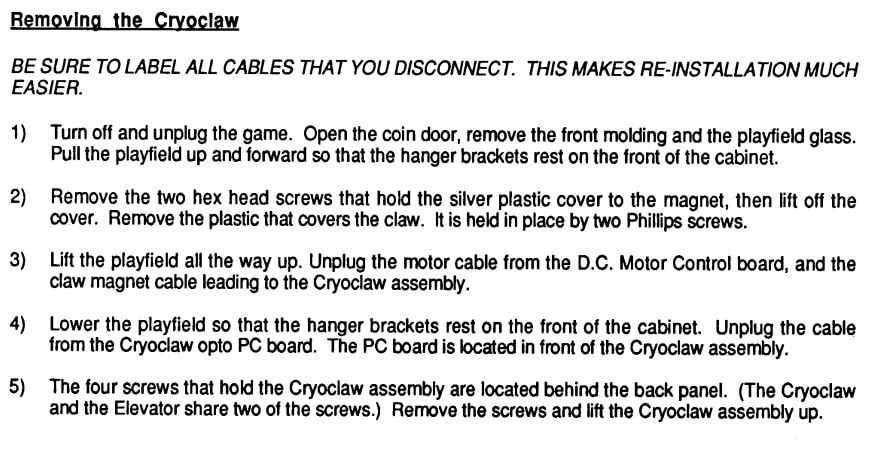
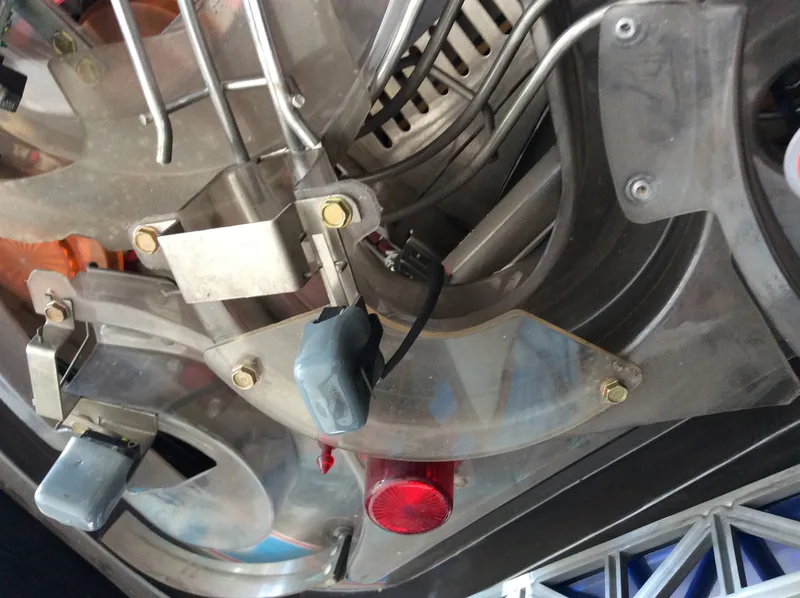
As is typical, I made life harder for myself by trying to remove more components than necessary. After removing the silver plastic covering the claw, I loosened the two grub screws at the back of the claw, and slid the claw arm off the spindle. I left this hanging behind the playfield until I was ready to reassemble. Next, I loosened the three screws attaching the lamp board in front of the claw to the support posts. I then removed the two screws which attach the grey plastic in front of the claw motor. You can manoeuvre this plastic out by lifting the lamp board and ramp plastics out of the way. It takes a little finesse, but it can be done without removing any ramps or plastics. This reveals the motor, and I could finally remove the four screws holding the motor assembly to the playfield backboard, lifting up and away from the playfield. Don't forget to unplug the connector on the opto board before you pull it away from the playfield, too!
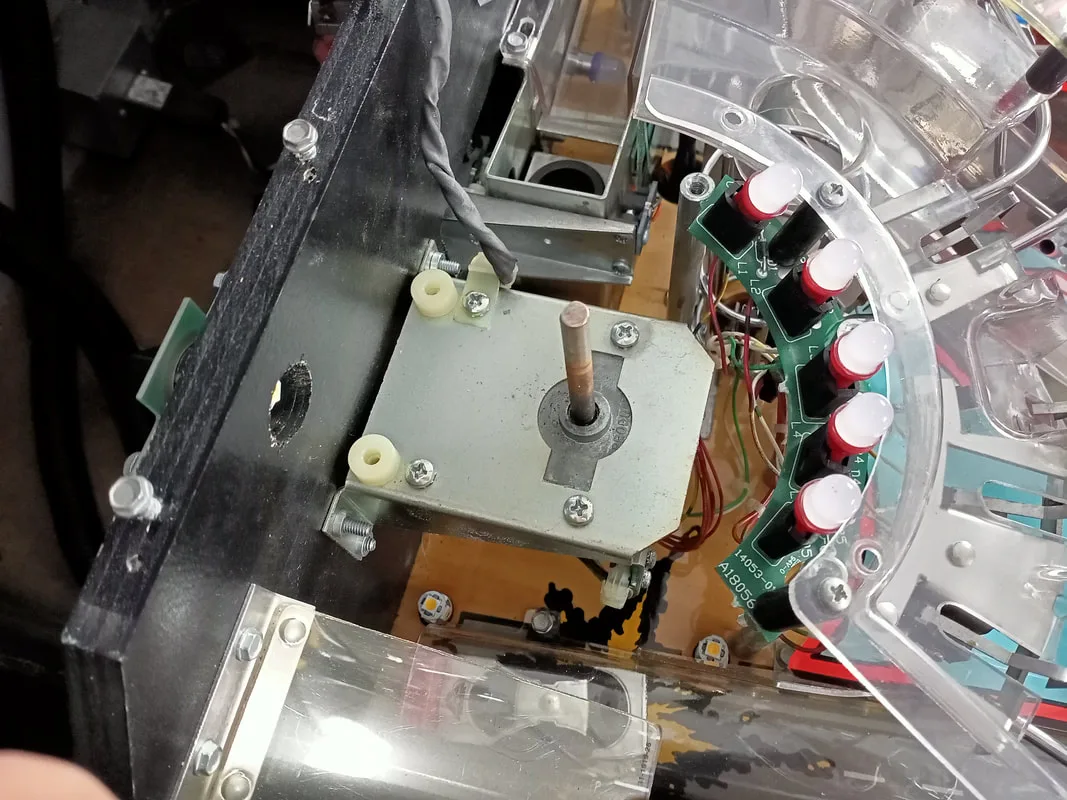
View of the Cryo claw motor after removal of covering plastics and screws.
With the motor assembly out of the game, remove the motor, brackets, and other hardware until you're left with the gearbox. The gearbox is riveted shut with tubular rivets, so you'll need to remove them. I used a 2.5mm drill to grind down the terminal ends of the rivets to loosen their grip on the assembly. Then, I drove them out with a punch. They came out quite easily.
Punching out the gearbox rivets.

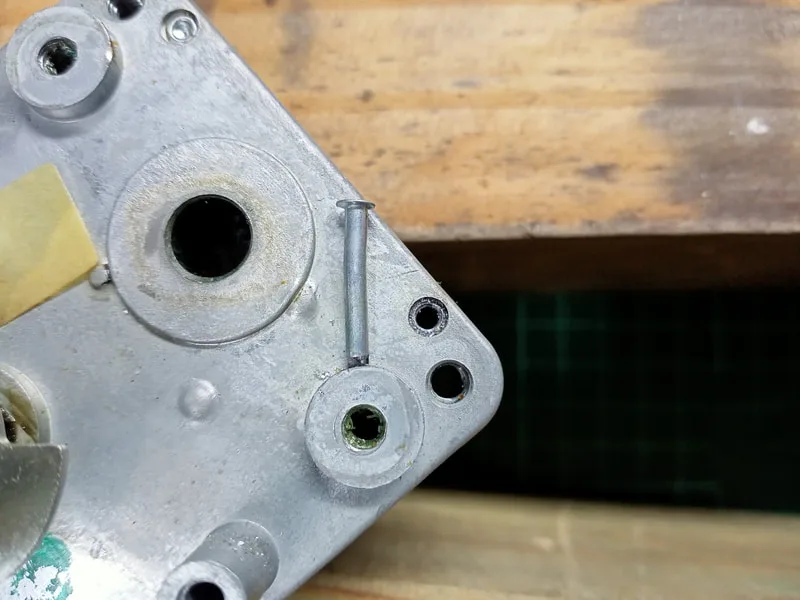
Rivet after removal.

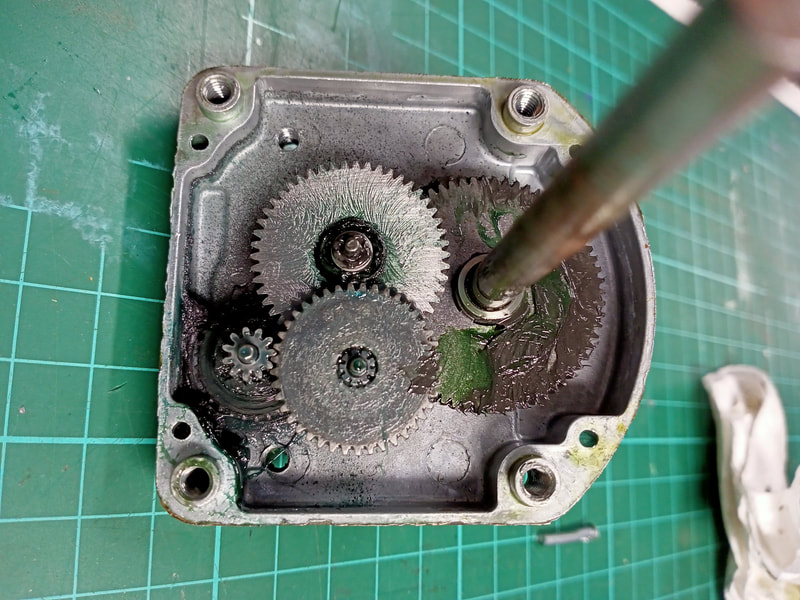
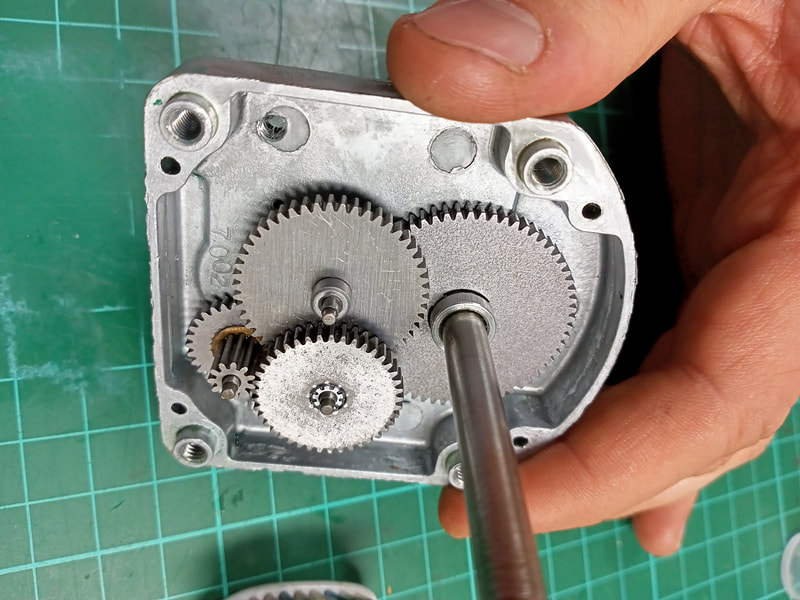
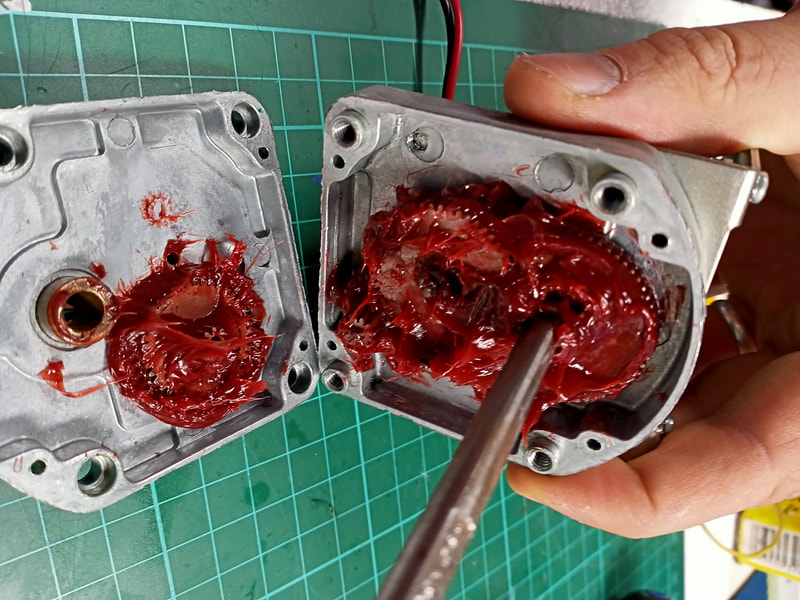
Finally, I could open up the gearbox case. There was a little grease present but there weren't any other obstructions in the gearbox. So, I wasn't quite sure why it was making a grinding noise. All the gears appeared to move quite freely with the case open. The gear teeth were all intact and looked OK. There weren't any mechanical problems in here that I could identify. The factory grease did look a little thinly spread, and some of it was quite dirty. The whole gearbox got a clean with degreaser (Bunnings) before liberal application of new grease (SuperCheap).

View of the gearbox after opening for the first time.

Gearbox after cleaning.

After application of new grease.
Reassembly is fairly straightforward. I didn't need to replace the rivets to secure the gearbox case as I was able to use the existing screw holes and slightly longer screws to hold everything in place.
Be mindful to properly adjust the height of the Cryoclaw arm when you secure it over the motor spindle. You may find that placing this as low as possible (as it naturally wants to sit) will cause the silver Cryoclaw plastic to sit too low, and will stop dropped balls from rolling down the ramps. Loosen the grub screws securing the claw and raise it a little higher to prevent this. Be careful not to mount it too high, as it will hit the top edge of the cabinet above the playfield when swinging to the right.
The gearbox overhaul seemed to help, and movement of the claw was a little smoother afterwards. The grinding noise appeared to be much better. However, the claw still moved a little slower than it should. I noted that, when picking up a ball, the claw moved even slower. This made it difficult to select a mode with the claw, as you would not have enough time to change your mind once you committed to a specific direction.
With mechanical problems seemingly eliminated, I moved onto electrical issues. I actually resorted to a bit of a hack to fix this issue as per a thread on Pinside describing a very similar problem. The solution in that case was to reconfigure the transformer for an input voltage of 220 volts rather than the standard 230 volt configuration. A decrease in voltage results in an increase of current, which would give the Cryoclaw motor more "juice". Reconfiguring the transformer for different input voltages is simple, and requires modifying the jumper plug which feeds voltages to the transformer. This is explained thoroughly on Pinwiki. The game manual lists a number of "alternative" configurations for different line voltages however these are based on a 9-pin power configuration connector, whereas my game has a 12-pin connector. Pinside user arakissun provided some photos and schematics showing how a 12-pin connector should be configured for each voltage.
240-volt jumper configuration.

220-volt jumper configuration.
Unfortunately, there was no improvement after the connector was reconfigured for 220 volts. I didn't notice any overall difference in the behaviour of the game's coils, or other components, either. It looks like this gearbox or motor may just be a little old and noisy. I'll live with it for now, as it still functions as it should. New motors and gearboxes are available if I ever go decide to replace it (Marco).
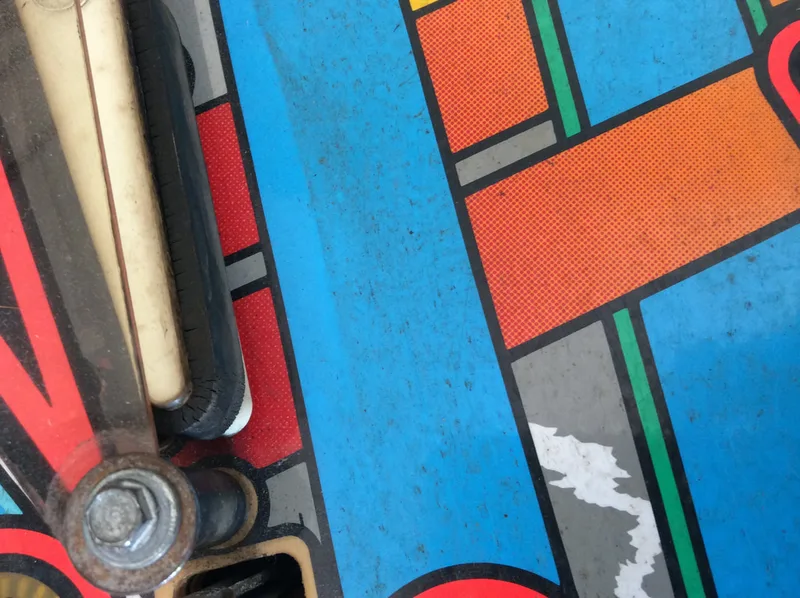
Areas of wear above the flippers.
Whenever you have areas like this that need repainting, sand the area down with 400 grit sandpaper to roughen it up and help the paint adhere to it. I didn't do this, which caused some problems with the paint lifting and peeling away as it could not stick to the playfield. Painting on playfields is hard because they are naturally polished, clean surfaces. You need a bit of grit for the paint to stick. When you're ready to paint, mask or frisket the area to protect against overspray. I buy most of my airbrush supplies and paints from Airbrush Megastore, which has a great selection. As per Vid's guide, Createx paints are the go-to product.
Next is colour matching. Fiona helped out with this as she has a great eye for colour. The insert borders are black and orange/red. The orange/red was a hard colour to match as it is fluorescent. We used Fluorescent Orange, mixed with Fluorescent Hot Pink, to get the proper shade. This playfield was not faded at all, but a lot of Demolition Man playfields are. You will be looking at more of a light pink colour if this is the case.
Shoot some layers down with an airbrush, or by hand, if you have a steady grip. Fiona was in charge of the painting and I stood by with the hair dryer to seal and dry the layers as they went down, which was a good system. The main mistake we made here was laying down too many layers. The dry paint film didn't stick to the playfield properly and peeled a little. We were able to push it back down and get it to stick, but sanding the playfield would have prevented this. After the orange/red areas were done, we had to do the black insert borders and areas between the orange sections. This was much easier - just a layer of Opaque Black. We followed these repairs up with some Matte Top Coat to match the sheen of the playfield and blend the repair area in with the original artwork.
Overall I was happy with the result, but we are our own worst critics! The area sticks out if you look for it as the paint is slightly uneven. This could have been avoided by using fewer paint layers and making sure they stuck to the playfield. Good to know for next time. For the time being, the repair looks pretty good and is difficult to spot under playfield GI lighting.

Playfield after repair and repainting. Vast improvement.

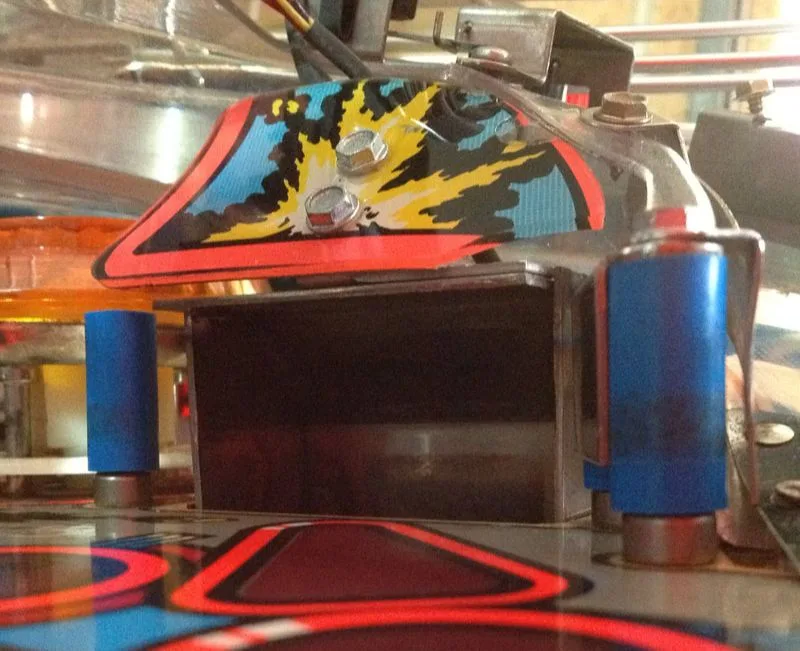
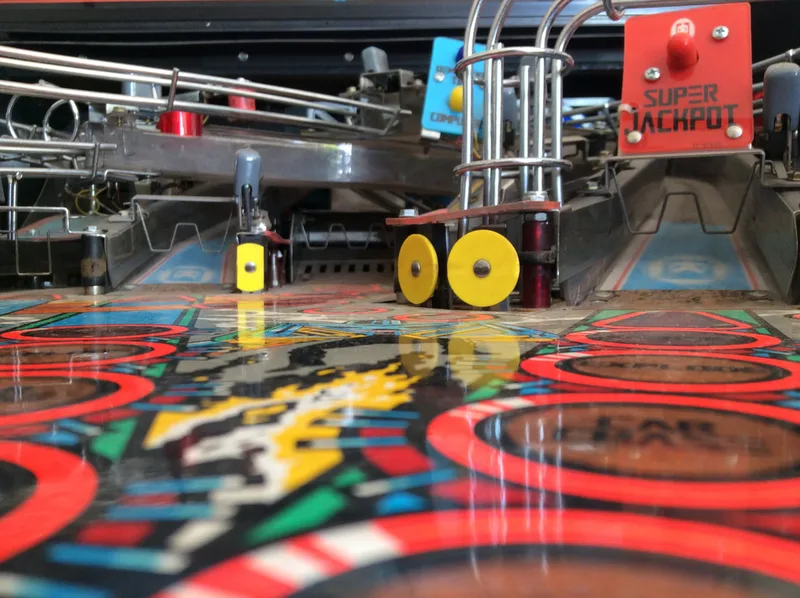
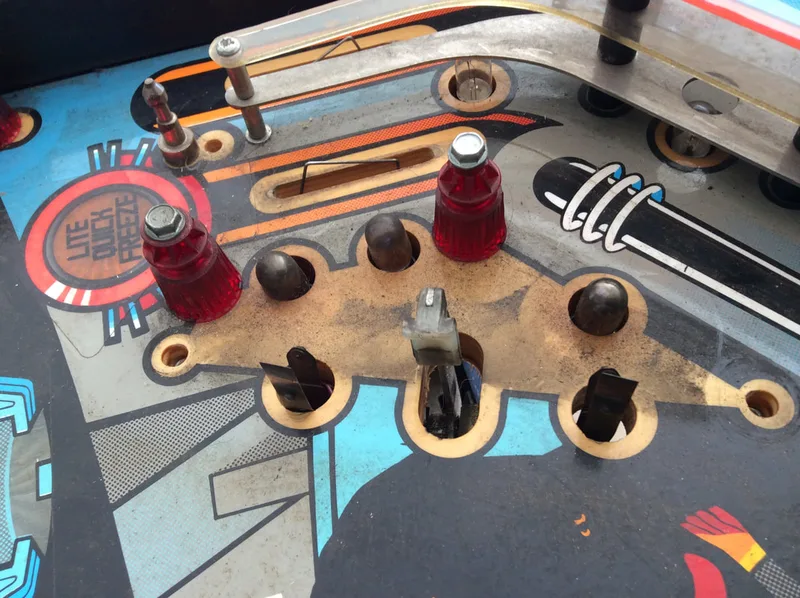
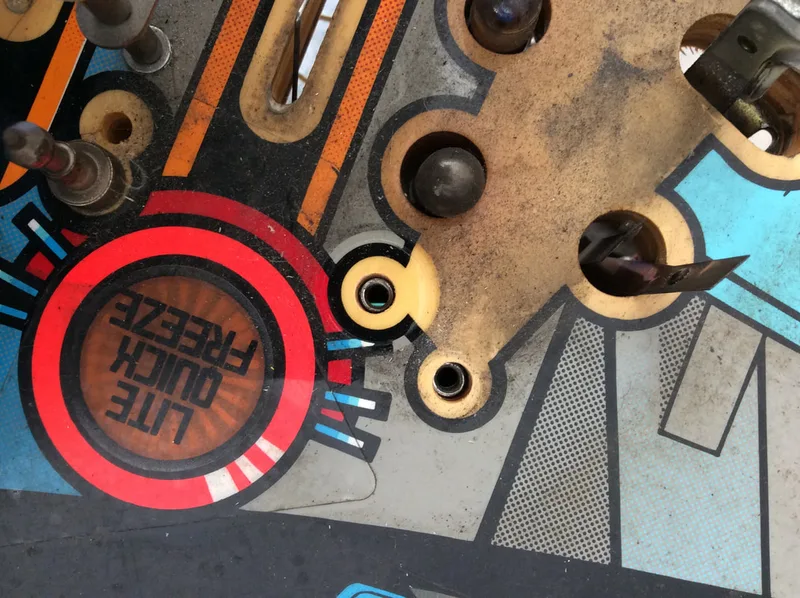
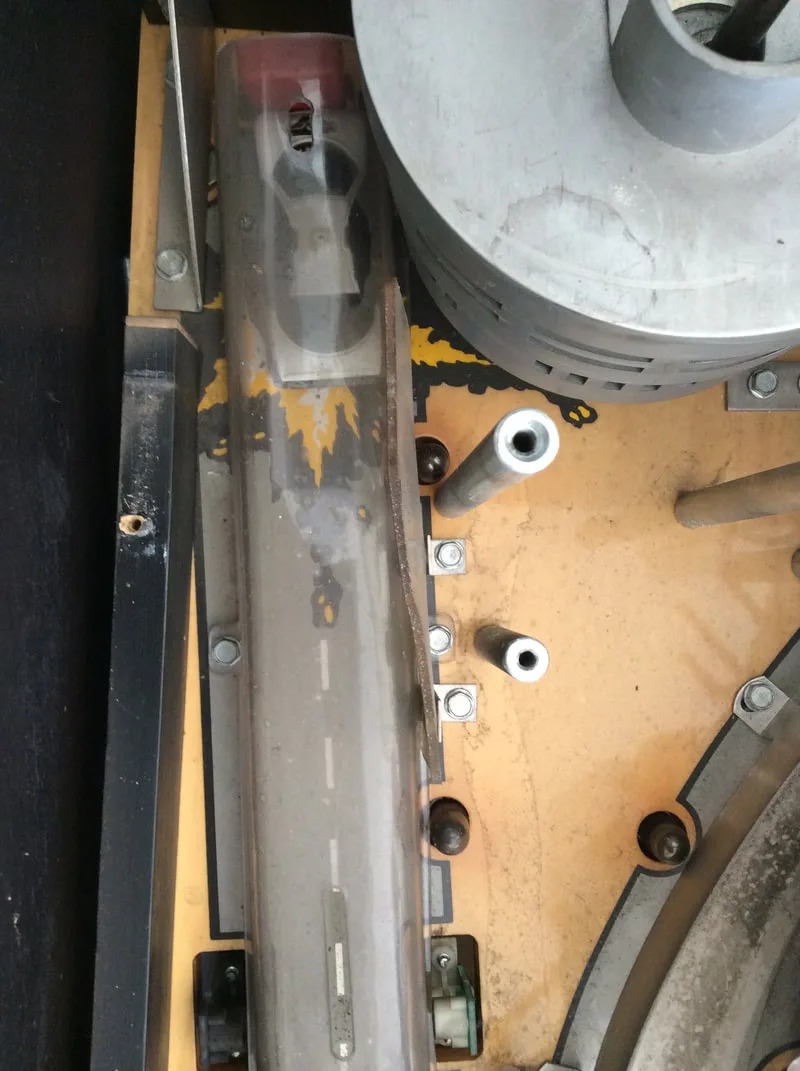
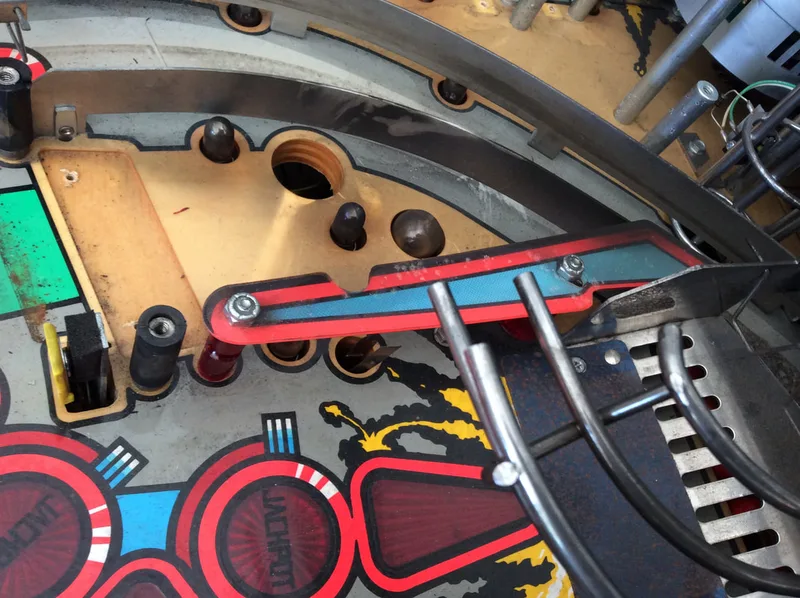
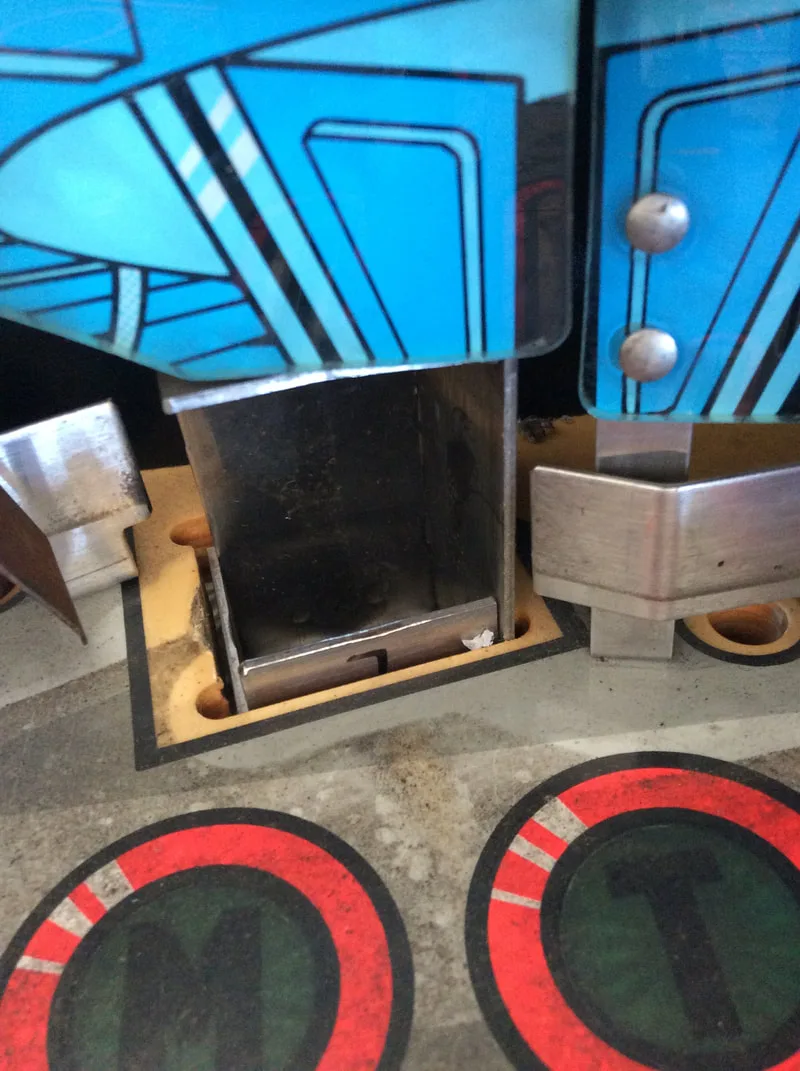
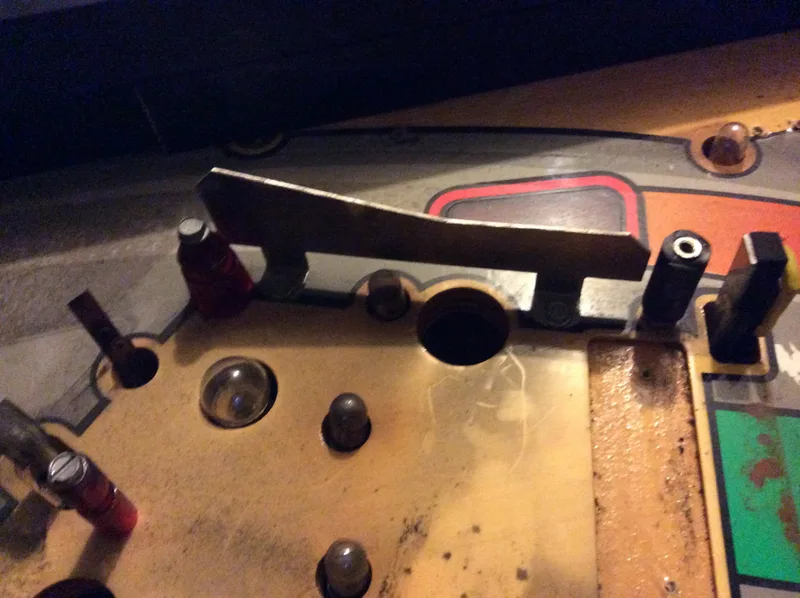
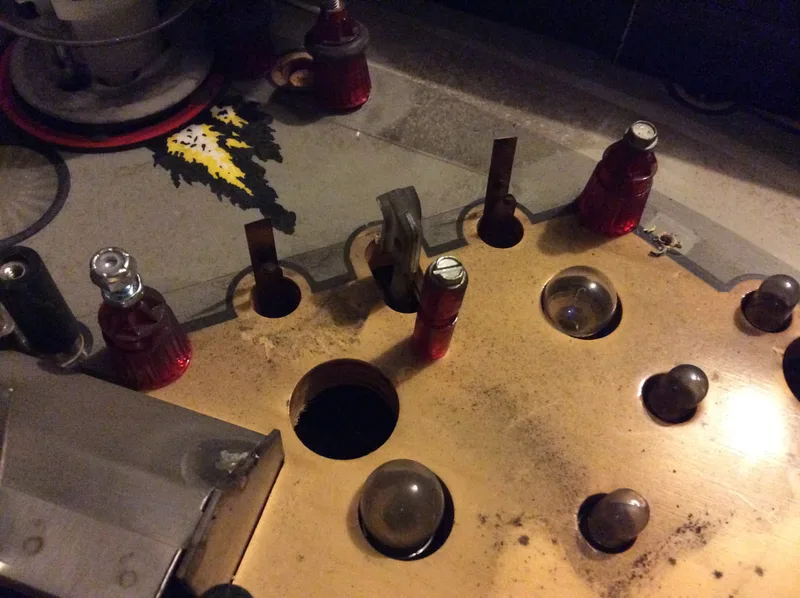
Ball view of the subway chute entrance.

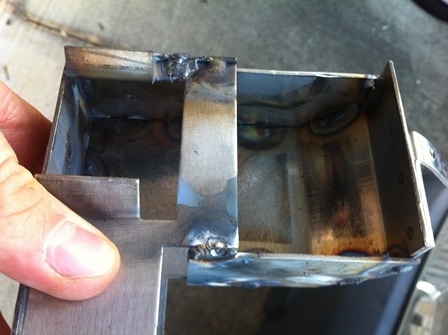
The welding on this assembly was poorly done at the factory, with only a couple of spot welds holding the plates of the assembly together. Usually, the plates on the side of the hole break away from the rest of the assembly. This is exactly what happened on my machine; the plate on the right side was completely detached and the plate on the left was starting to come apart. Having this assembly re-welded properly ensures it will survive for years to come. All credit for the welding goes to a boilermaker friend of mine who made it stronger than it ever was before. Thanks, Daz!
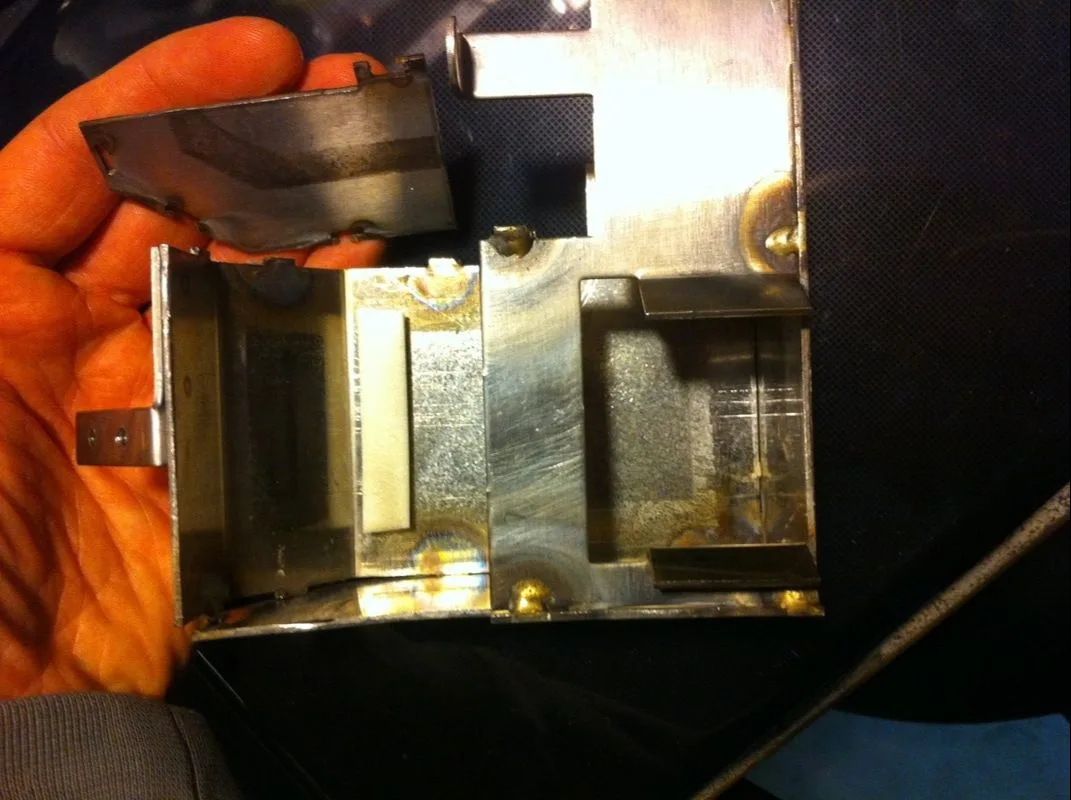
Complete separation of the plates of the chute assembly before repair.

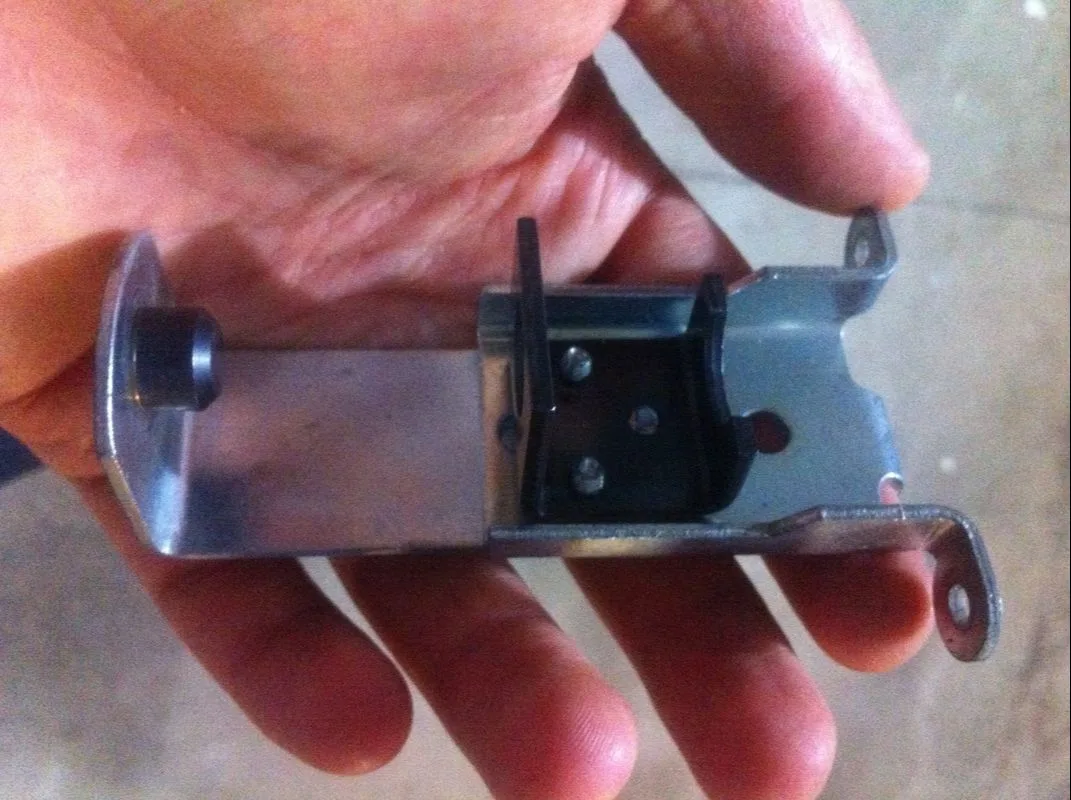
Rewelding of the chute assembly to stronger than new! Front view.

Rewelding of the chute assembly to stronger than new! Rear view.

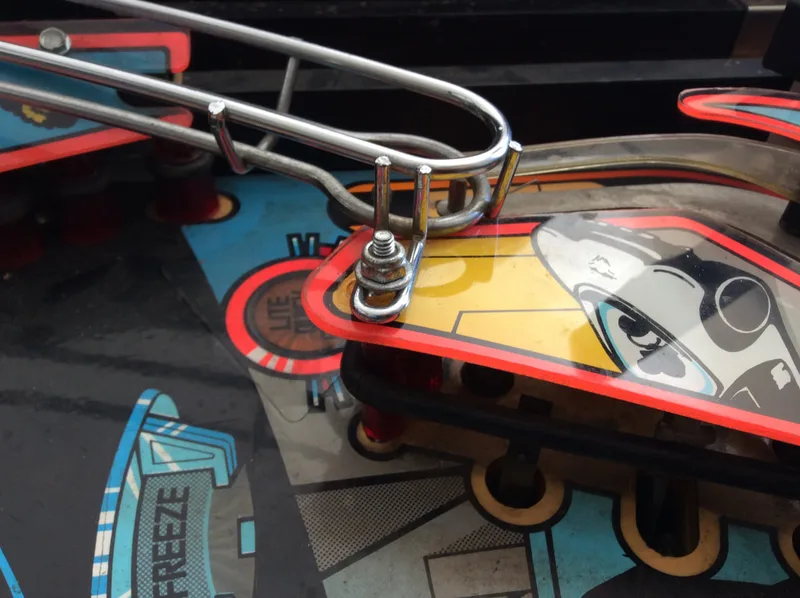
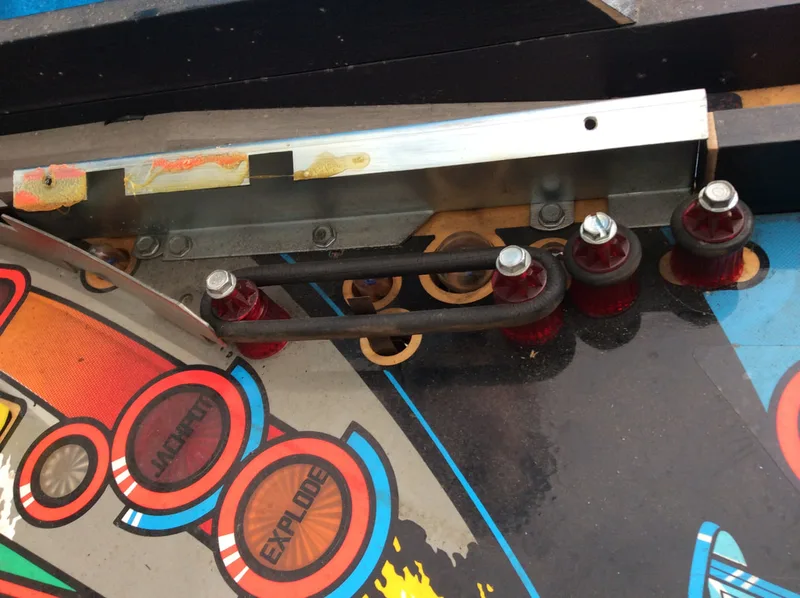
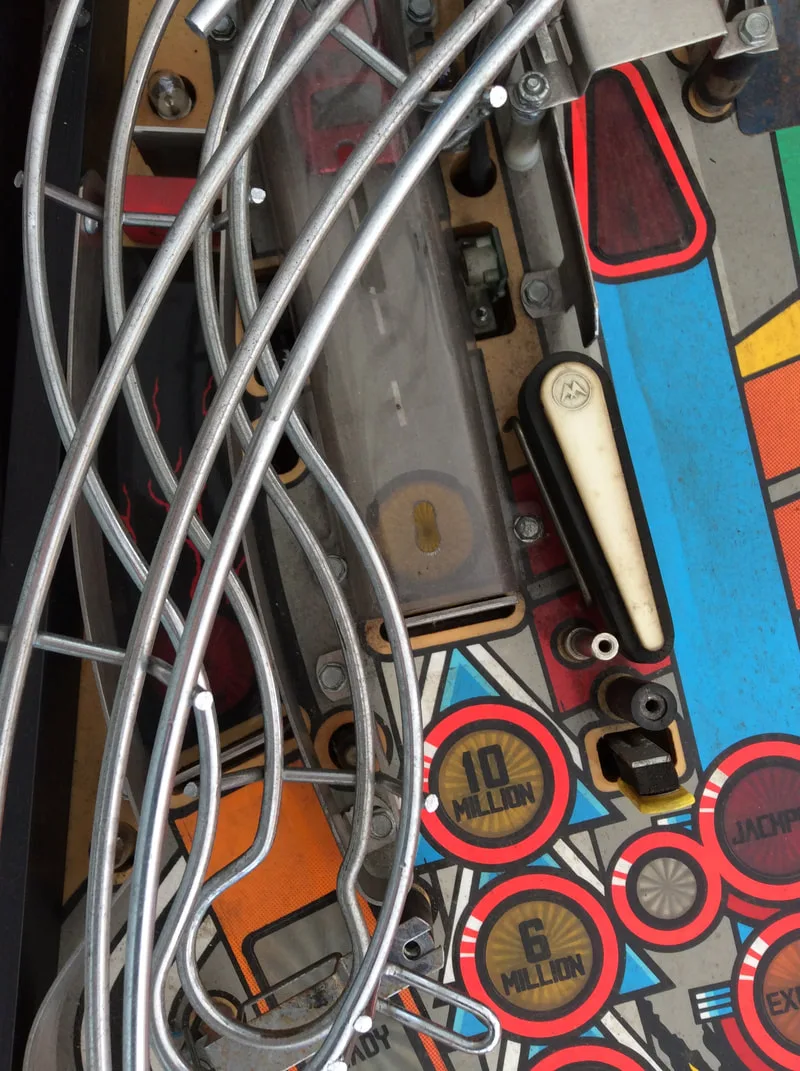
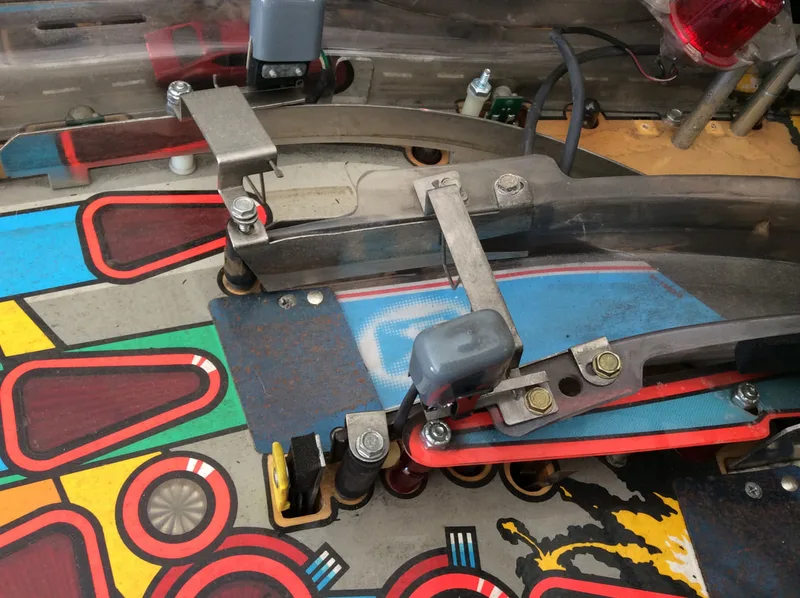
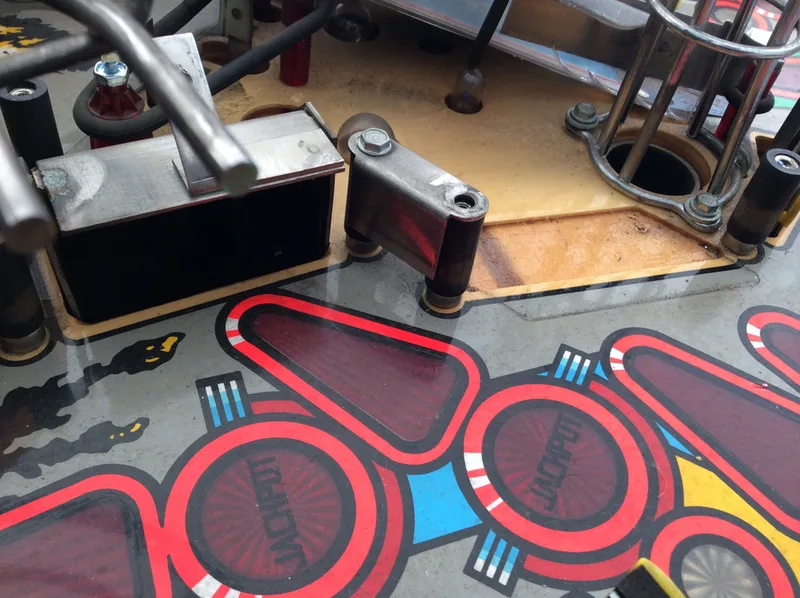
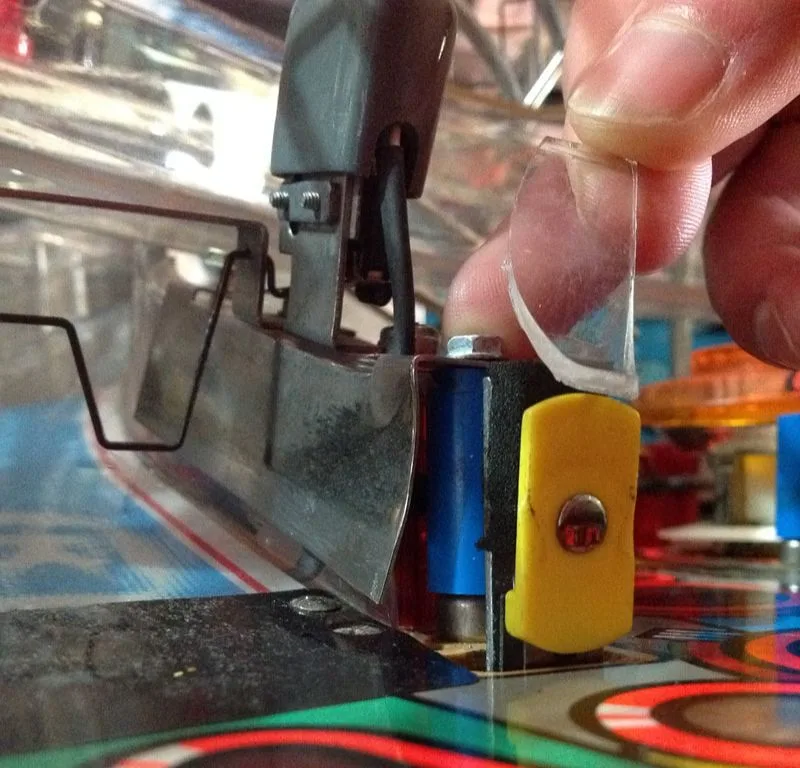
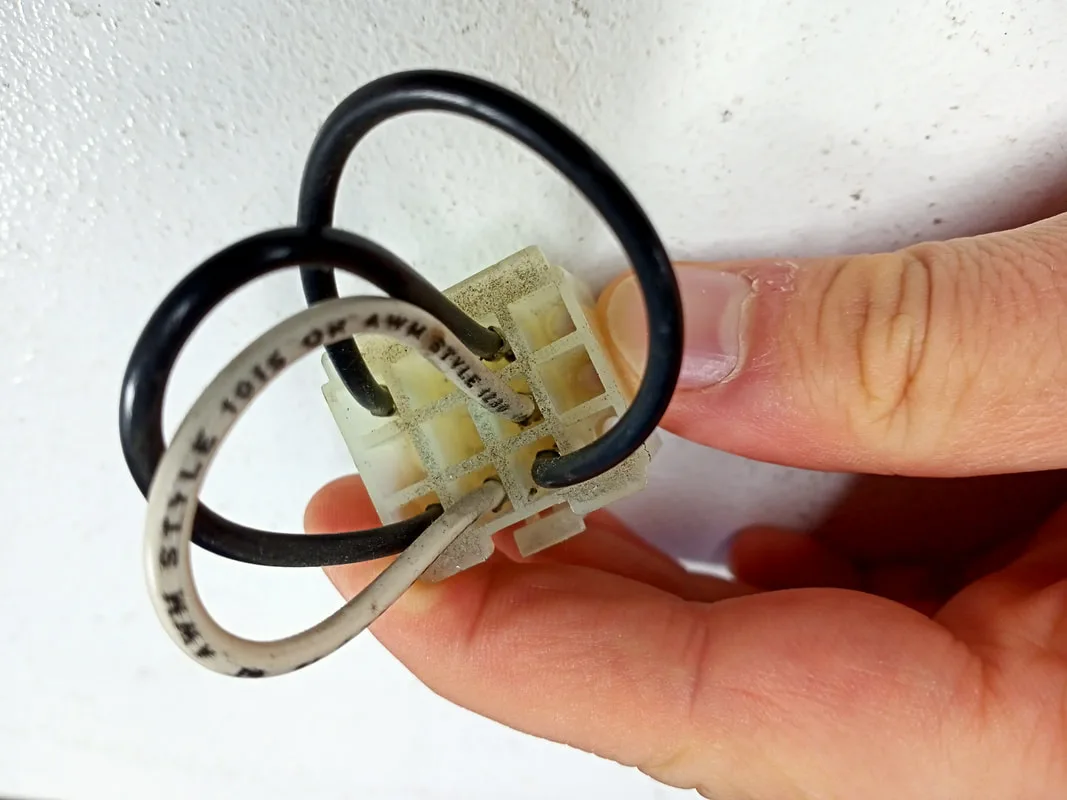
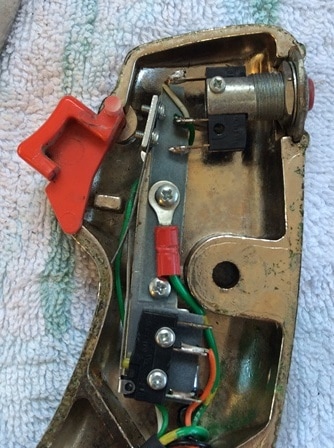
Bally/Midway thumper bumper bracket used in place of a Williams pop bumper bracket.
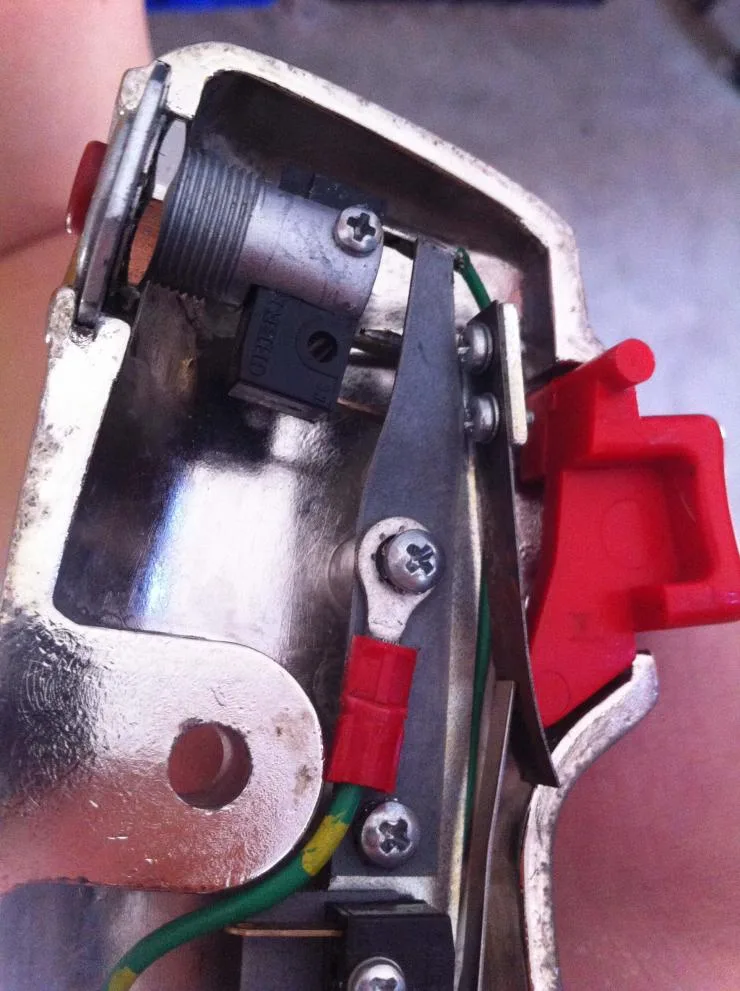
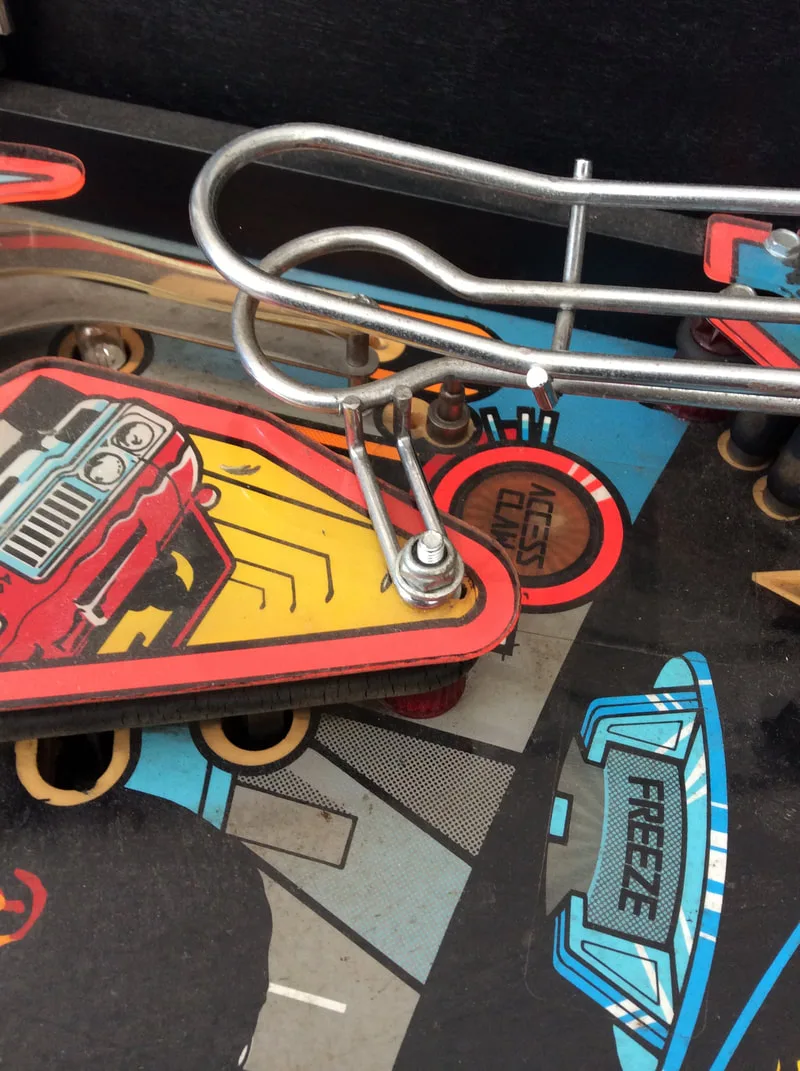
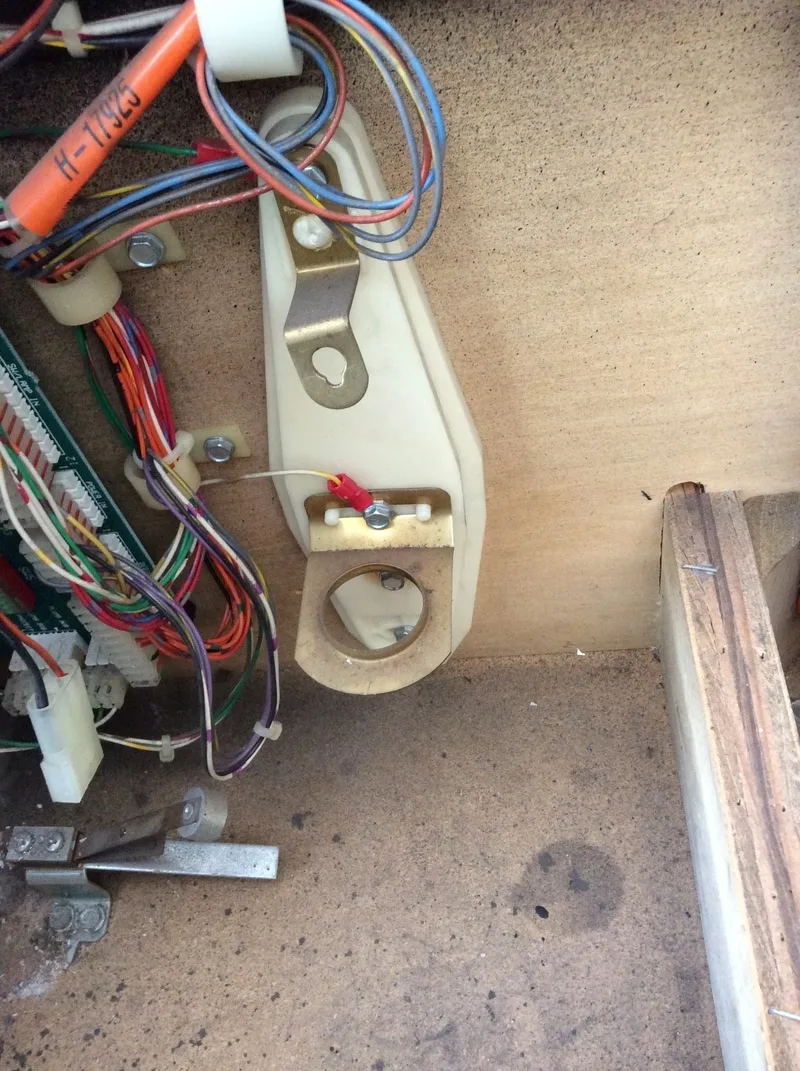
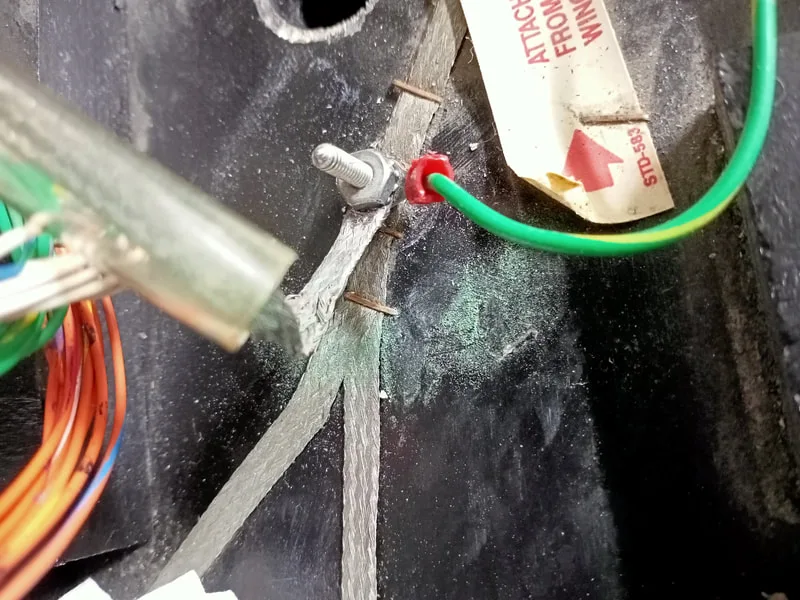
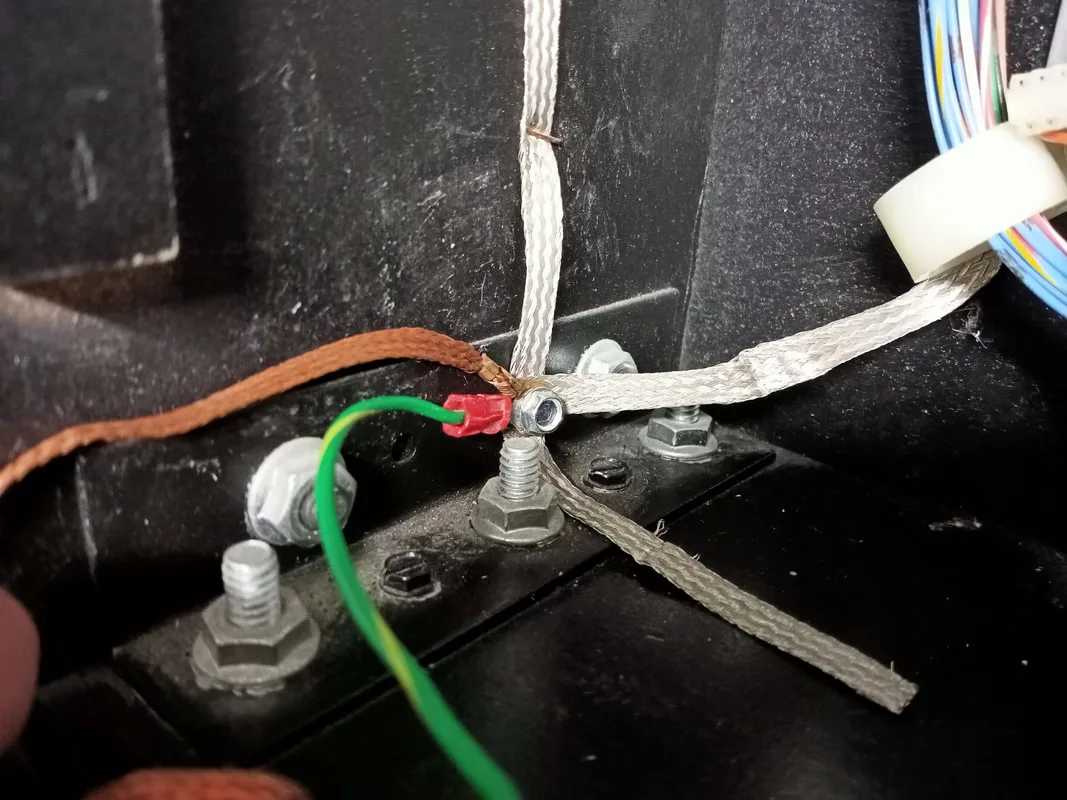
Incorrect installation of the grounding strap. Notice it is on top of the button switch lugs.


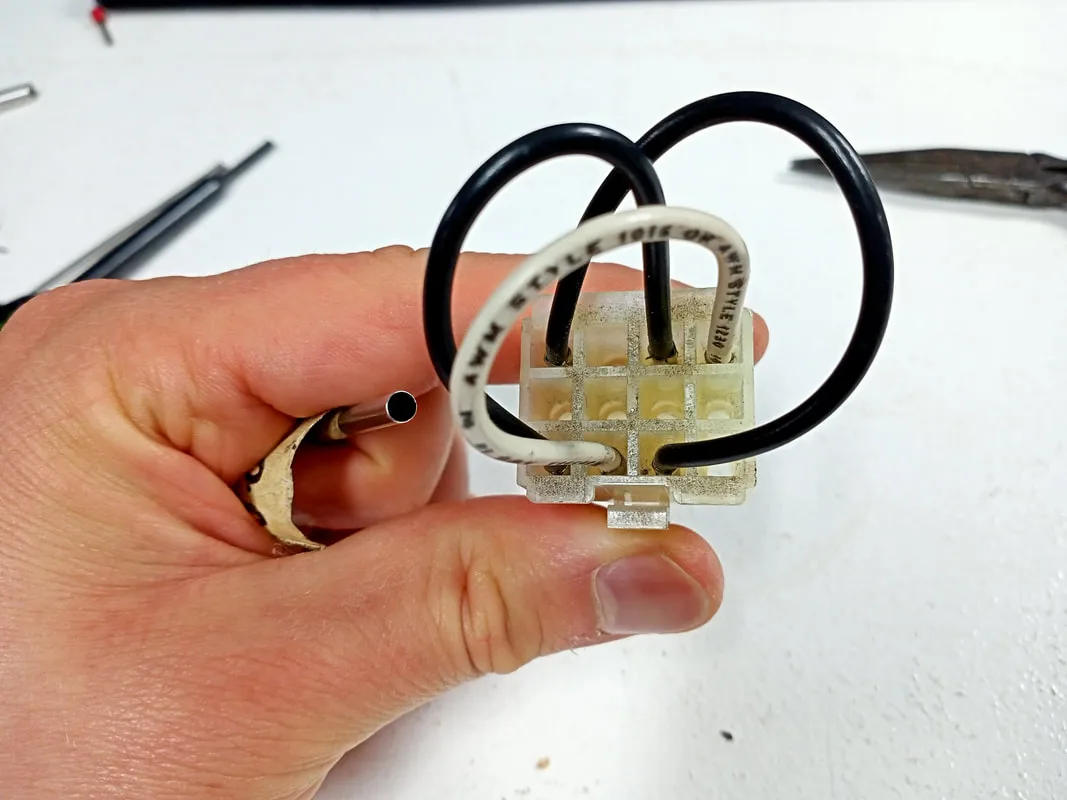
Correct installation of the grounding strap on the opposite handle.
However, that wasn't the end of my grounding issues. After I had fixed the shorting issue caused by the grounding strap in the trigger handle assemblies, I started to see switch issues where every single switch row was throwing a ground short. The physical switches on the cabinet and playfield did not seem to be the problem. After unplugging J209 and J212 from the MPU board, all switches showed as open, including switch 24. Switch 24 in WPC games is always meant to be closed, as it is not actually a switch, but a diode on the coin door interface board. An issue with switch 24 showing open indicates a serious issue with the switch matrix circuitry.
This suggested the problem was not with the wiring on the playfield, but with the MPU board itself. To confirm, I used a test lead to ground pins at J207 to those on J209, simulating a switch closure on the playfield. This procedure of switch testing is described on Pinwiki. Each pin registered several switch closures each time I made contact instead of just one. Another bad sign. So then I had a look further up the MPU board as specifically at the integrated circuits and resistors above the switch matrix connectors. Bingo! One of the pins on the U20 chip had fried!
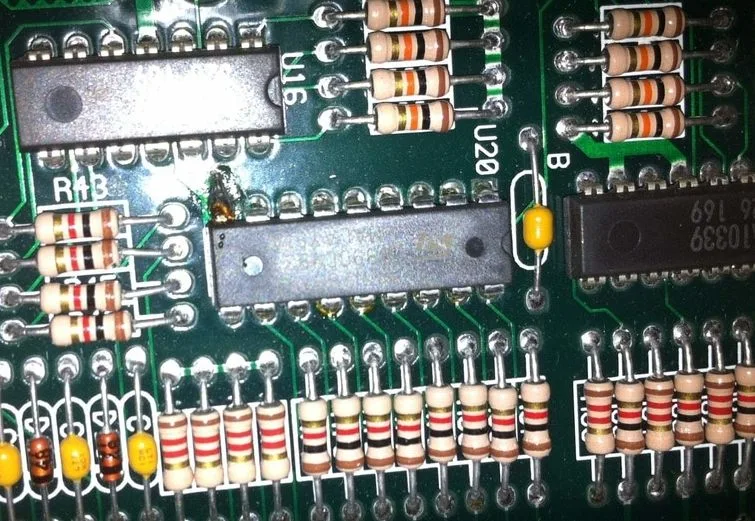
Blown pin on the U20 chip on the MPU board.

This is actually a very common issue with WPC systems and can happen if a higher voltage is sent down the switch matrix (such as when you connect a live lamp socket to a switch lug with a screwdriver!). I have no idea how U20 blew up on my machine, but John from John's Arcade graciously offered to help me out by removing the old U20 chip, soldering a socket into the MPU board and installing a new U20 chip into it. He also repaired the traces on the underside of the board which were also damaged. I reinstalled the MPU and all of the switches worked perfectly. Thanks, John!
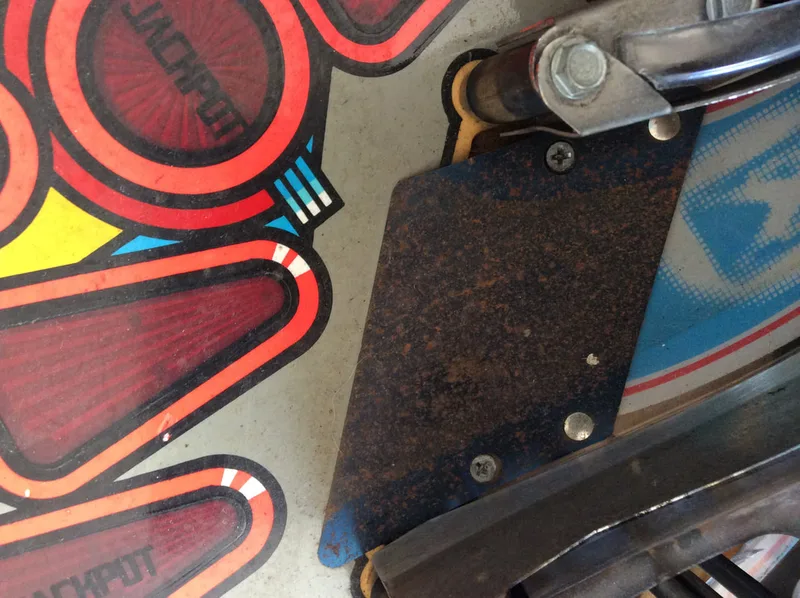
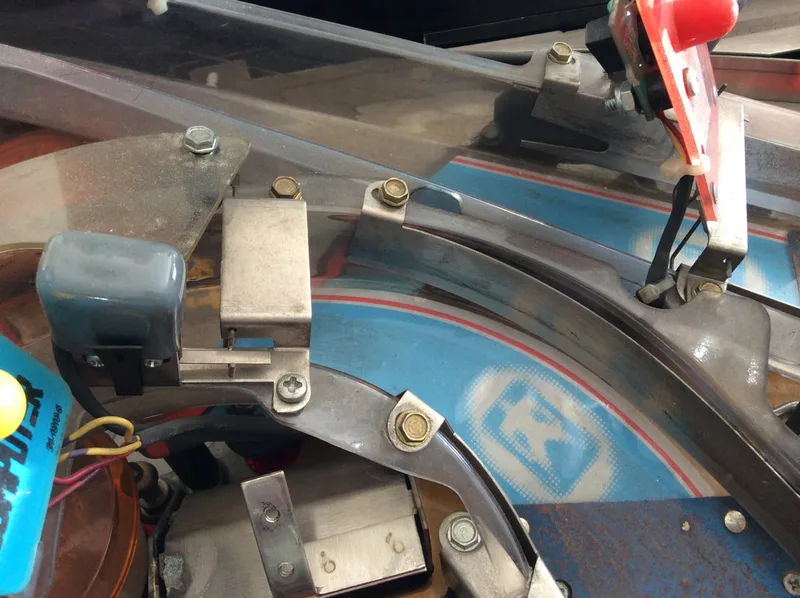
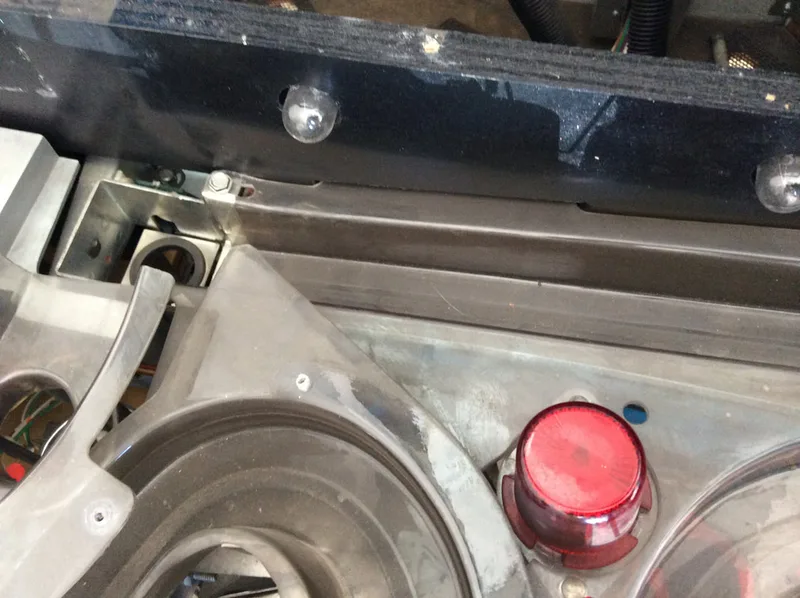
There was another grounding issue which I discovered by chance when testing voltages in the backbox. As I was trying to find an appropriate ground point to connect my meter lead to, I realised that I would get totally nonsensical voltage readings when I used the right side rail as a ground point. The left side rail, and all other grounded parts of the cabinet, gave me correct voltages when used as a ground reference. So why didn't the right side rail do the same?
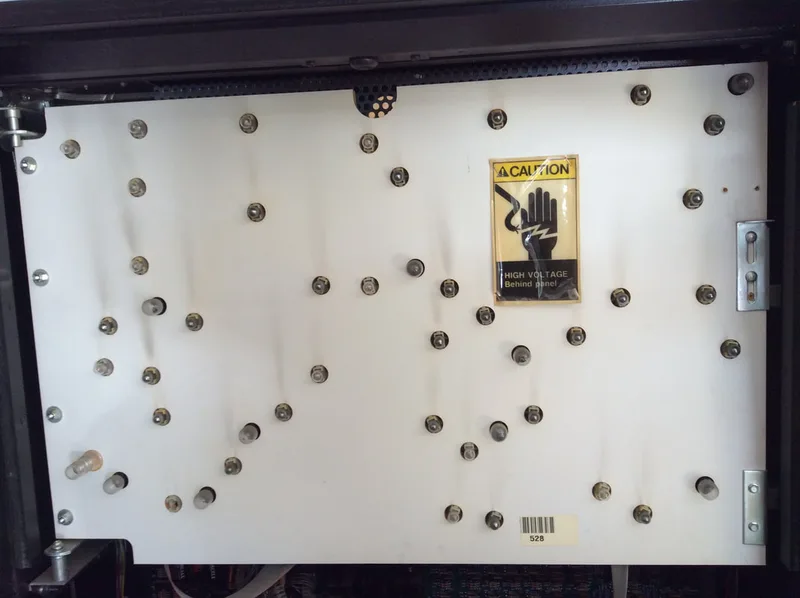
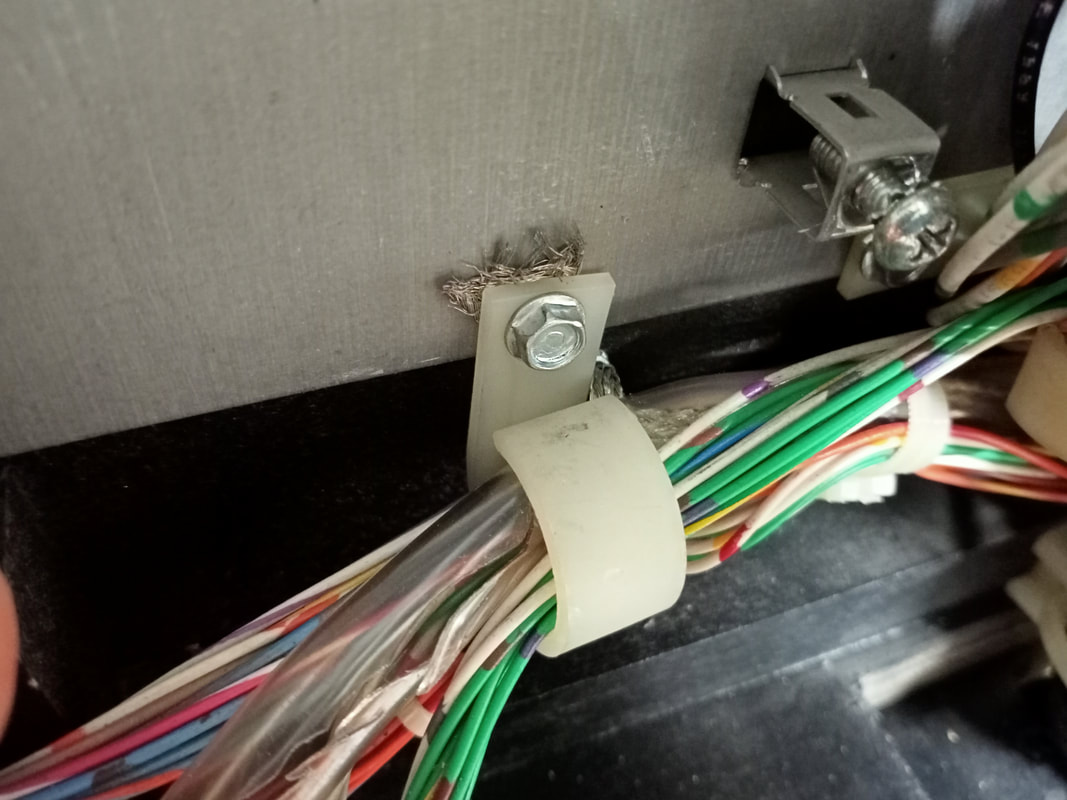
All of the metal parts within the cabinet, and especially those that are present on the exterior of the cabinet, must be properly grounded so that they do not become electrically active should a live wire contact them. I found that there was no continuity between the right side rail and other grounded parts of the game. On WPC games, the side rails are connected to the ground braid via a single bolt and nut towards the front of the cabinet. This nut had come slightly loose, so the bolt attached to the side rail was not making good contact with the ground braid attached to the same metal bracket. Tightening up the nut restored continuity between the side rail and the rest of the grounded cabinet.

Nut securing the side rail bolt to the metal bracket attached to the ground braid.


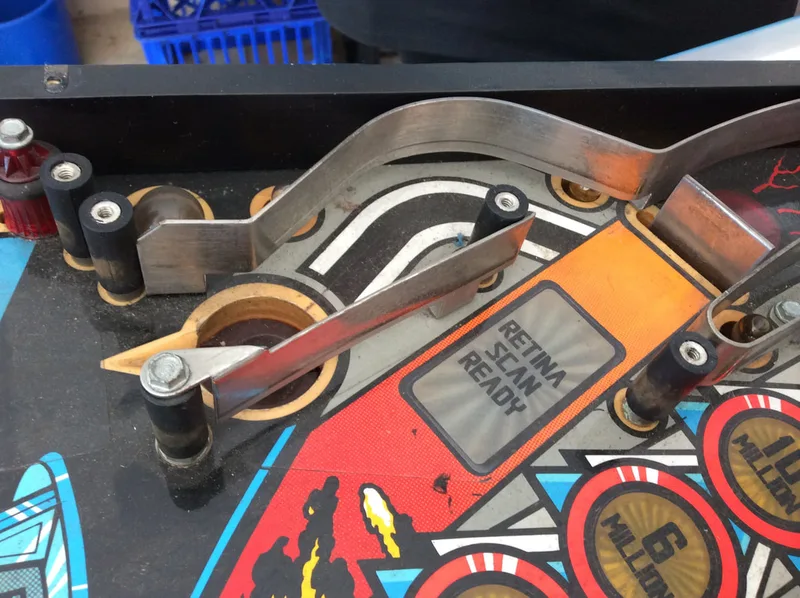
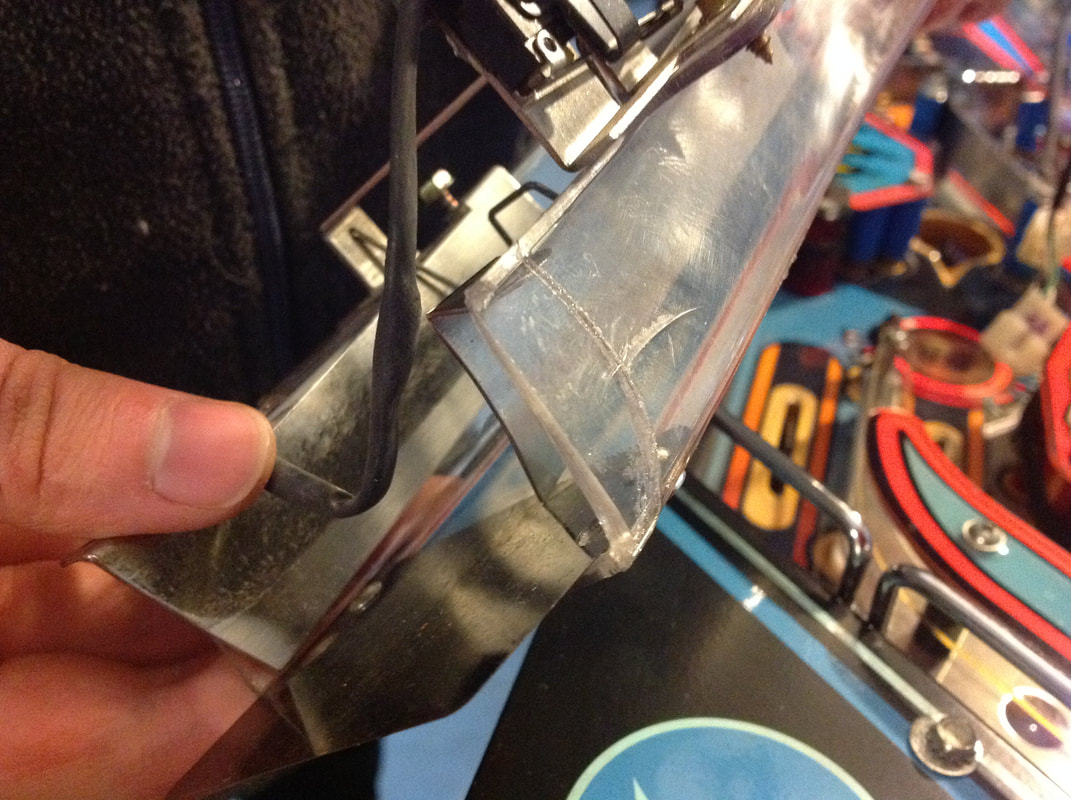
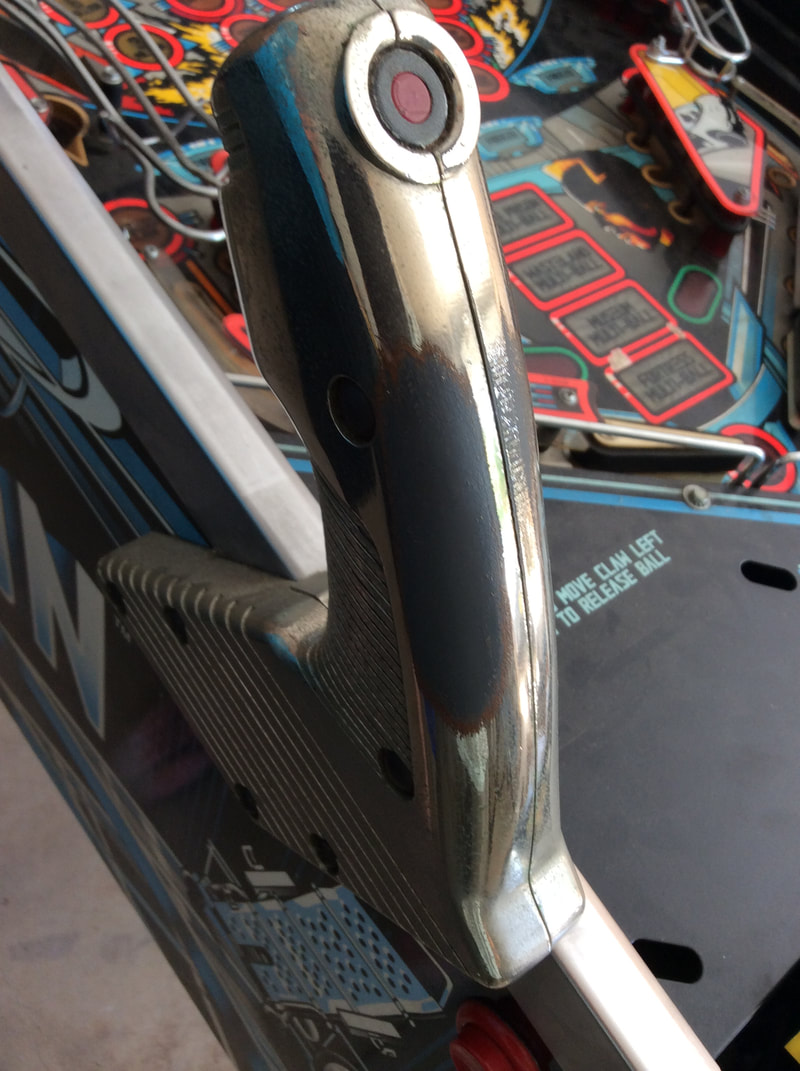
Wear to the trigger handles down to the bear metal.

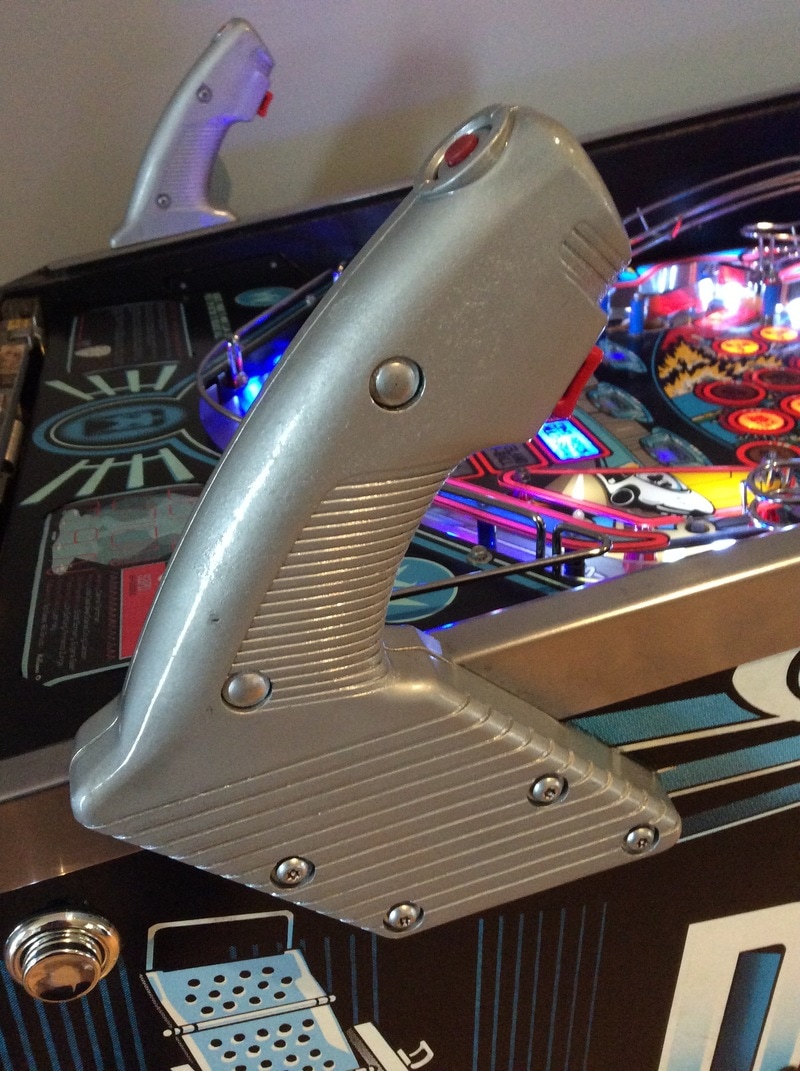
The trigger handles after respraying with chrome paint.
Figuring out flasher or coil issues promptly is important as any locked-on power circuit will either melt coils (if a coil transistor is locked on) or melt plastics if nearby flashers are locked on.
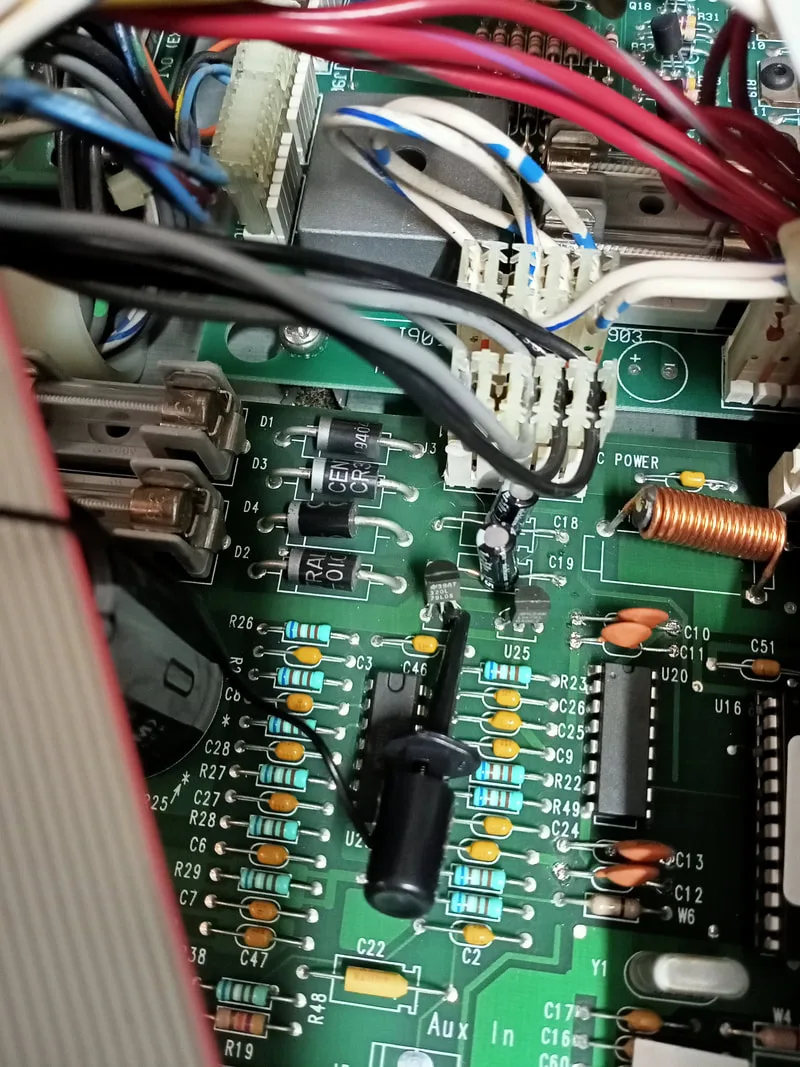
I looked at some of the usual suspects, being connectors and capacitors. Connector J3, which supplies DC voltages to the board, seemed to be a little loose. I repinned the connector with Trifurcon crimp terminals (element14) and a new 5-way Molex style connector (element14). The connector was nice and tight now, but nothing improved.
Next cab off the rank were the capacitors. Tantalum capacitors have a tendency to fail on Williams sound boards, and they tend to fail in a spectacular way (by exploding). All of the tantalum capacitors on this board were intact. I began to suspect some of the electrolytic capacitors on the board, particularly the smaller, blue 1uF capacitors made by Philips at positions C15, C18, C19, C32 and C41. Philips capacitors cause issues with the 5-volt circuit on MPU boards, and I suspected they may have been the cause of this issue as well. I replaced them all with 1uF, 50-volt electrolytic capacitors (element14). Unfortunately this made no difference. I also replaced the larger 100uF capacitor at C52 (element14), as this can sometimes leak. This one had not leaked, and replacing it made no difference.
No luck so far. It was time to research the problem a little deeper. There don't appear to be any readily available WPC DCS sound board schematics available online, so I had to trace some of the circuits on the board manually. A thread on Pinside by John Wart Jr. describing some of the theory of operation behind the WPC-95 (and DCS) sound system was also very useful. I also stumbled across another thread on Pinside by user RonaldRayGun, where he described a very similar issue with his World Cup Soccer (Bally, 1994), another DCS game.
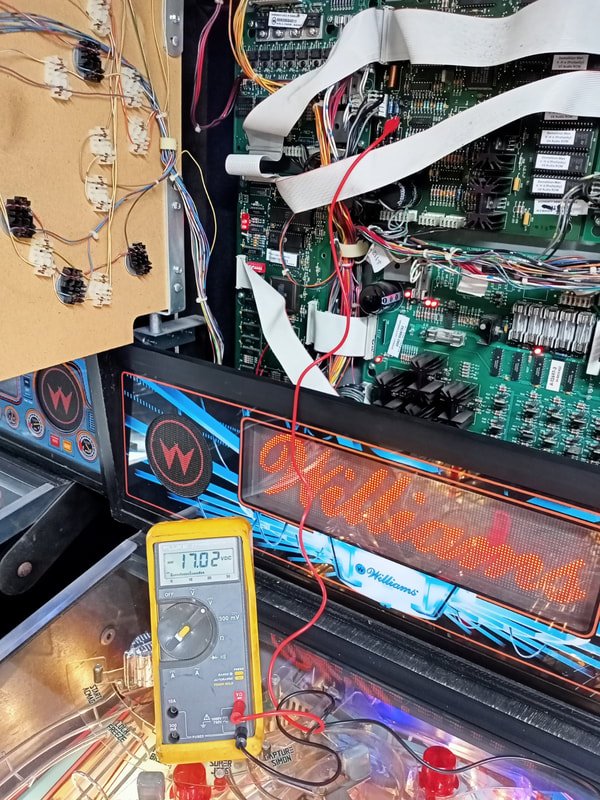
In that thread, user JeffHect posted some great information regarding uneven positive (+) and negative (-) voltages that supply the audio amplifiers. The (+) and (-) voltages should be relatively similar, and can be tested at the positive and negative legs of C18 and C19 respectively. Uneven voltages can be balanced by adding bleeder resistors to the large capacitors at C20 and C21. Unfortunately, the positive and negative voltages on Demolition Man were perfectly balanced at ~17 volts. So this was not the issue.
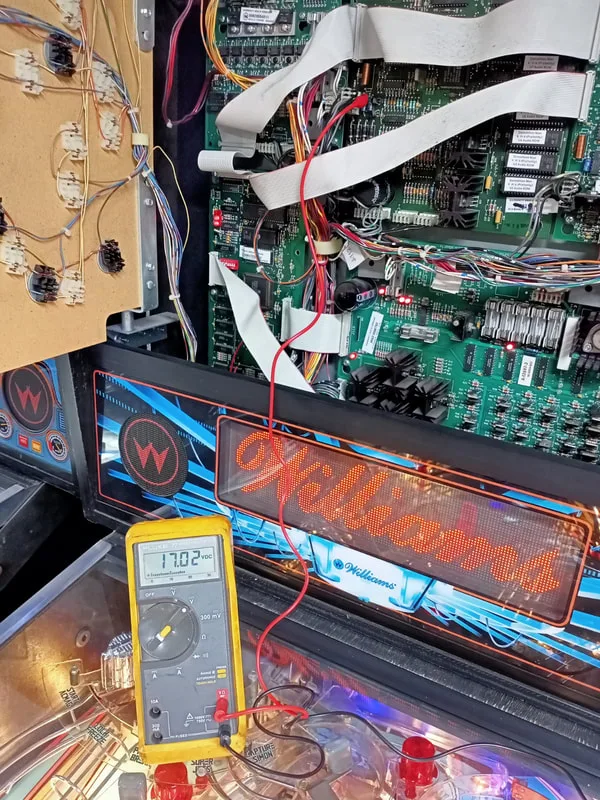
Positive voltage test at C18.

Negative voltage test at C19.
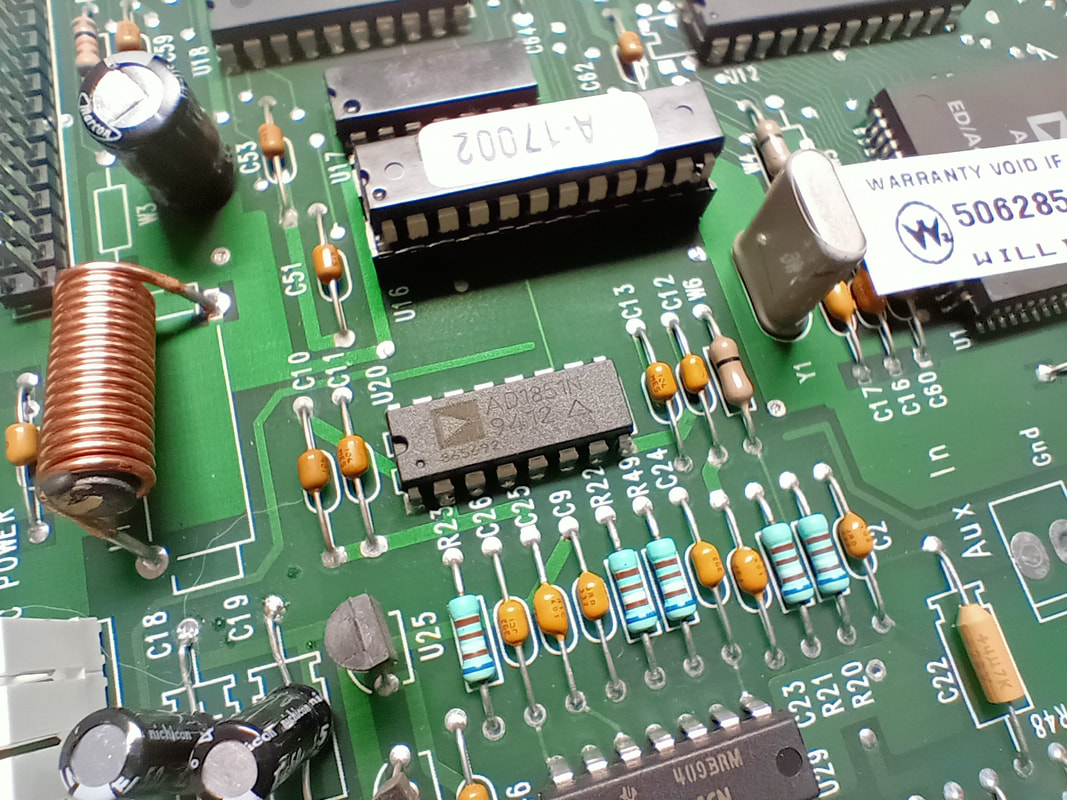
At this point it looked like the problem was an unusual one. I went back to the drawing board and focused on the fact that the sound improved after the game was on for a short while. This suggested to me that the problem was potentially heat related, as the problem got better once all of the board components had heated up. To test this theory, I turned the game on from a cold state. The sound was horribly distorted, as expected. I then used some freeze spray (Jaycar) and methodically sprayed the connectors and components on the board to see if I could elicit a reaction from the cold spray. Eventually, I got a reaction. Spraying the AD1851 digital-to-analog converter at U20 caused the sound to distort even more, to the point it was a mess of unintelligible static. Bingo! This was a good result.
I ordered a replacement for U20. These chips are obsolete, and expensive to buy. I had good luck with a seller on eBay, who listed the chips as new. However, I doubt they were actually new, and I suspect they were used chips pulled from another device. Either way, once the "new" AD1851 was installed with a socket, I fired the game up and the sound worked normally again. Success!
Original AD1851 at U20.
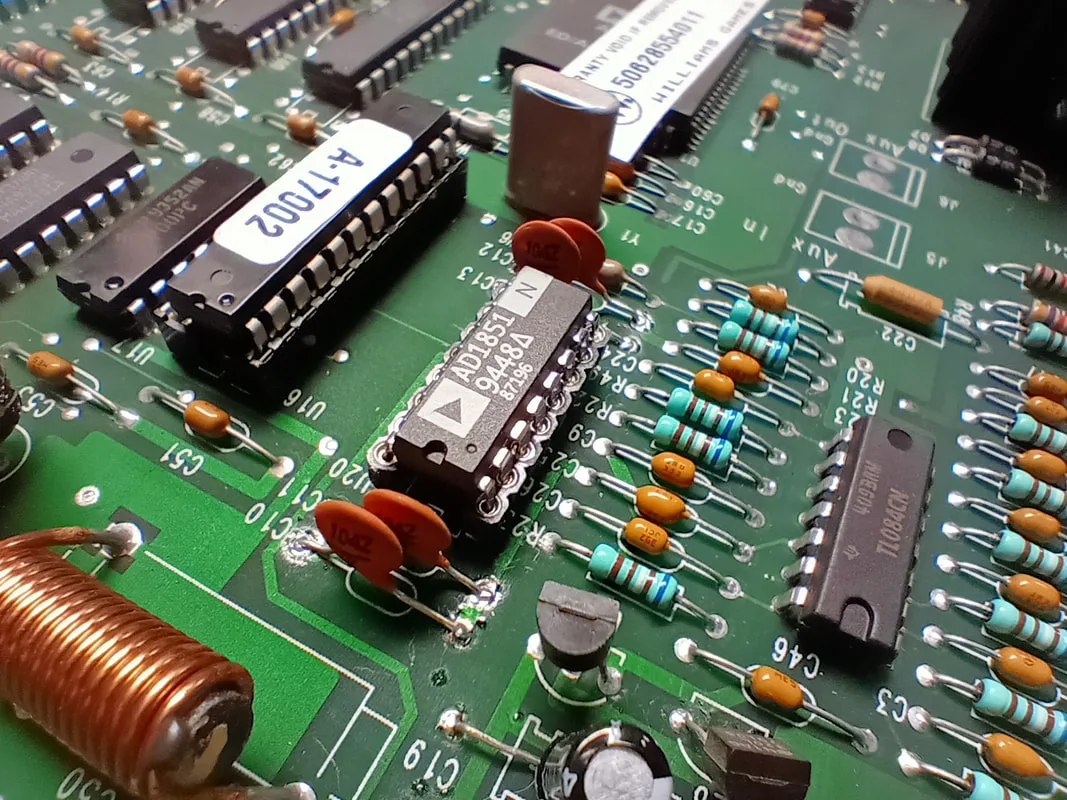
New AD1851 and socket installed.

I also discovered another small issue when probing around on the board. The voltage being output from the negative 5-volt regulator was a little low at -4.82 volts. This wasn't contributing to the issue, but was indicative of a failing regulator. So, this one got replaced for good measure as well. A good first step in troubleshooting issues on this board is to verify that the 78L05 (+5 volt regulator) at U25 (Jaycar, element14) and the 79L05 (-5 volt regulator) at U26 (element14) are both delivering the proper voltages.
Checking output on the -5v regulator at U26.
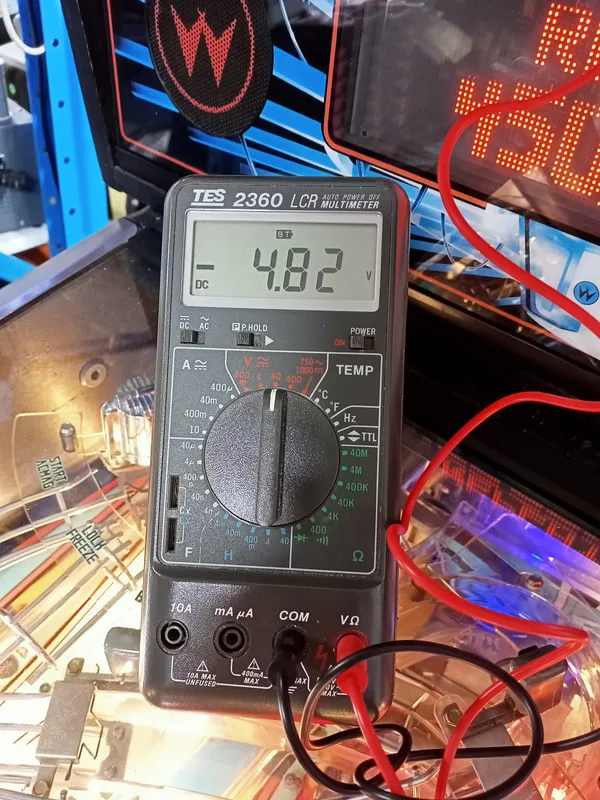
The regulator was a little out of spec from -5 volts.

There was one final modification to do on this board. This is a small upgrade I try to do on all WPC DCS sound boards. The ceramic capacitors at C37 and C45 are unnecessary, and were actually removed from the next revision of sound boards (WPC 95), as described on Pinwiki as well as on Pinball Rehab. I removed them both from the board. This cleans up the sound effects a little and makes the sound clearer.
New pane of glass installed. Shiny!

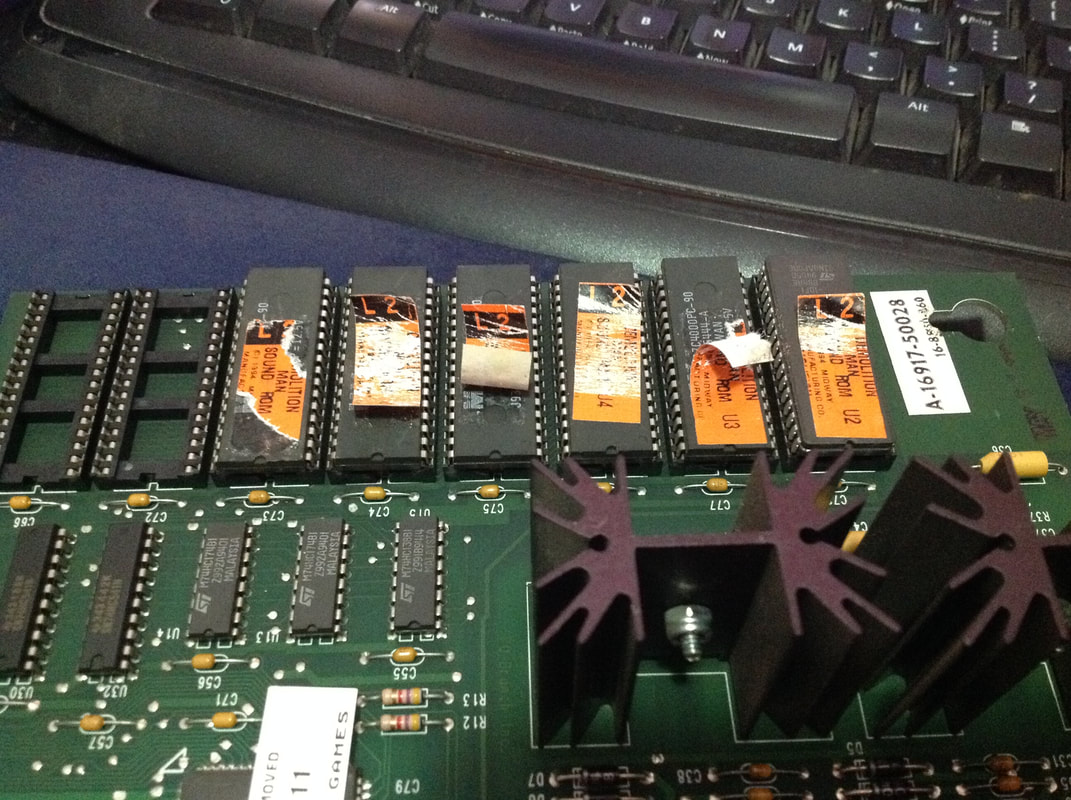
The ROMs are readily available (IPDB) as a set of nine sound ROMs and a game ROM. Installation is a bit of a pain, as you need to burn all ten ROM files and replace the ROMs originally on the sound board. Most of the sound board ROMs are not eraseable. Only two on my game were. You might get lucky and get a few more you can reuse. All ROMs with a small window in the centre of the chip are eraseable and repogrammable, so peel off the stickers to see if the chip has a window or not.
Next, you'll need a ROM eraser. These are quite easy to get (eBay) and I prefer a standalone unit with a drawer I can place the ROMs in with a timer. However, all you need to erase these ROMs is an ultraviolet light. You can get a UV torch or lamp and simply sit it on top of the window on the ROM to achieve the same result. The stronger the light, the quicker the ROMs will be erased.
You'll also need a ROM burner. There are heaps of different types, and Pinside has some good discussions on various models (here and here). But if you're like me, you just want one that is cheap and works. I have found that the TL866 models (eBay) are suited to most pinball ROMs and there are plenty of adapters and modifications you can get to burn more exotic memory. Next, you'll need the burner software, which you can download from the XGecu manufacturer's site.
The programmer software is not very intuitive to use, and documentation for it is poor (written in Chingrish). Luckily there is a fantastic video from Pinball Workshop on Youtube which explains how to use this type of programmer and how to wrangle the software.
To remove the ROMs from the game, don't forget to use the proper tool (Jaycar). Integrated circuit extraction tools are a safer option for removing ROMs than prying them up with a flathead screwdriver. For this upgrade, you'll need to remove all of the sound ROMs (marked U2-U9) on the sound board, and the game ROM (U6) on the MPU board. Once you have the ROMs removed, you can assess how many eraseable/reprogrammable ones you have. Whack these in the eraser once you have removed the stickers and residue from the windows. I find leaving them for 5-10 minutes is usually enough to blank them.
The non-rewritable chips (with no window) cannot be used, but keep these as spares in case you want to go back to the original sound ROMs. You will undoubtedly need to buy more ROM chips. Two types of ROM will work for this purpose: 27C4001 or 27C040. I found that 27C4001s were cheaper, so I grabbed a bulk lot of ten (eBay). Beware when buying obsolete ROMs on eBay, as most are either originals that have been refurbished, or fakes. As long as they work, there is no real problem, but grab some spares in any case.
Then it's just a matter of burning each of the files onto the ROMs, and installing them back on the sound board and MPU board. Keep in mind that you will lose your scores and settings when performing this upgrade, as you are removing the game ROM. I like to recreate my own ROM labels with the new software revision number on them so it is easy to tell what has been changed. Then simply cut them out and glue them over the ROM window, or use adhesive labels of some kind. Then you're done! Now you can sit back and be sworn at by Wesley Snipes and Sylvester Stallone in the comfort of your own home! In the words of Stallone, "fuck you!"

Original sound ROMs on the sound board.
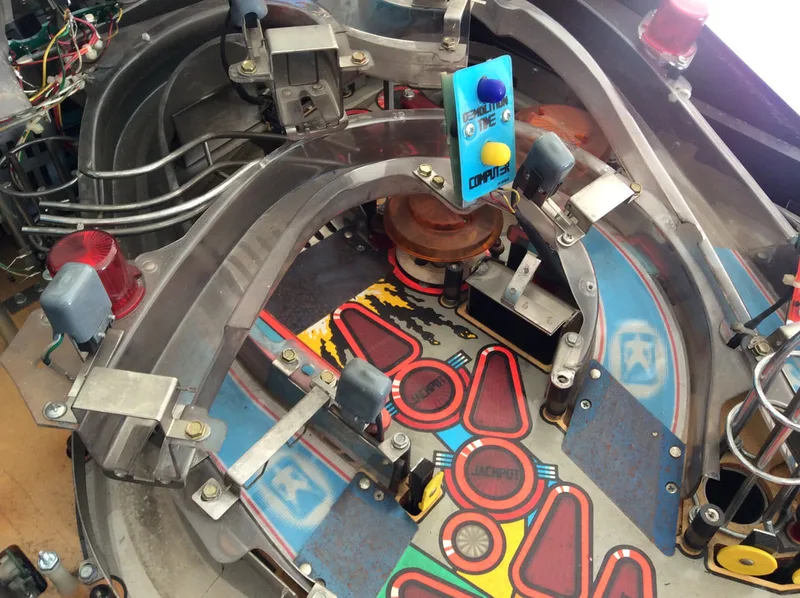
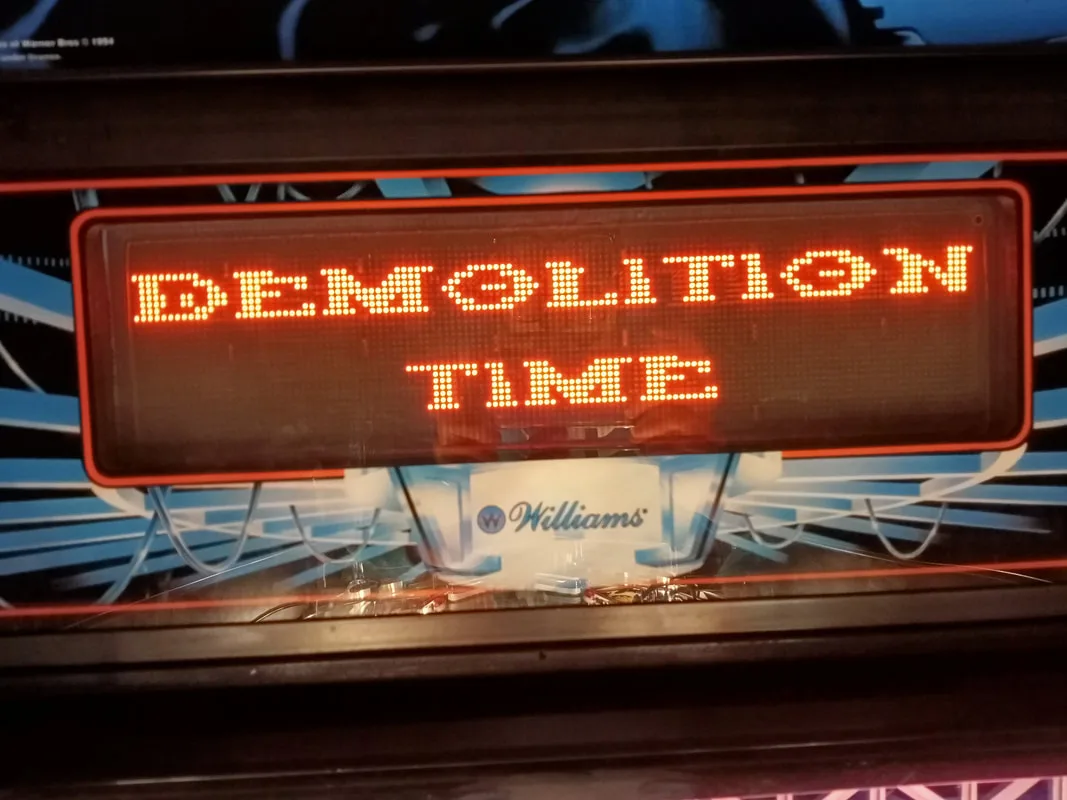
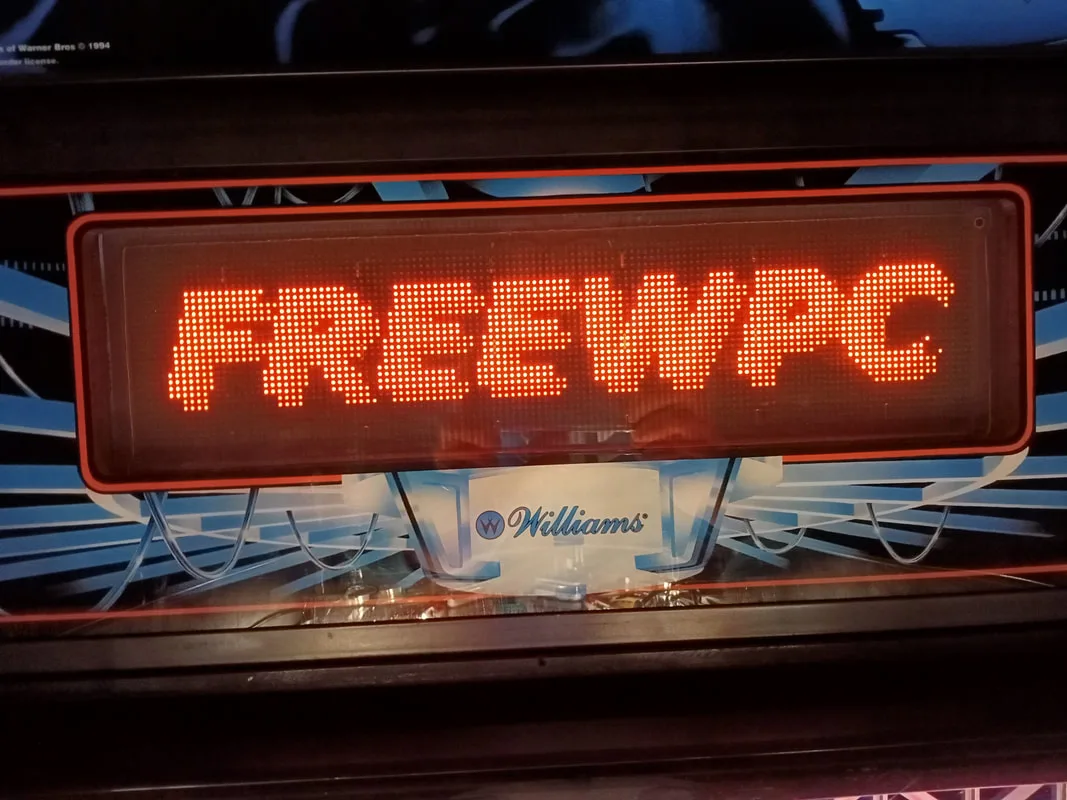
Another upgrade I decided to try was to download the FreeWPC Demolition Time ROMs made by James Cardona. This was a passion project which involved a complete rewrite of the game's code. No small feat. His website lists all of the changes he made to the code such as new modes, scoring, and multiballs. It's an impressive amount of work.
The code update requires burning a new ROM for the CPU. This game code update works with the profanity ROMs, too, so you don't need to remove those if you have them installed like I did. The main difference here is you'll need to upgrade the CPU ROM to a larger 8 megabyte ROM; you can't just reuse the original one, even if it is rewritable, as it has a lower capacity.
Once I had the ROM installed I played a number of games over the course of a week to test it out. There are some really cool additions to the game which I think fit perfectly with the theme. Simon Says video mode is a brilliant way to integrate the flipper handles, and it's a tough mode to beat. The animations on the display are great, and the new sound effects and movie scenes are nice to hear. Where the code falls down is the the polish. It's not quite finished, as it still contains a few bugs and other issues which stop the game from playing as smoothly as an original. For example, my game froze up at once point and the display went blank, which required a restart. The playfield insert lights need better coding, too. It's hard to tell what to shoot at sometimes because the inserts do not light up and guide you as clearly as they should. It makes it frustrating when cradling a ball and having no shots lit on the playfield to shoot for! The general consensus on the Pinside thread dedicated to the code update is that the ROM in it's current form is great to experiment with in the home, but not suitable for location or tournament play. And I'd agree with that sentiment.
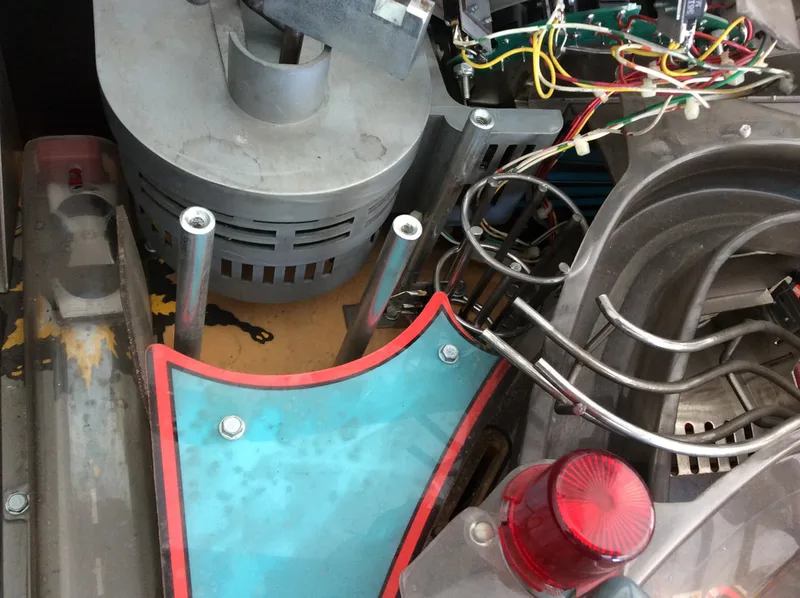
While doing some cleaning in the backbox, I noticed a lot of green dust on the base of the backbox. This green dust is very much typical of alkali corrosion, as the potassium hydroxide electrolyte within the batteries turns green when exposed to air, and is a very flaky, dusty substance. It almost looked as if it had come from leaky batteries on the MPU board, but this MPU no longer had batteries! So where the hell did it come from?
Green dust from battery corrosion found on the backbox base.

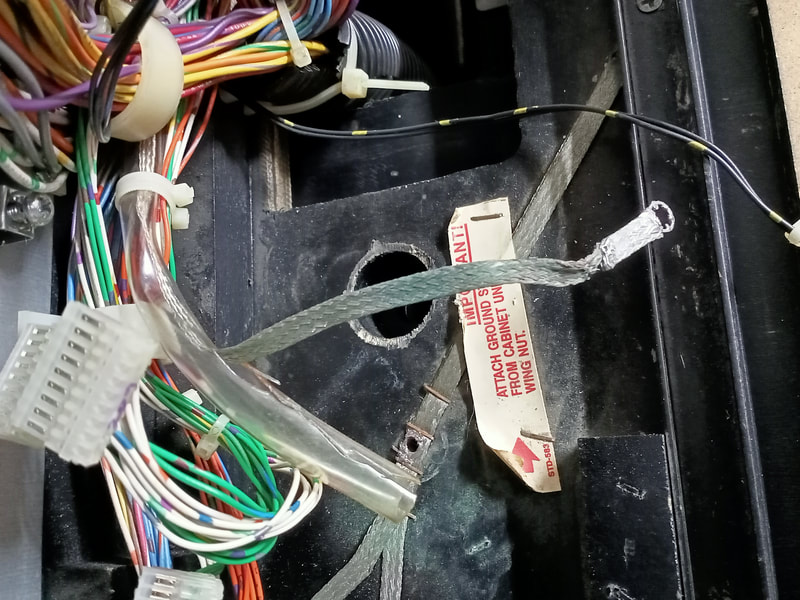
I eventually realised that the green dust was coming from the ground braid encased in plastic tubing which was secured to this part of the backbox base. The ground braid came from the main cabinet body, and was enclosed in a length of plastic tubing to protect it from other wiring. The braid was contaminated by corrosion several inches down the tube, which had probably come from batteries leaking on the original MPU board. The electrolyte tends to clump and fall down, and this braid was bolted to the backbox underneath the MPU board. When the original board was removed, the owner probably didn't realise that corrosion had fallen onto the braid as well, and it has festered there ever since.
Corrosion affecting a length of the main cabinet ground braid.
Abatement was simple: remove all the affected ground braid. This involved cutting back the braid from the main cabinet, a length of braid connecting to the backbox ground plane, and another length of braid which was bolted to the bottom display panel support channel. Fortunately once these sections were cut, and the plastic tube was thoroughly cleaned with alcohol, the braids simply needed to be reconnected to ground reference points. I created a new reference point in the left corner of the backbox, to which I connected the backbox ground plane, main backbox braid, and display panel support channel braid (replacement braid). The speaker panel ground wire was also connected to this point as well. The only ground braid that remained disconnected was the braid from the main cabinet. This was simply connected to the backbox ground plane via an existing screw, which held a wiring loom support ring in place.
If necessary, lengths of ground braid can be stapled together or screwed together at a mounting point to join separate runs (RTBB, PSPA). I only needed to replace the braid leading to the display panel support channel, as the original was not long enough to reach the new mounting point. While it may seem savage to simply cut all of these braids short, this is the only way you can be sure corrosion won't return in future. There is no functional difference to the game, as all of the braids were reconnected to each other and the main ground pin at the power plug.
New ground point: left corner of backbox.

Main cabinet ground braid connected to backbox grounding plane behind plastic ring.
Make sure you completely reassemble the upper part of the playfield before reinstalling any of the ramps. Why? Since Demolition Man has so many intertwining ramps covering the top half of the playfield, getting back to that area to install a forgotten component is near impossible (also been there, done that). You don't want to have to take the top half of the playfield apart more times than you absolutely have to, so be thorough the first time around.
I chose light blue Cliffy post sleeves for Demolition Man, as the playfield has blue accents. I ordered new white flipper bats and fitted them with blue Super-Bands to match the post sleeves. I replaced all of the rubber rings with new black rings.
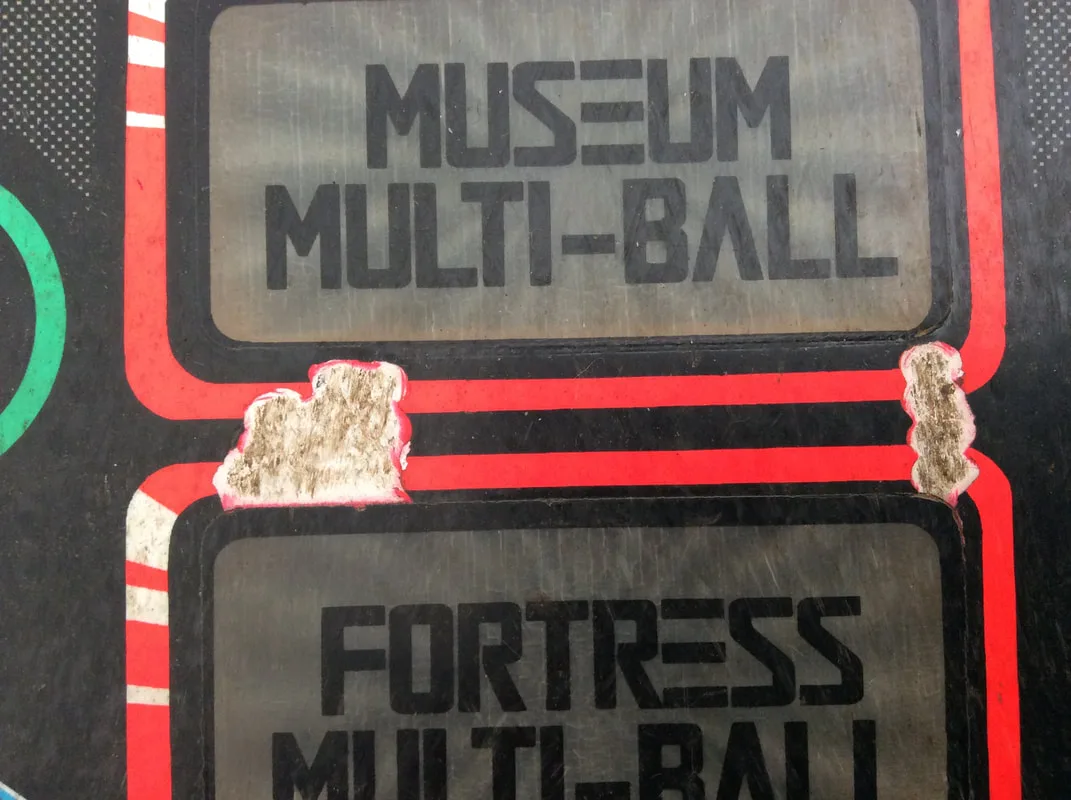
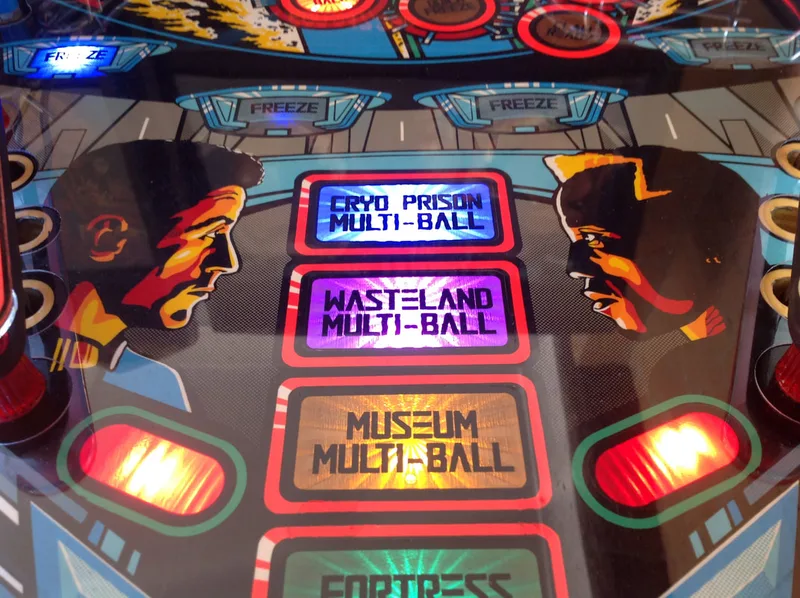
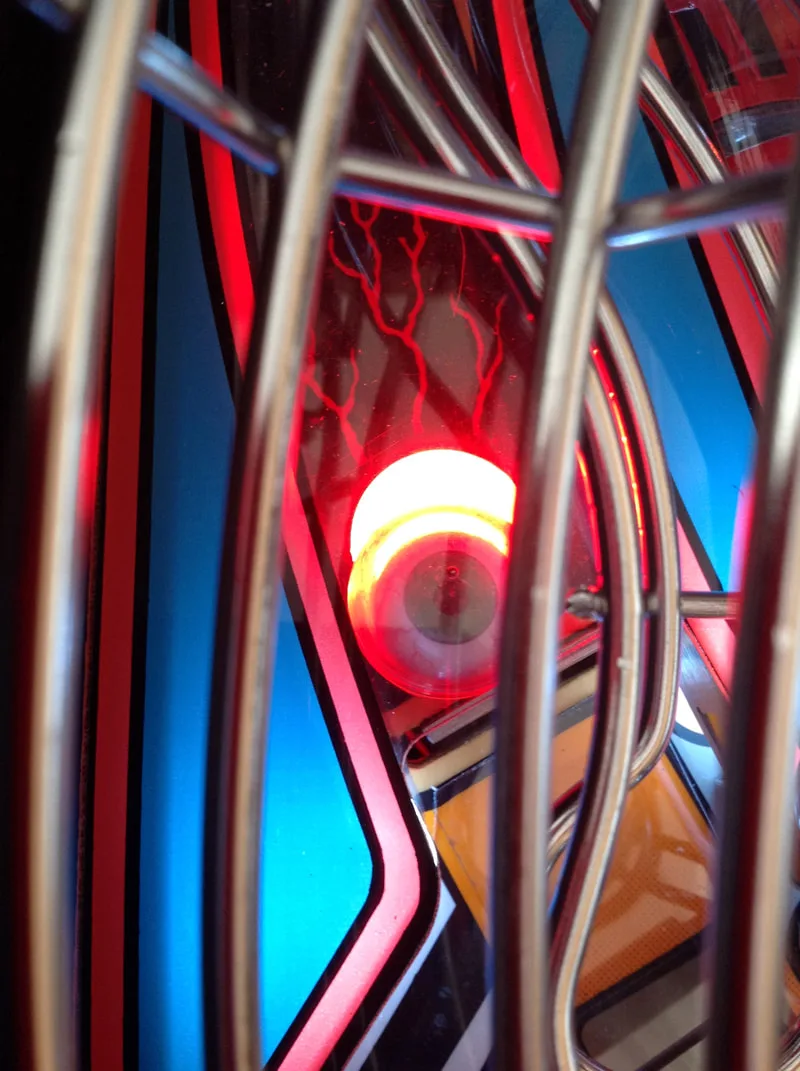
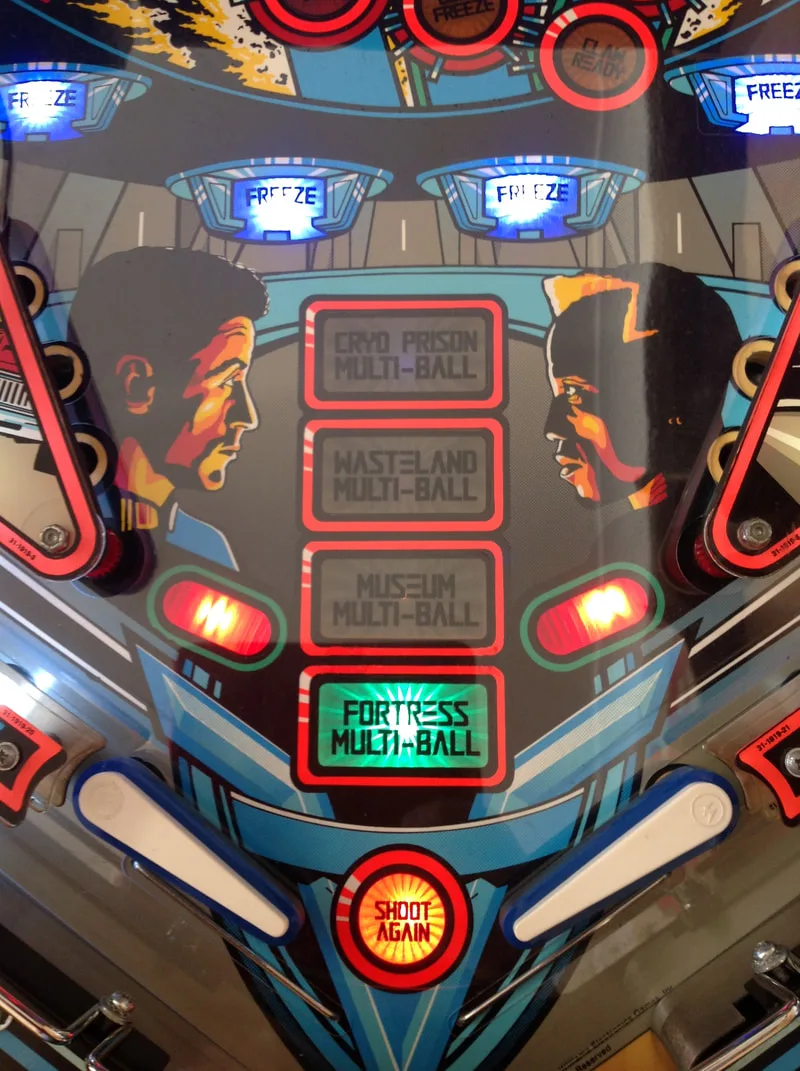
I installed LEDs from Luke's Pinballs throughout the whole machine. I used blue frosted globes in the inlane/outlane ball guides, as well as on the back panel of the playfield. Most of the ramps have blue decals at the entrances, and there are flashers behind the blue transparent plastic along the top edge of the playfield back panel. I used blue GI lamps and flashers in these locations to accent the blue that was already there. I also used blue frosted LEDs in the flipper inlane ball guides. I replaced the globes around the Cryo Claw with red frosted LEDs, matching the colour of the original bulb sleeves. Everywhere else on the top of the playfield, I used frosted white LEDs for general illumination. I used coloured LEDs for feature lamps underneath the playfield, and matched them to the colours of the inserts. There were two exceptions: the four freeze inserts and the multiball inserts. The freeze inserts are white, but I used blue LEDs to give them more of a 'freezy' look. The multiball inserts are also clear, but I think they look boring with plan white LEDs. I used four different colours which I thought best matched the name of the multiball: green for fortress multiball, yellow for museum multiball, red for wasteland multiball, and blue for Cryo prison multiball.
Below is a spreadsheet containing the LEDs I ordered for my machine. Feel free to edit and use it as you wish.
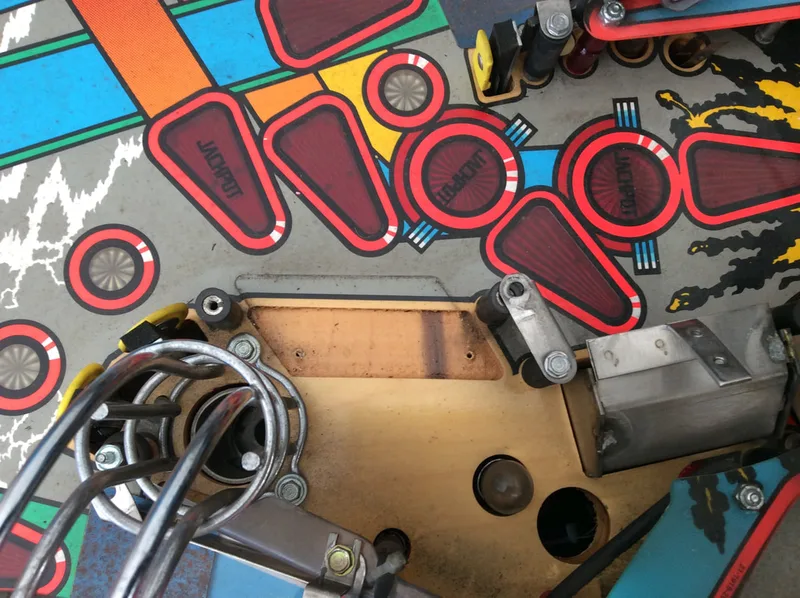
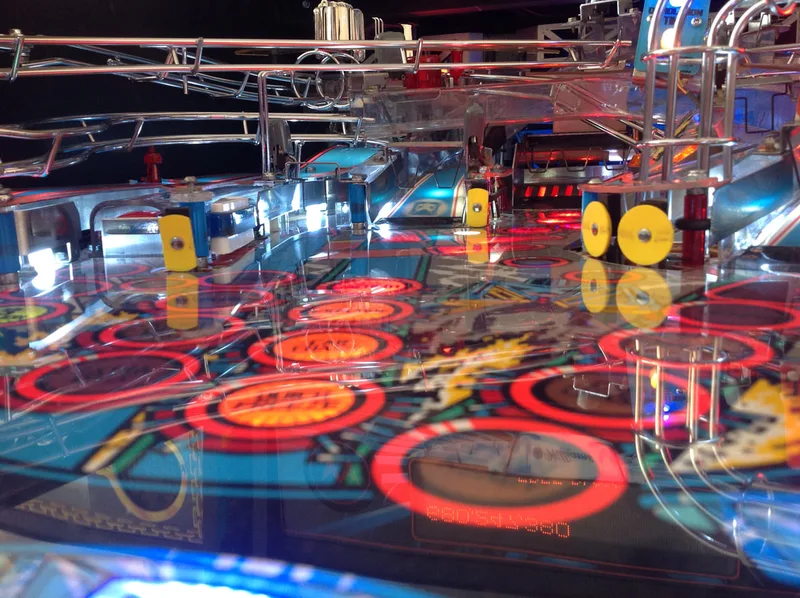
Playfield protector installed. Shiny!

Ball stuck on the playfield protector edge.
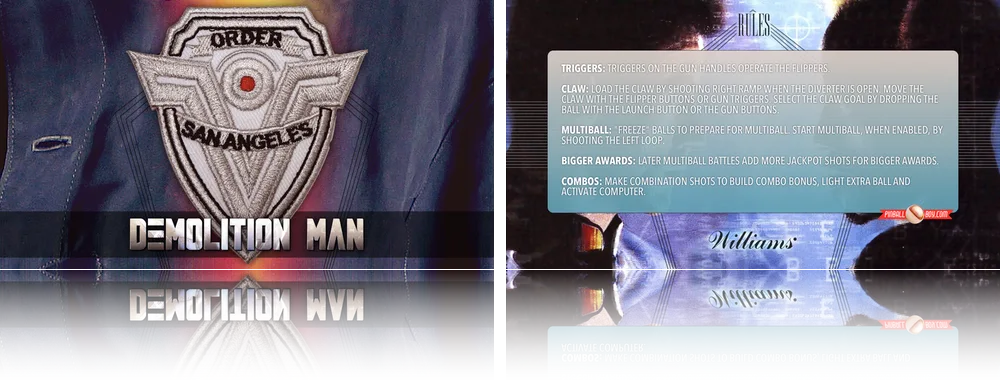
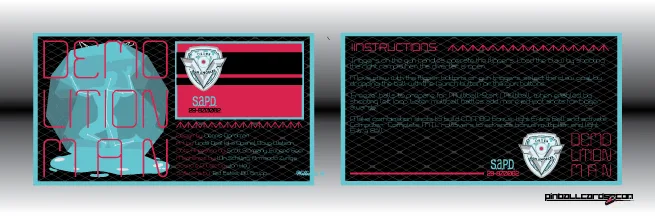
I also grabbed some great instruction and pricing cards from Pinball Boy and Pinball Cards.
When properly cleaned and adjusted, Demolition Man is a very fast game dominated by combos, ramp shots, and great flow. For our first restoration, Demolition Man was a great success. It is not the easiest machine to work on as there are a lot of ramps to deal with and the Cryo Claw and elevator can sometimes be troublesome to get working poperly. Nevertheless, with Demolition Man, we learned a lot about how pinball machines work and what is involved in getting them up and running. And so began our pinball hobby!

Edit from 2017: It is interesting to see how your pinball tastes develop over time! Reading back over this post in 2017 and knowing what I know now about pinball, I am kicking myself that I didn't make a move sooner and take the Guns 'N' Roses! It is an awesome game that I have only played a handful of times. However, I don't regret buying Demolition Man at all. It was a great first machine to tear down and rebuild.
Demolition Man is a great first machine! If you need help with repairs, feel free to email me via the contact page and I can arrange a time to come and help you out!