- Published on
Pinball Pop-Up 2024 (and a new Pinball Moving Vehicle!)
- Author
-
-
- Name
- Posts
- Posts
-
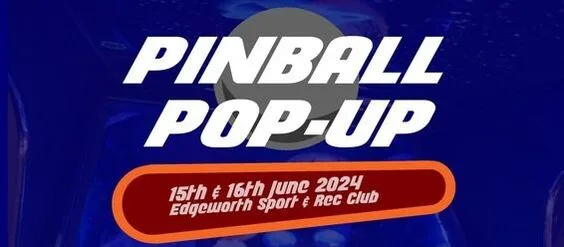
This is starting to turn into a travel blog. I've posted more pinball travel and event recounts this year than I ever have before! What's going on? I don't even like travelling! Well it turns out, I actually do like to travel, as long as there is pinball at the destination! Last weekend Fiona and I headed to the Pinball Pop-Up event held at Edgeworth Sports & Rec Club. This is the first time this event has been run by the Newcastle Pinball Association, the purpose of which was to raise funds for Kressy (Kress Electrix) to bring one of his fantastic homebrew pinball machines to a pinball show in the US. Plus, it was a chance for the public to get their pinball fix before the main event later in the year; Pinfest! All pinball is good pinball, so we were happy to donate two machines to the event.
Click on the sections below to read about the repairs and upgrades to the van, or skip ahead to read about this year's Pinball Pop-Up!

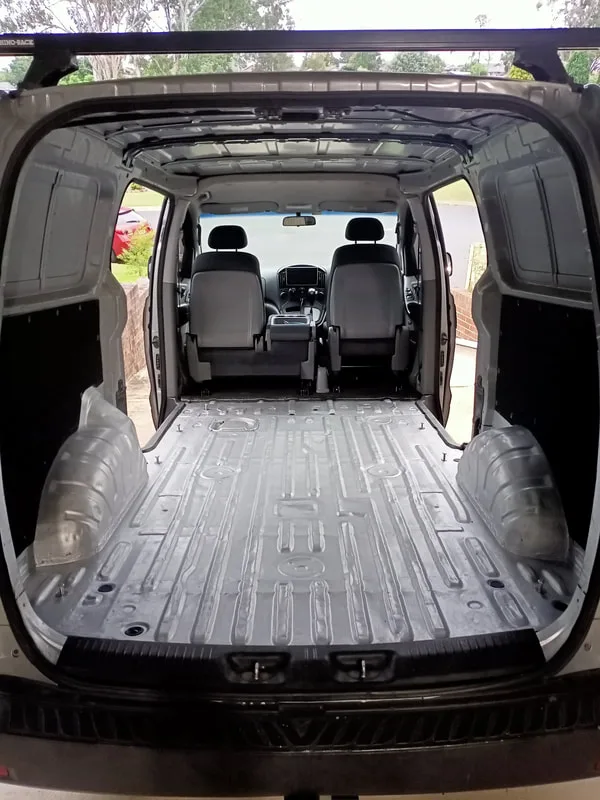
A sign of things to come: rust visible near the handbrake.
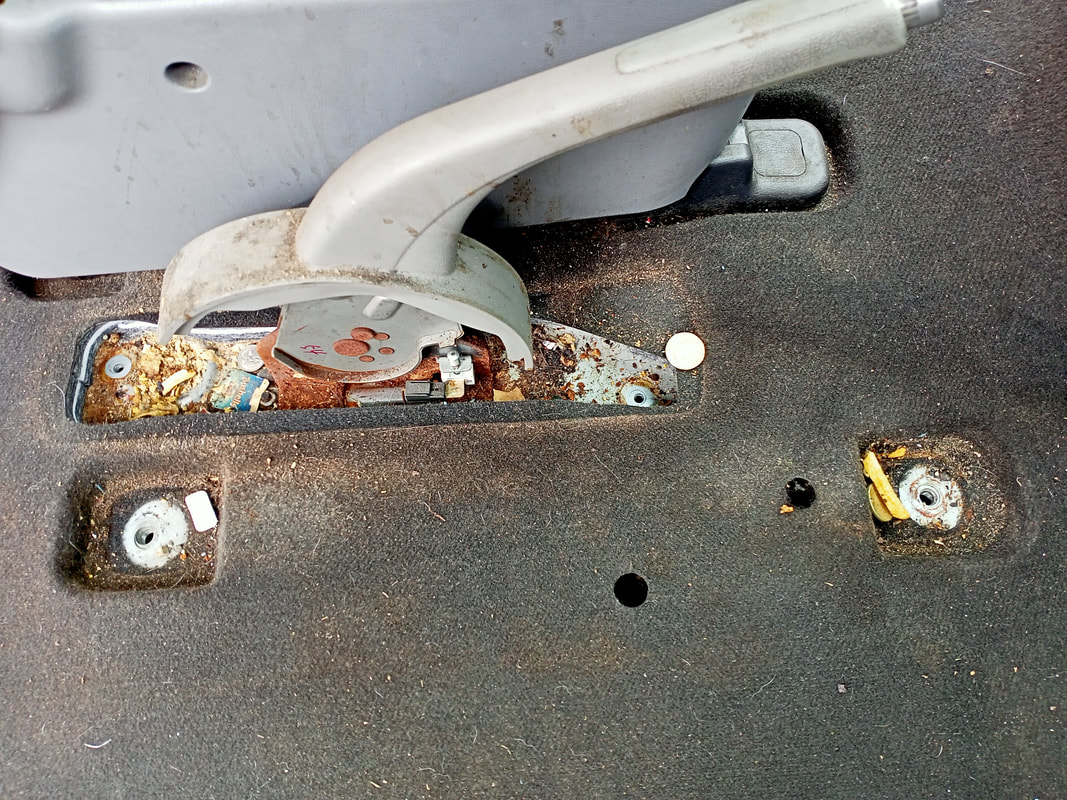

Rust visible after pulling up the carpet and floor mat.

There were only a couple of small spots near the rear of the floor where the rust had actually eaten through the metal (not a huge concern). The rest of the floor was still intact. So, I spent a couple of weeks in the back of the van with an angle grinder slowly grinding out all of the rust spots until there was nothing but bare metal underneath. This took a long time, and was a fiddly job, and one that I hadn't had to do before. But I eventually got it to the point that it was bare. A drill with wire brush attachments of various sizes (Bunnings) was useful to get into all of the nooks and crannies.
At this point I was able to treat the (very minor) leftover rust with a rust converter (Supercheap). This also primed the surface for paint, so I followed up with a coat of a basic, cheap-as-shit silver paint (Bunnings). I wasn't too fussed about it looking brand new or being brilliantly durable, but as long as it was protected from rust in the future I was happy. The van floor was still dented to hell and back, but I wasn't worried about that.
Van floor after rust treatment and painting. Rear view.
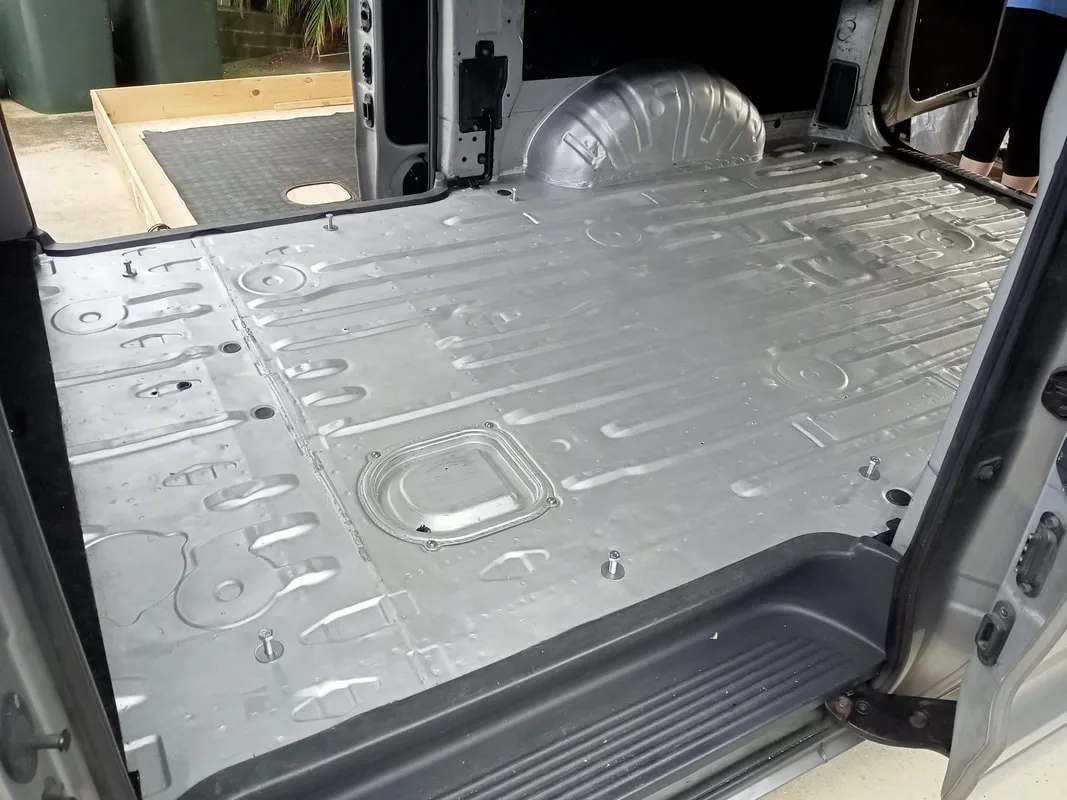
Van floor after rust treatment and painting. Side view.

I eventually found a shop that was throwing away some timber shipping crates. One of these crates was originally used to transport some large artwork pieces and was huge, about 3x2m. This was the perfect candidate. Me and Fiona went to pick up the crate, struggled somewhat to get it onto the roof, then tied it down and took it home. Once home, I used the rubber floor mat already in the van to trace out a template for the floor, and cut it to size with the circular saw. A lot of adjustments and trimming were needed to get it to sit right. I then installed some additional strips of timber on the underside of the floor to give it better stability. Ideally I should have cut out a hole to access the fuel filter, which is under the floor on the passenger side. However, you can just unbolt and remove the floor to get to it instead. That can be the mechanic's problem if it ever needs to be changed! To measure out the locations of the bolt holes to secure the floor, I got underneath the van and drew marks on the underside of the floor, poking through the bolt holes. My best advice is to make these holes larger than necessary, so that the fitment of the floor doesn't have to be so exact.
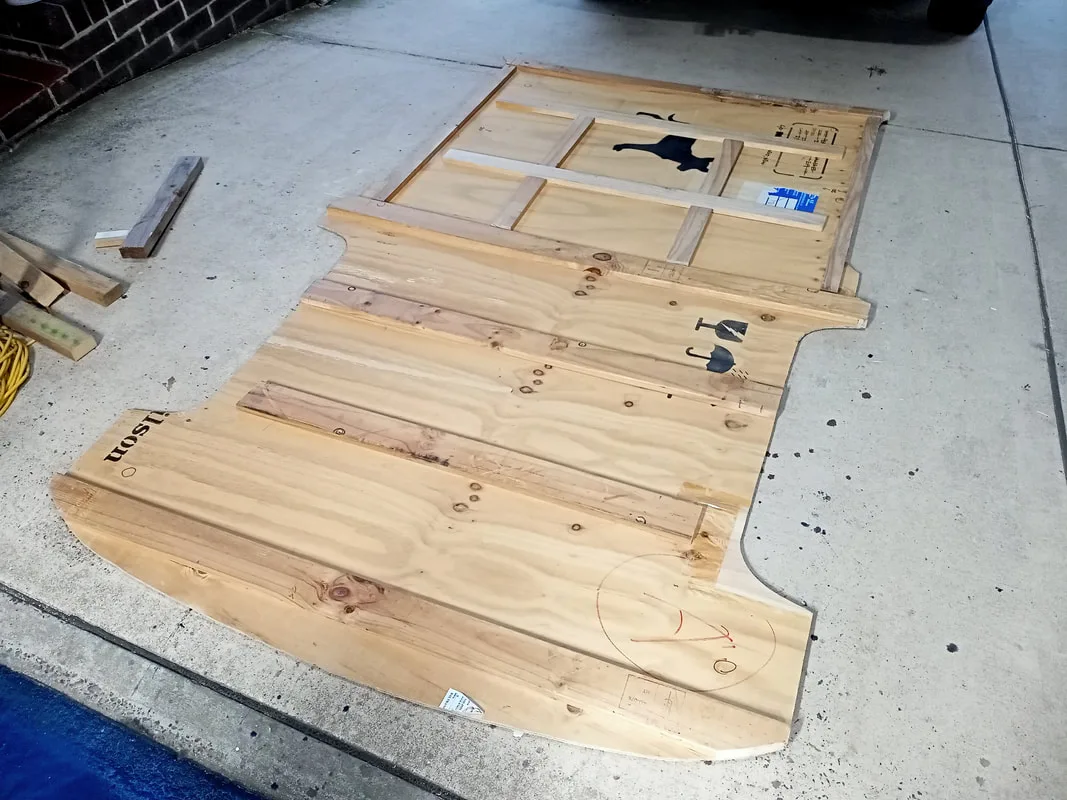
Timber floor after cutting and timber reinforcement.

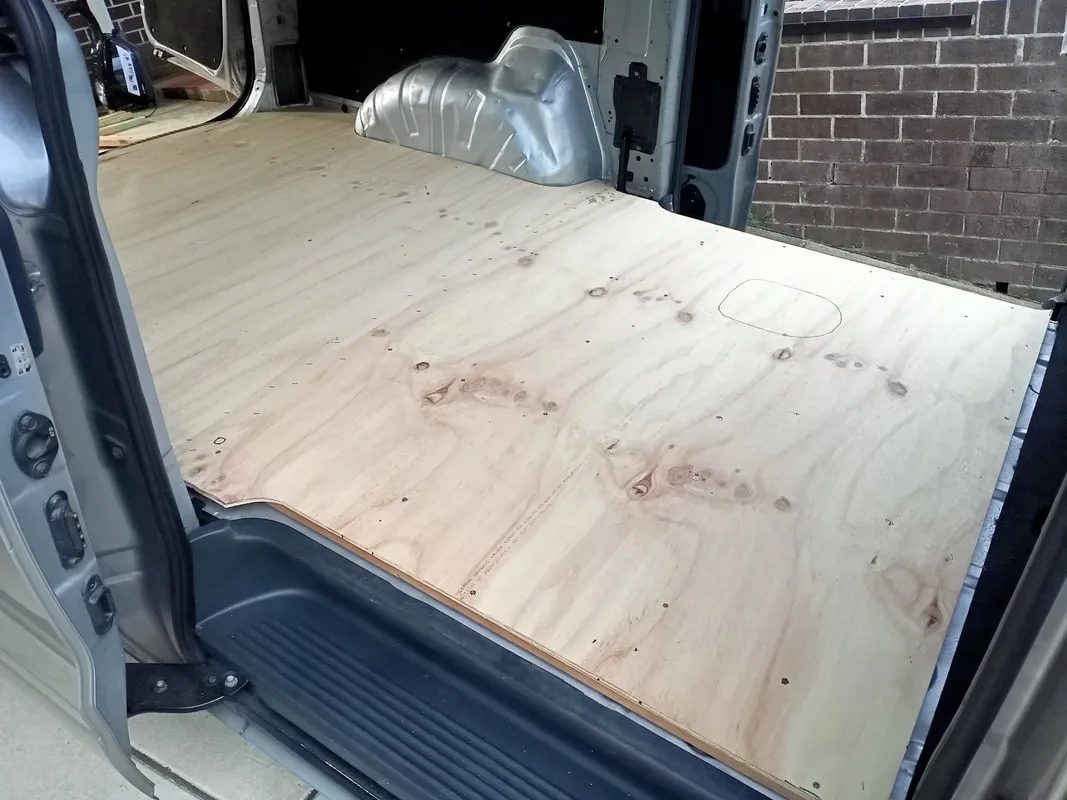
Floor installed and ready to go!

You can't carry big heavy things like pinball machines around if you can't secure them property in the cargo bay, right? So, the last thing to do was to buy a new set of bolts to secure the timber floor and tie down points. Then, I could just use ratchet straps to secure the pinball machines. The original bolts were either missing or rusty, so I opted to replace them all. I ordered slightly longer ones than the originals as I now had a few extra centimetres of timber floor to penetrate through. Note that the bolts are an odd thread pitch (1.25), so I had to source them from an online fastener store (Bolt & Nut Australia).
Cleaning the old bolt holes was a bit of a task, as a couple of them had gotten rusty and most of them were filthy with debris and dirt. I had to ream the holes a little with one of the original screws to get the new bolts to thread properly. I cleaned the holes thoroughly with degreaser and bottle brushes, eventually getting most of the muck out. Make sure you lube the new screws to keep the threads in good condition.
So, I bought a number of LED strip lights (AliExpress) in small batten-style fittings and stuck them to the roof of the van with adhesive. Then, I wired them in parallel and connected them to the overhead light at the rear of the van. This light gets supplied 12 VDC from the battery, which can also power the new LED lights. I soldered wires to the conductors within the overhead light switch assembly, so the strip lights would turn on whenever the overhead light was supposed to turn on. This has the added benefit of letting me control the lights with the override switch on the light assembly, so they can either turn on when the doors are open, or I can keep them on or off constantly. With three new LED fixtures on the roof of the van, I now had plenty of light.
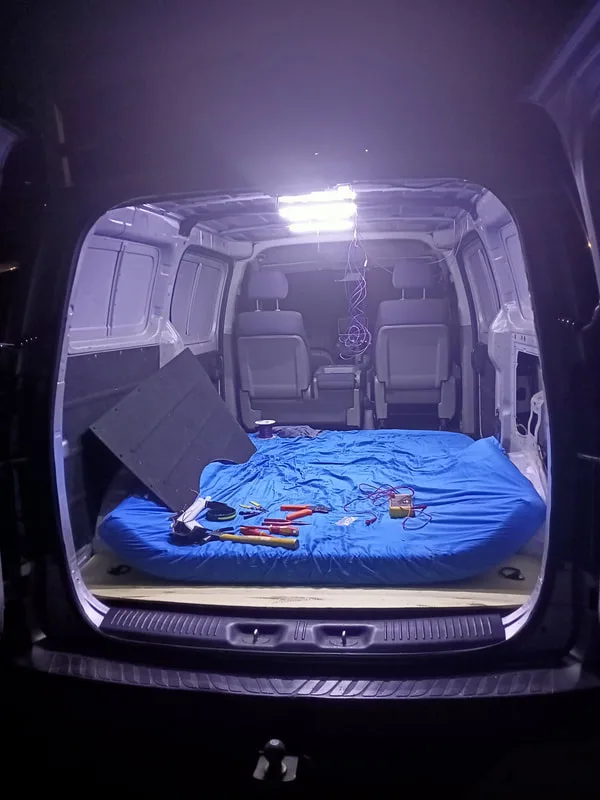
Lights on after installation of new LEDs. Rear view.

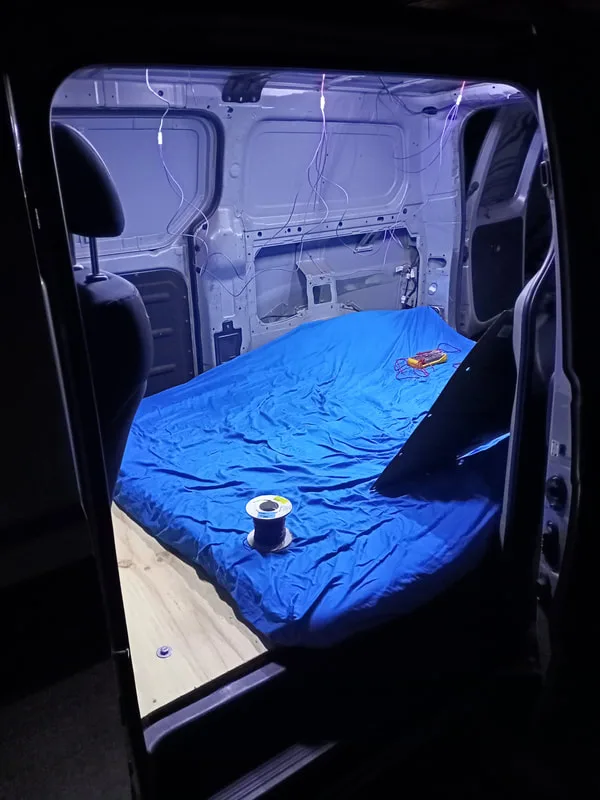
Lights on after installation of new LEDs. Side view.

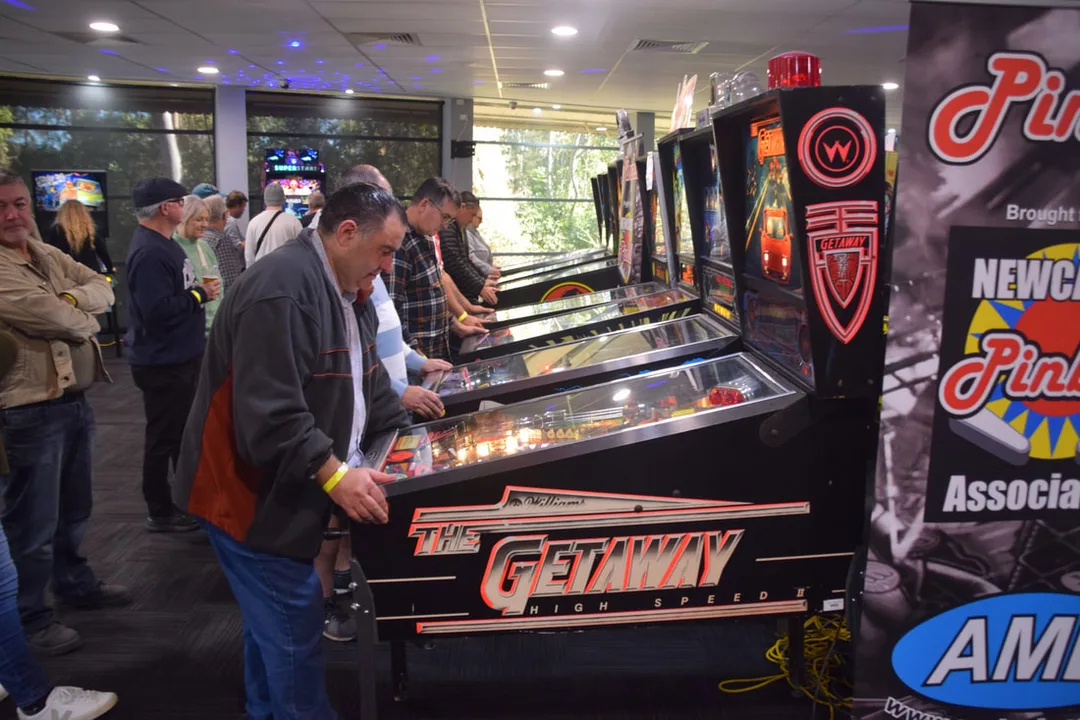
With the van ready to go, it was time to focus on the pinball machines. Friday night before the event was spent getting the games ready. First up was Getaway (Williams, 1992), which sprung a couple of leaks during test plays on Friday. Not a good start, as I decided to bring Getaway because it was usually so reliable! I love a bit of last minute, stress-fuelled troubleshooting! Here we go...
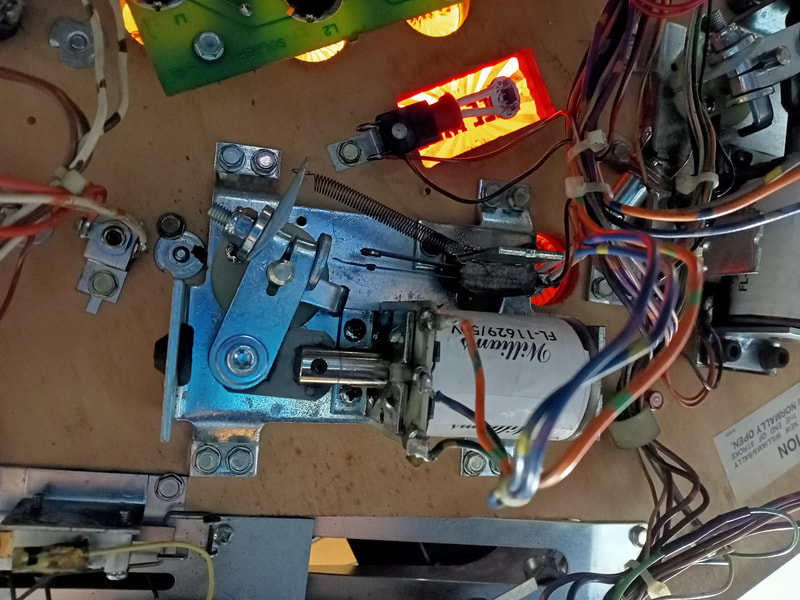
The first issue was a binding lower right flipper. The flipper would occasionally get stuck on the way back to its resting position. The coil sleeve, return spring, and plunger were all changed. Still, the problem persisted. Next step was to remove the flipper bat and inspect the shaft and bushing. These both seemed OK, but I gave them a clean while they were out. When I reinstalled them, and retightened the shaft in the pawl/crank, the binding stopped. I hadn't actually done anything to these parts other than give them a light clean, so I wasn't entirely sure what fixed the binding issue. Perhaps a slight realignment of the parts was all that was needed.

Right flipper assembly binding.
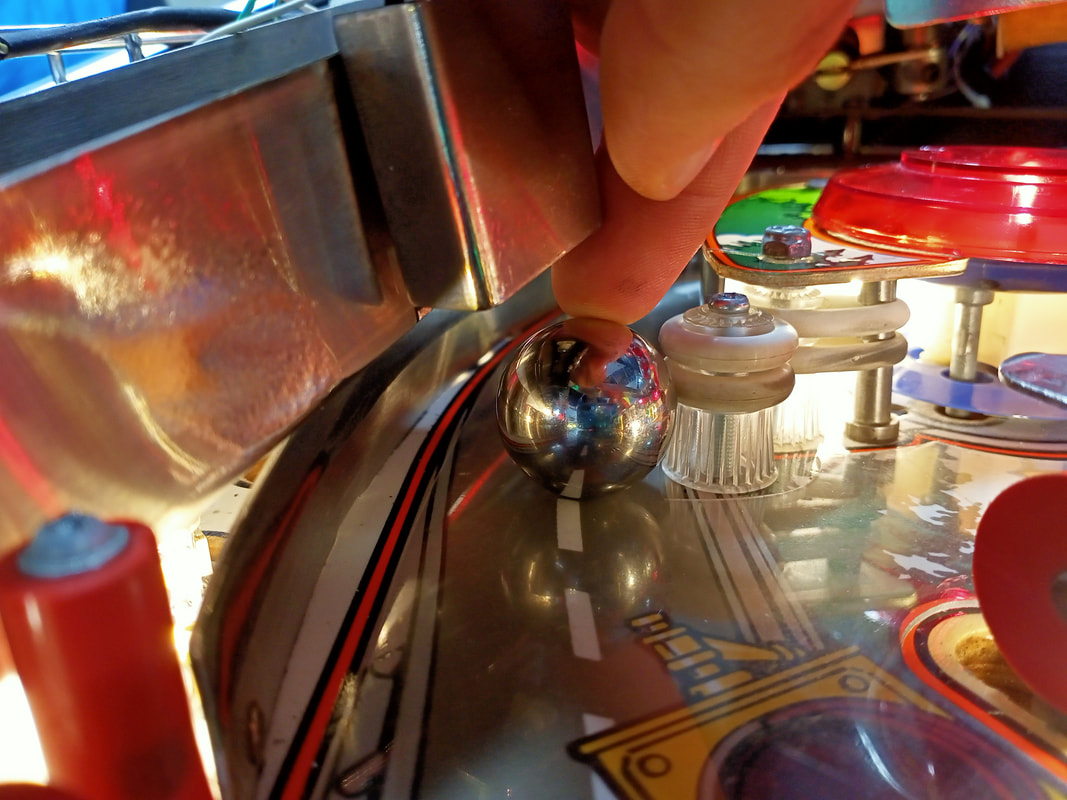
The next problem was a weak launch coil. The ball would not reliably make it around the upper loop. Approximately 50% of the time, the ball would only make it to the top of the pop bumper area, and would fall into the pop bumpers instead of making it around to the upper flipper. I installed a new coil sleeve in the plunger assembly, and gave it a good clean at the same time. This helped a bit, but it was still not consistently getting the ball all the way around the loop. I checked out the ball movement using a slow-motion camera. The ball was actually hitting a post on its way around the loop, which was robbing it of power. From memory, I also came across this issue when I first rebuilt the game, so I should have cottoned onto it sooner! I adjusted the shooter lane ball guide downwards, which prevented the ball from hitting the post. This required removing one of the adjustment screws in order to direct it all the way down. The ball made the loop cleanly after that.

The location where the ball hits the post after being launched.
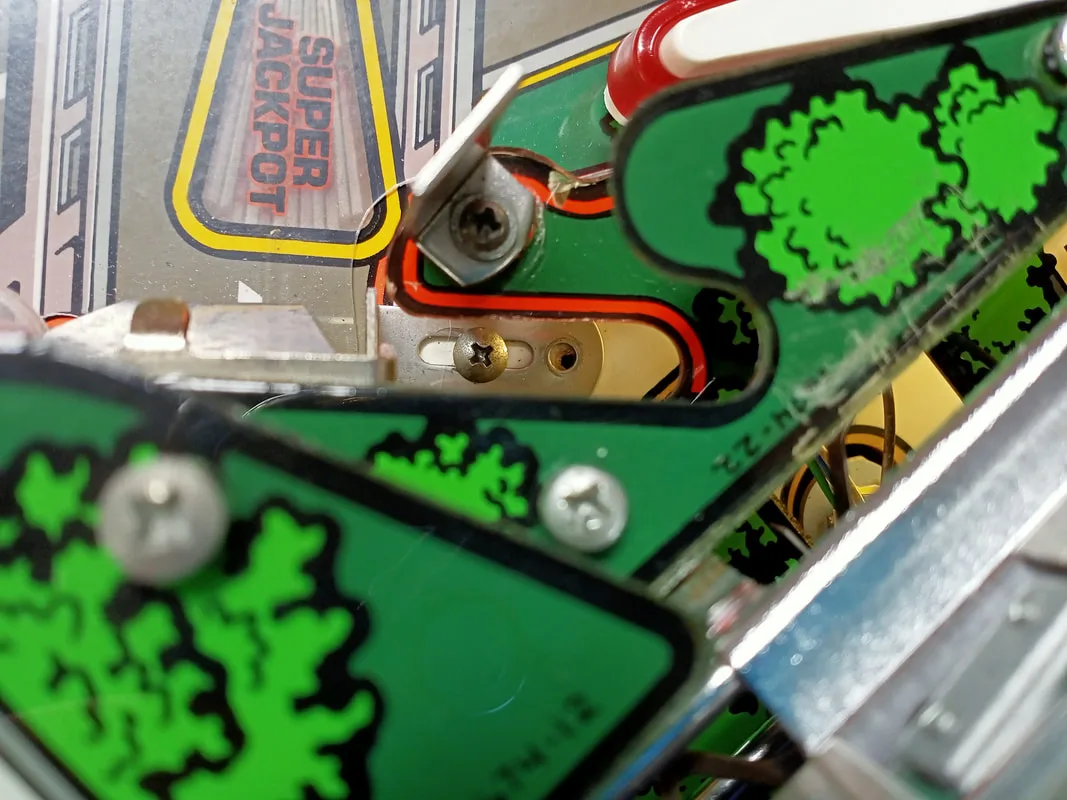
Shooter lane guide screws after adjustment.

The last problem was ball hang-ups in the trough and shooter lane. Sometimes, when served into the shooter lane, the ball would bounce off the shooter lane wall and back into the tough. Sometimes, it would get "stuck" on the edge of the trough, half in the shooter lane and half in the trough. I just needed to adjust the trough ball guide, as well as the trough eject arm, until the ball landed cleanly in the shooter lane.
Trough eject cam arm after adjustment.

Trough wall ball guide after adjustment.

As a bonus, I also installed my ColorDMD into the Getaway so it would be nice and colourful for the event. I've only got one ColorDMD, so I swap it into whatever machine I am taking to a show or event.
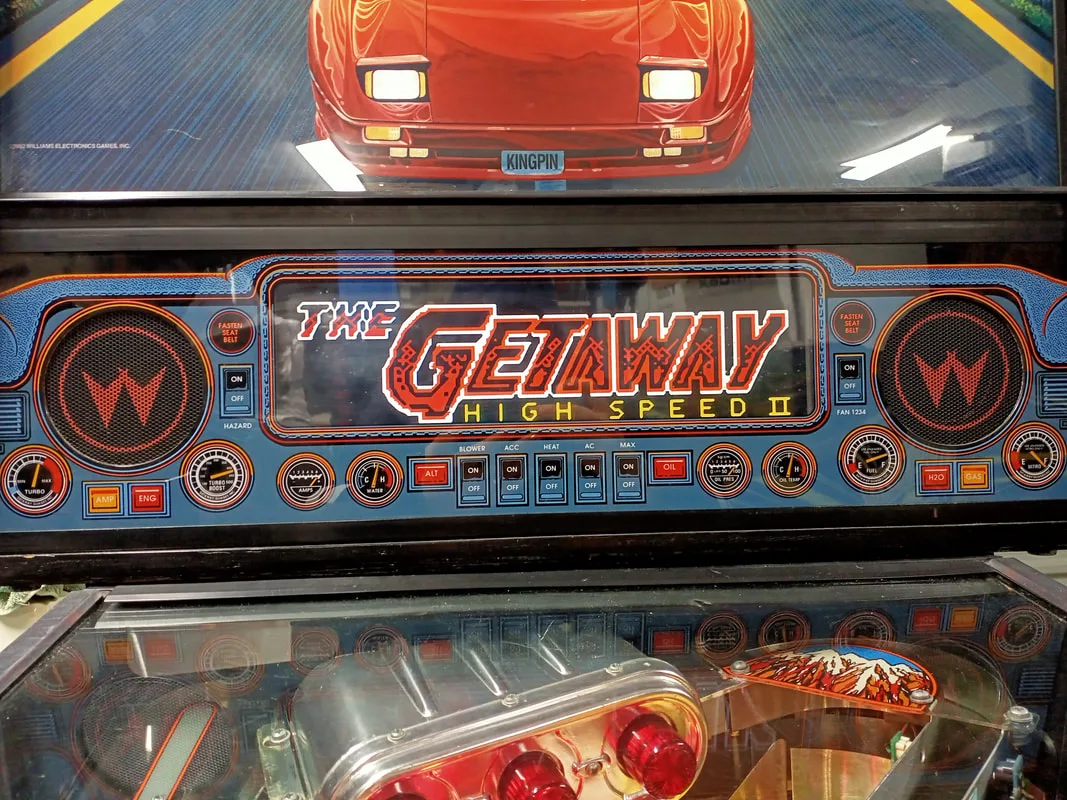
ColorDMD in Getaway.

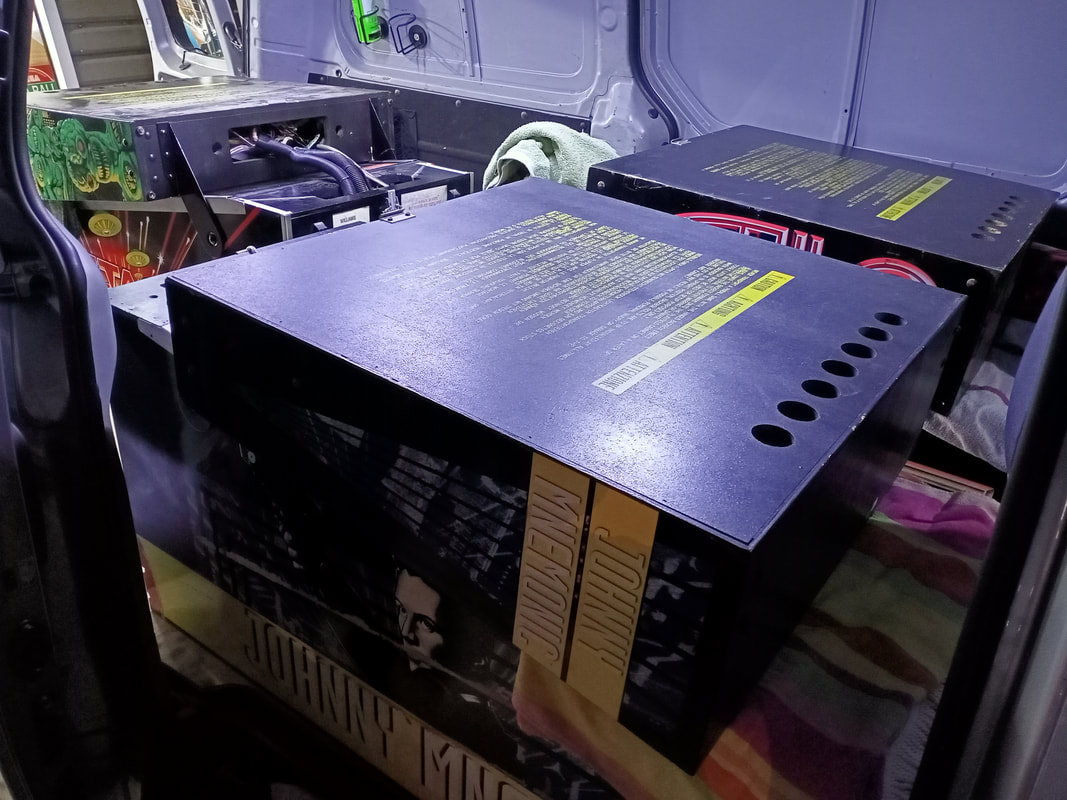
Also on Friday night, I checked in to see if there were any free spaces for additional machines. To my surprise, there were! So, I decided to bring a second game along. Due to the time I spent troubleshooting Getaway on Friday, I didn't have time to inspect or fix any of my other games in preparation for the event. So I took one which I knew was already working well; Johnny Mnemonic (Williams, 1995). Johnny was still working well since the restoration, and after a few minor fixes over the last year. I loaded both games into the van, and off we went! Note: ignore the Attack from Mars (Bally, 1995) in the photo below! That was a customer's game that I was dropping off on the way.

Loading up the games for the Pinball Pop-Up.
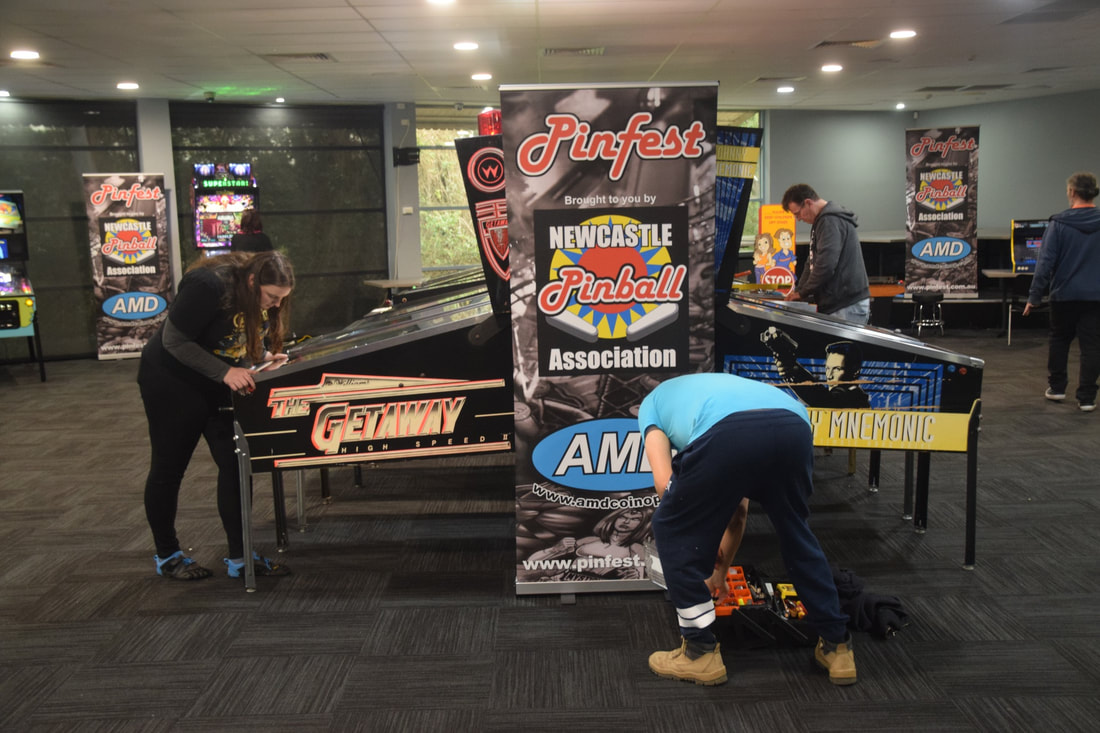
Once we got to the club late on Saturday morning, we were the last of the contributors to arrive. We set up the games at the end of the row, and gave them a quick test play and level. They were all good to go!
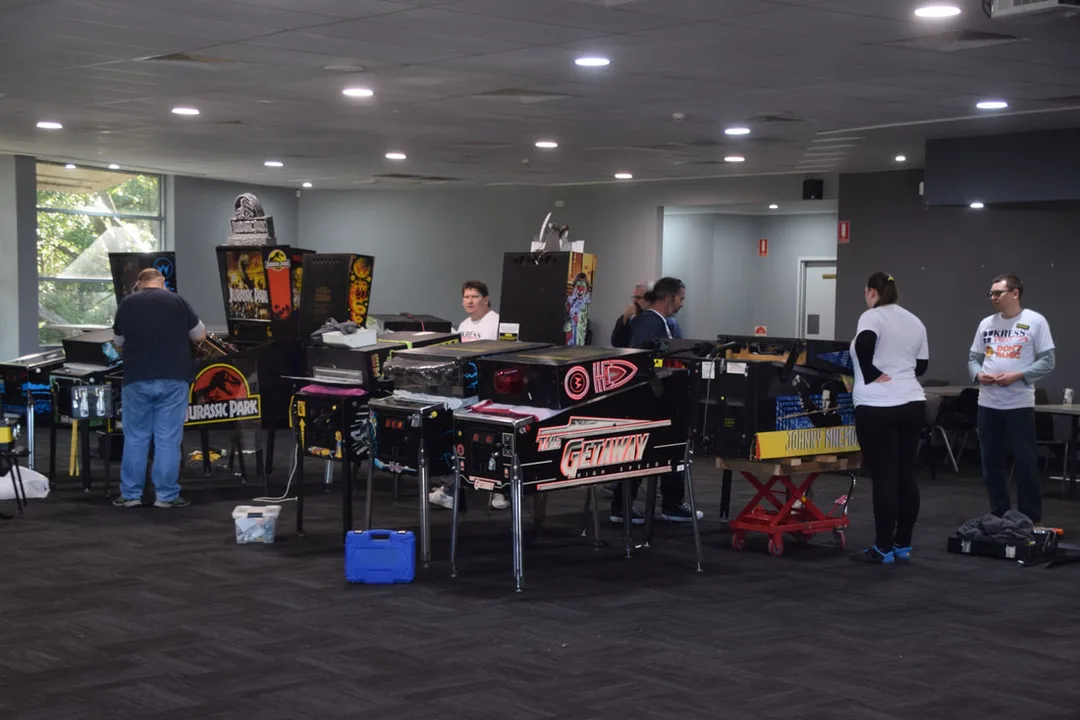
Setting up the games. Photo courtesy of the Newcastle Pinball Association.
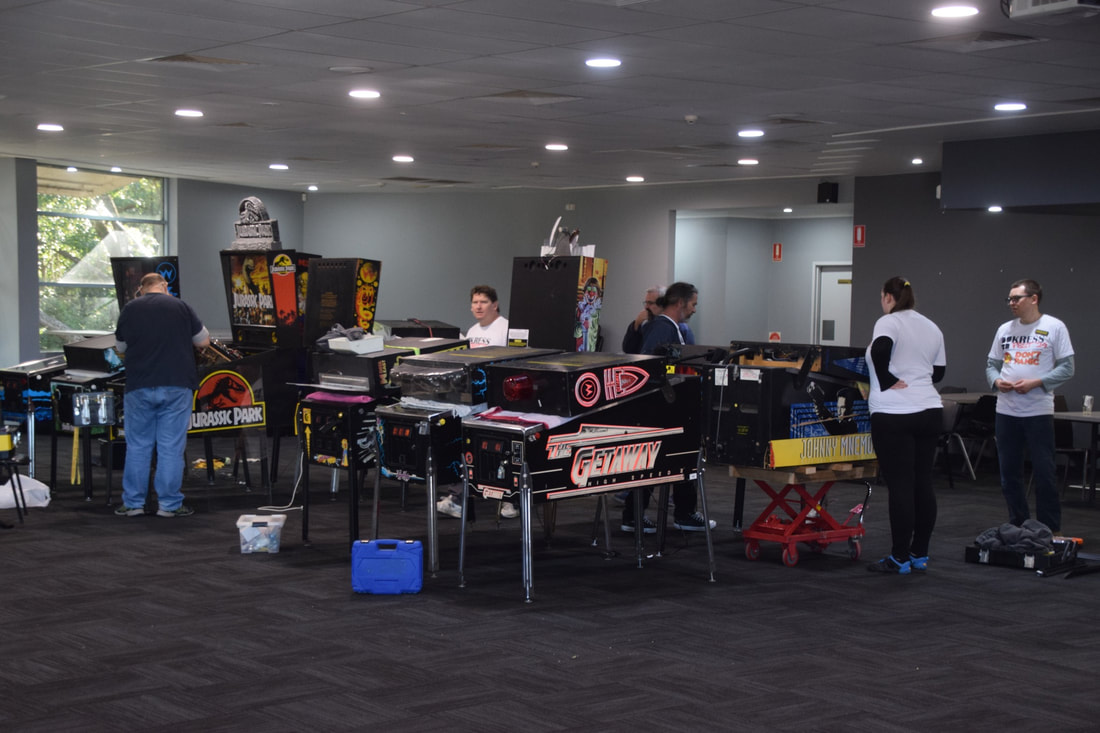
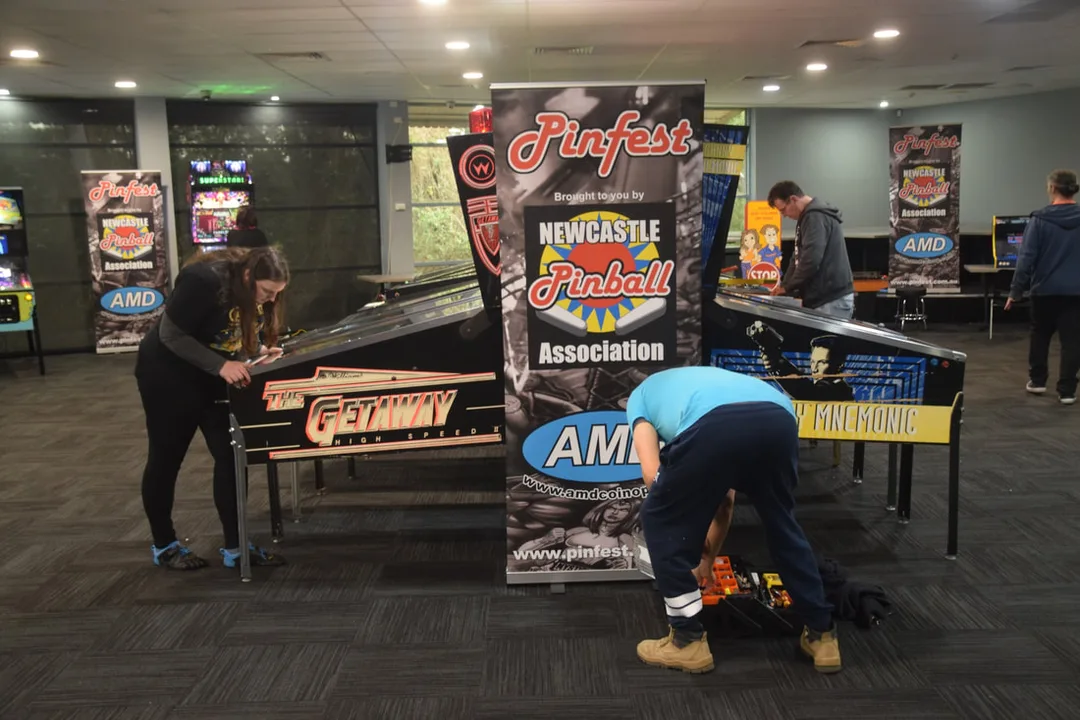
Test playing and final adjustments. Photo courtesy of the Newcastle Pinball Association.
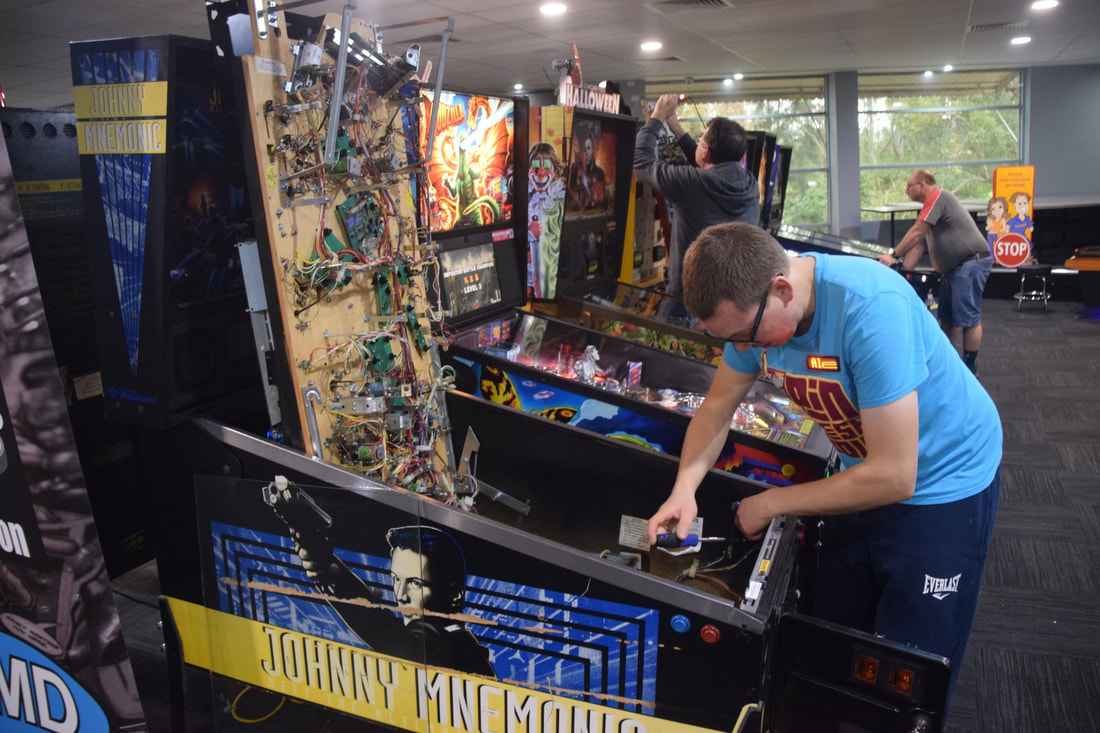
Saturday consisted of three two-hour sessions. The first session revealed an issue with Johnny Mnemonic. At some point, the right flipper got stuck in the engaged position. The key to this issue was that the flipper returned to the resting position when the game was turned off, or when the coin door was opened (i.e. when coil power was cut). This proved that the issue was electrical in nature. However, closer investigation revealed that it was not really an "issue" at all.

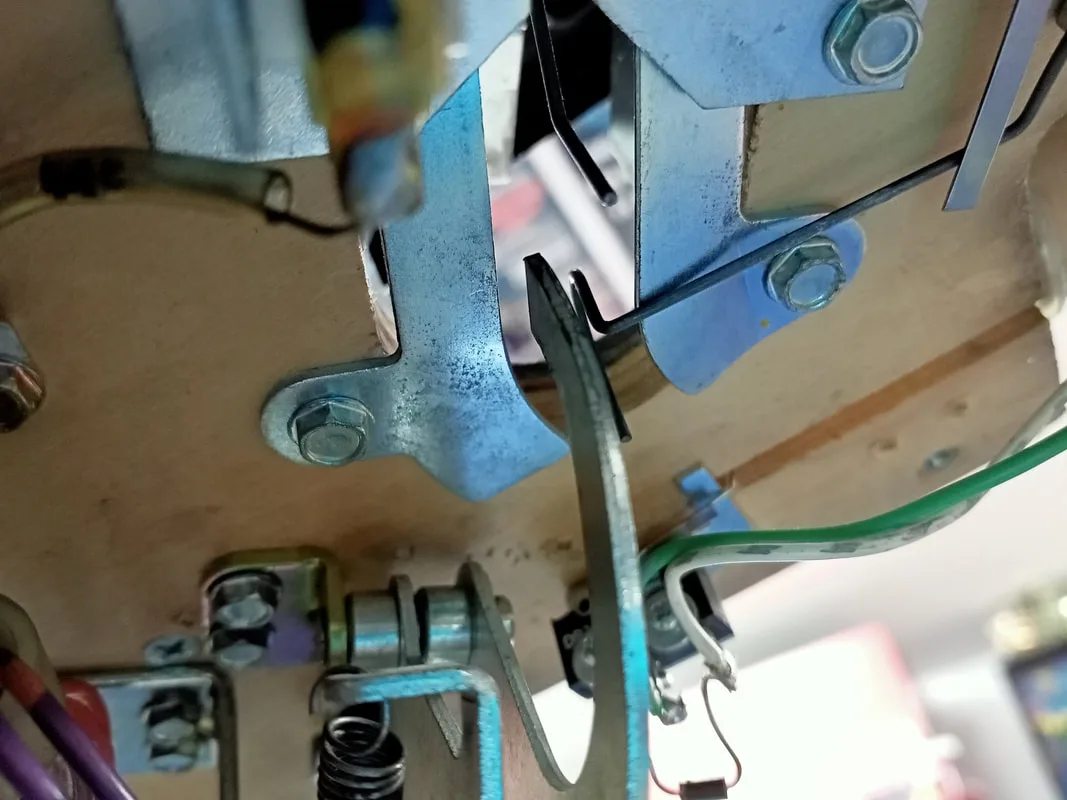
Performing repairs on the flipper opto board on Johnny Mnemonic. Photo courtesy of the Newcastle Pinball Association.
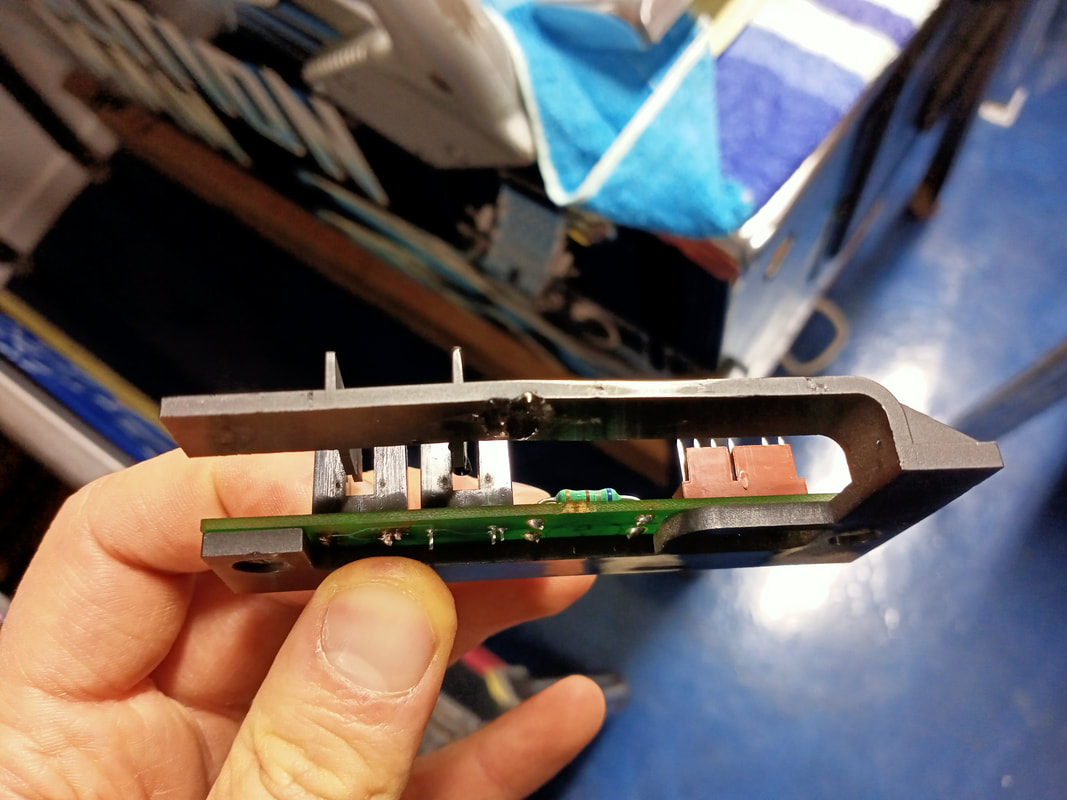
The lower right flipper switch was simply stuck on. This turned out to be because of the opto board inside the cabinet. The opto interrupter plastic was slightly bent (RTBB, PSPA), and was no longer closing the opto switch for the lower right flipper (bottom opto on the board). It looked to me like the plastic had been misshapen from being melted (hot soldering iron?). I didn't have a spare interrupter plastic, so I used a bit of tape to temporarily build up the spot on the plastic and make it longer. All that was needed was for it to close the opto switch when at rest. When I got home, I replaced the interrupter plastic and the switch worked reliably.

Placement of tape on the interrupter plastic to make it activate the opto.
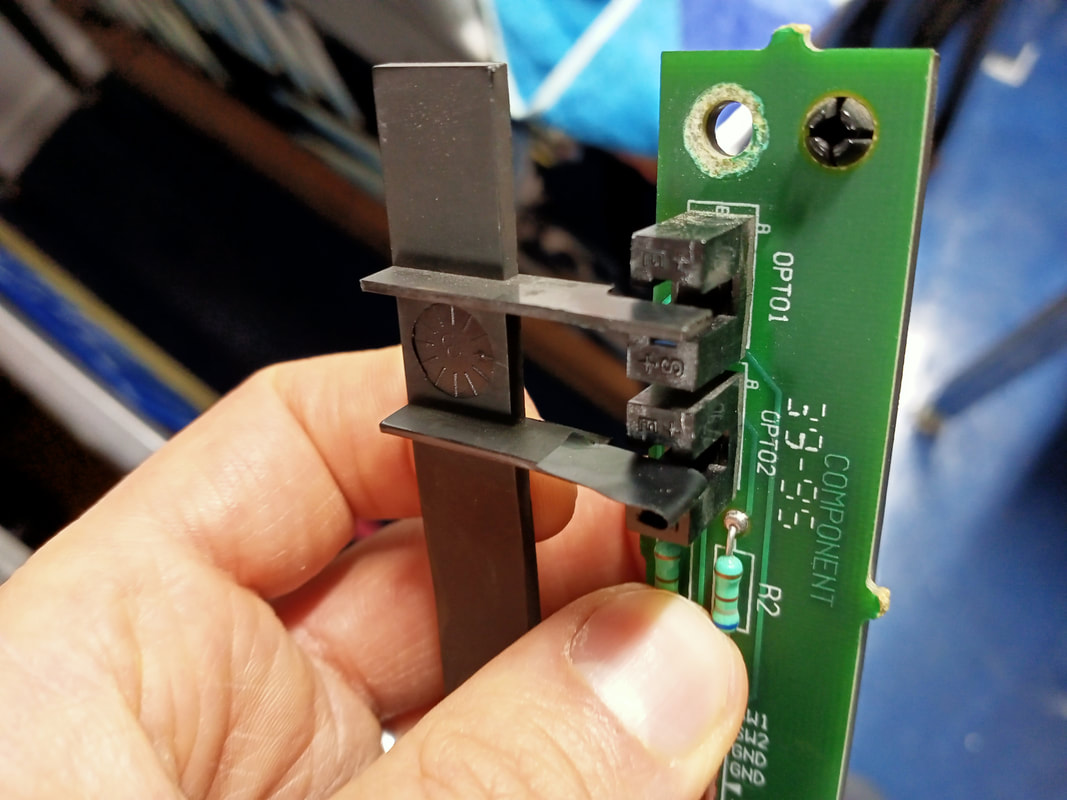

Melted and bent interrupter plastic.
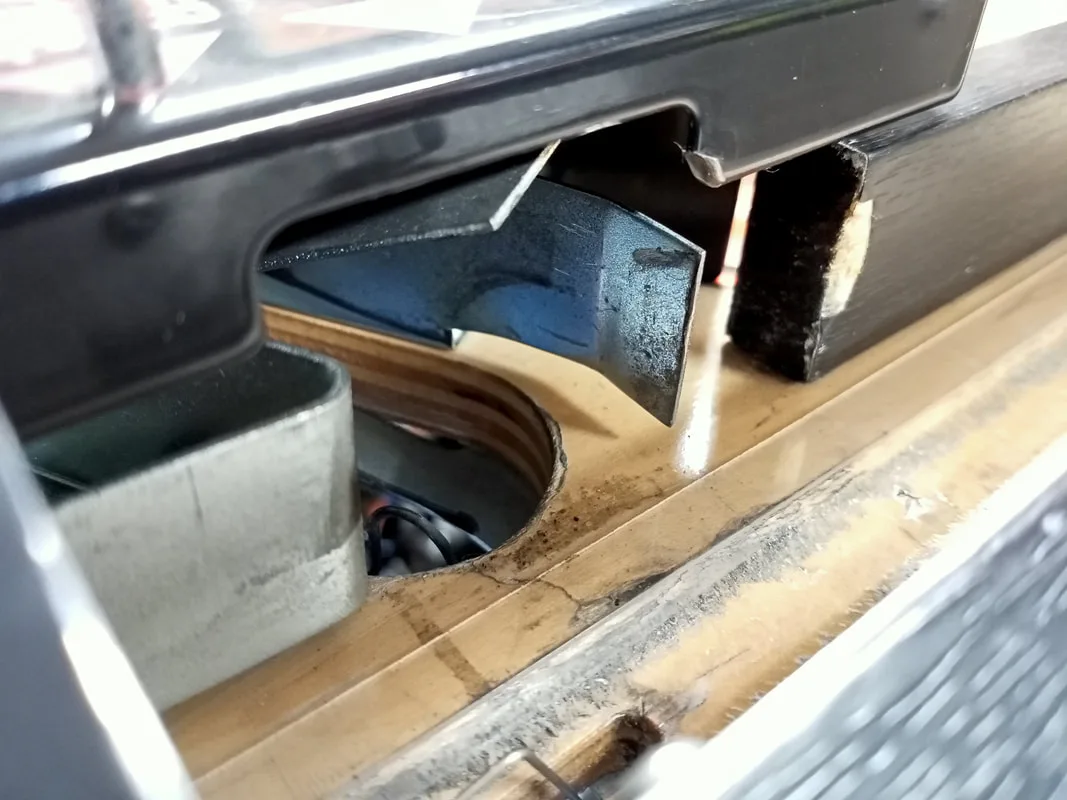
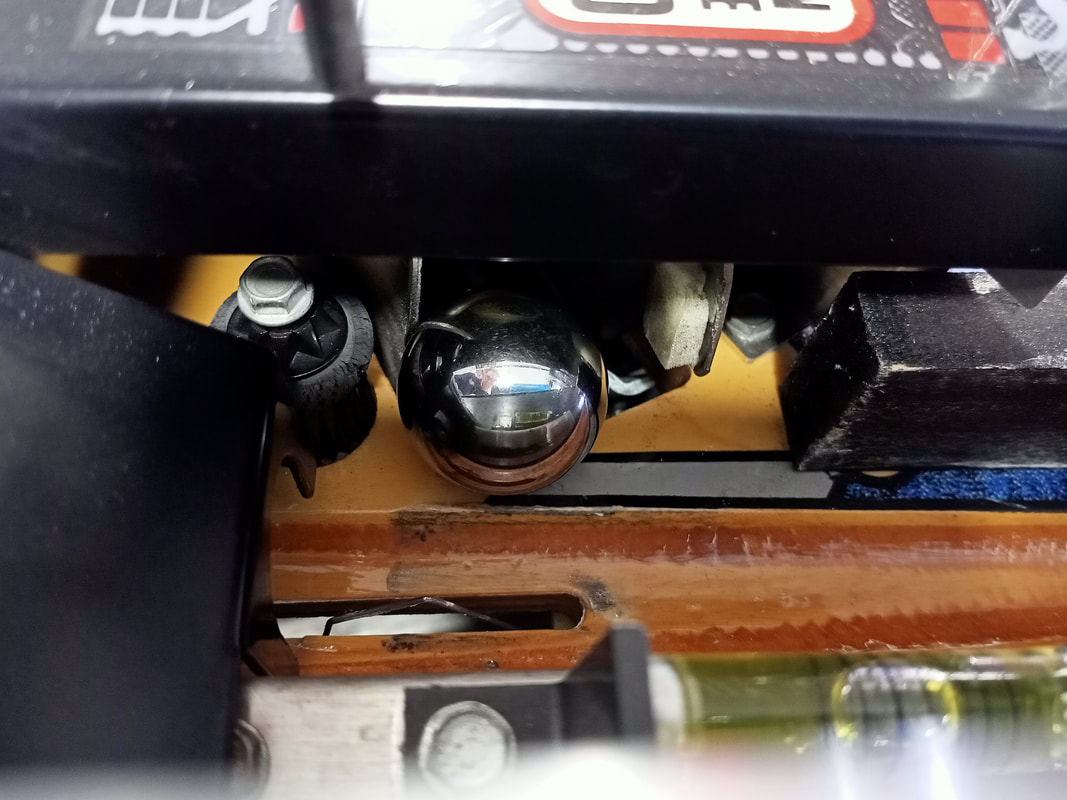
The games got a great workout on Saturday. I didn't record any of the game audits, but Getaway and Johnny were both very popular throughout the day. Only one other issue cropped up on Johnny. The ball was occasionally getting stuck in a divot between the ball trough and the shooter lane. This was because of a small gap between the trough assembly and the playfield, which creates a divot for the ball to get stuck in. It only occurred sporadically, but often enough that I had to help a couple of people out when the ball couldn't be shaken loose. I only figured out the cause of this issue after looking under the playfield.
Balls getting stuck between the ball trough and shooter lane.
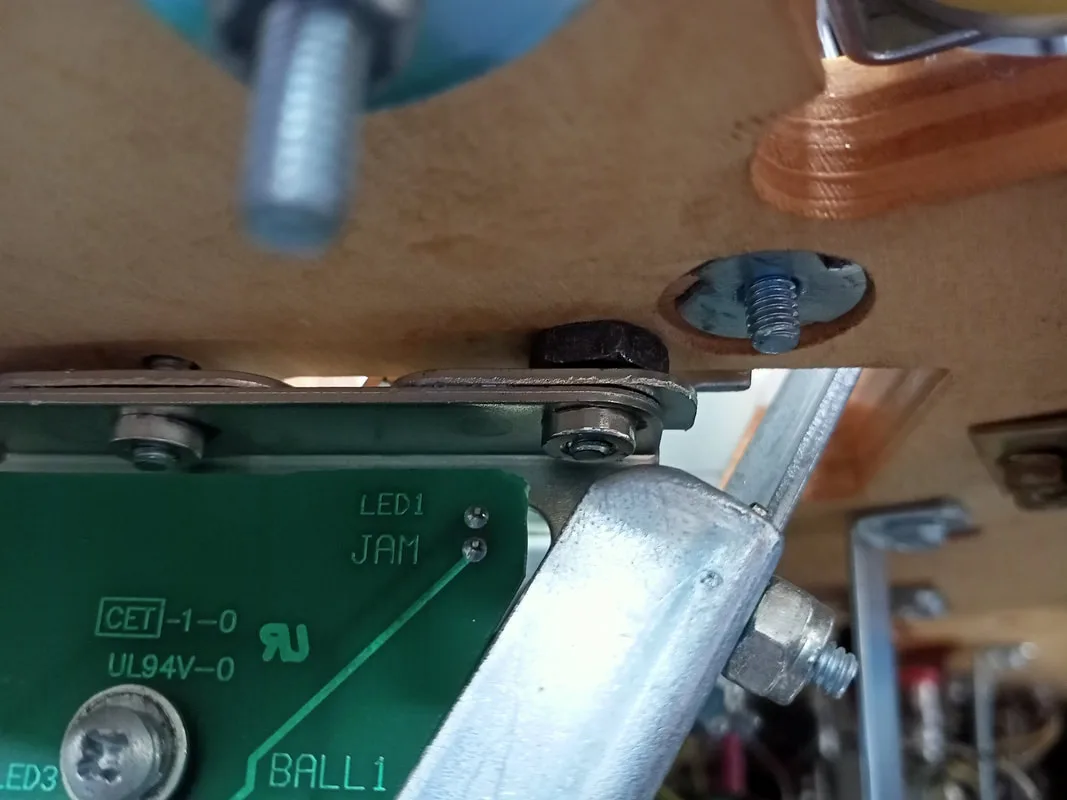
Incorrect spacer under the ball trough.

Someone in the past had placed a spacer under the bolts that fasten the trough to the playfield. This made the trough entry sit lower than the playfield edge, allowing balls to get stuck on the gap between the trough assembly and the playfield. I removed the spacers, bringing the trough a little higher and making it impossible for balls to sit in this spot.
More repairs on Johnny Mnemonic. Photo courtesy of the Newcastle Pinball Association.

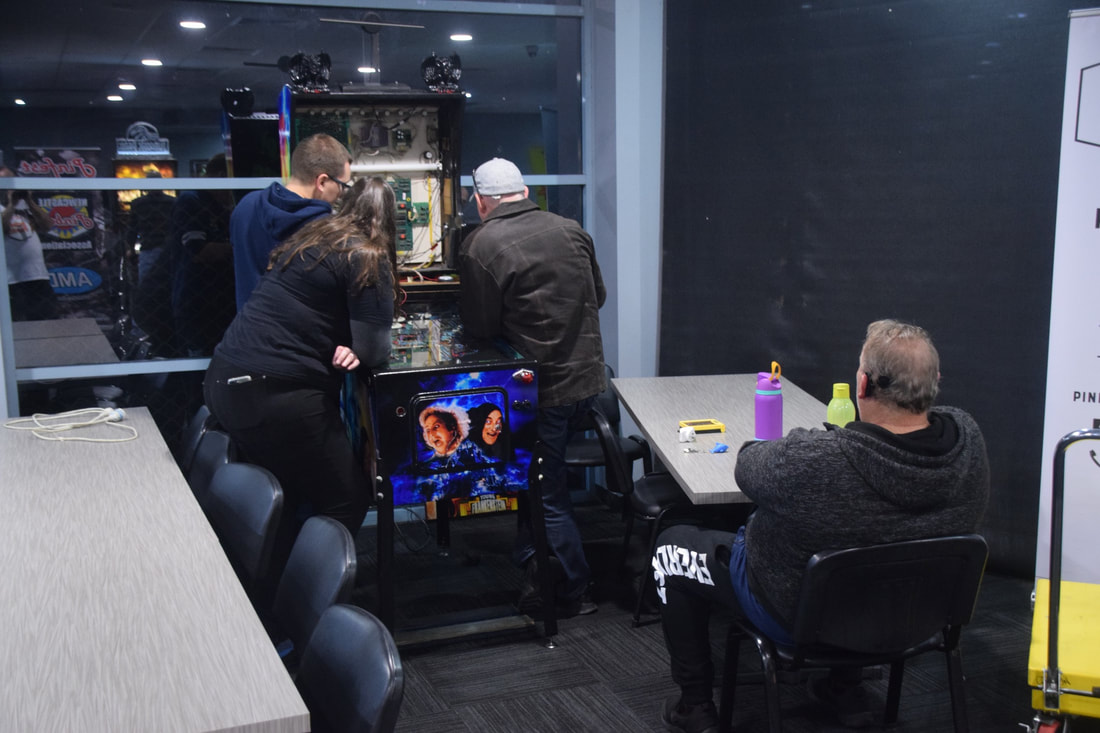
We tried to help out with repairs to a few other machines as well. There were some coil power issues with Mata Hari (Bally, 1978), which were caused by low line voltage at the socket the game was plugged into. Moving the game across the room solved the problem. Young Frankenstein (retheme of Genesis, Gottlieb, 1986) was also knocked down for the count; the CPU stopped booting. I wasn't able to diagnose this issue much further at the event, but I suspect it was a blown switch matrix; a very common problem on Gottlieb System 80s and one that had affected this game previously.

Inspecting the coils on Mata Hari. Photo courtesy of the Newcastle Pinball Association.
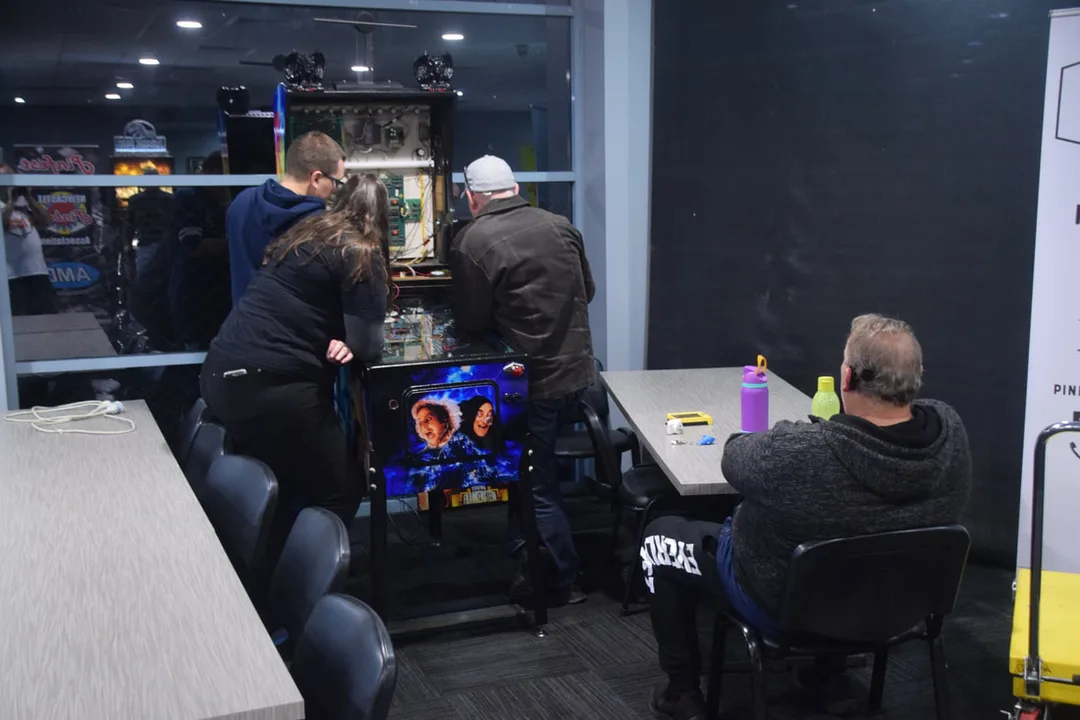
Tackling issues on Young Frankenstein (Genesis). Photo courtesy of the Newcastle Pinball Association.
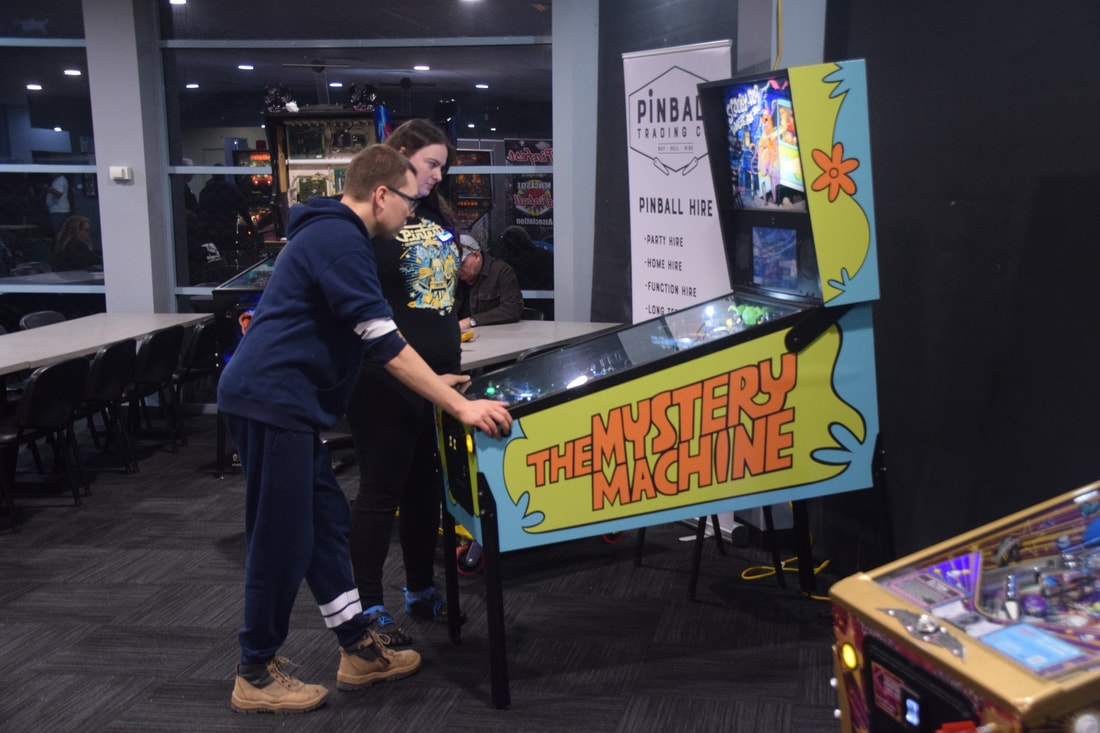
There was a nice selection of games at the event, including some brand new ones. This was my first chance to play Scooby Doo (Spooky Pinball, 2022) and Elton John (Jersey Jack Pinball, 2023). Scooby Doo was fun to play. I loved the upper left flipper on the upper playfield, which functions both as a flipper and as a moving ball guide. The sounds and callouts were fitting for the theme but got irritating after a while. But I'm not a fan of Scooby Doo, so maybe that's why. Elton John was a very bright, flashy game. The glitter in the playfield, cabinet, and plastics really made it pop, especially when the lightshows start. Of course the music is the main draw for this game, and it is incorporated well. It's hard not to sing or dance along while making your shots!

Having a game on Scooby Doo! Photo courtesy of the Newcastle Pinball Association.
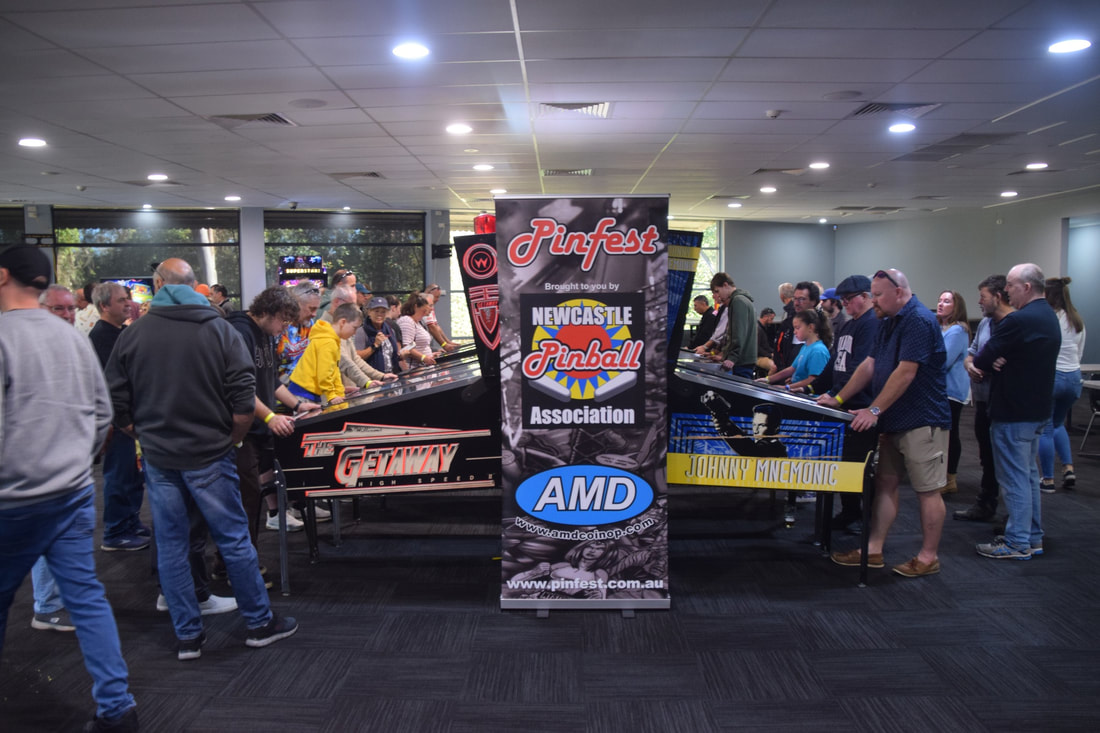
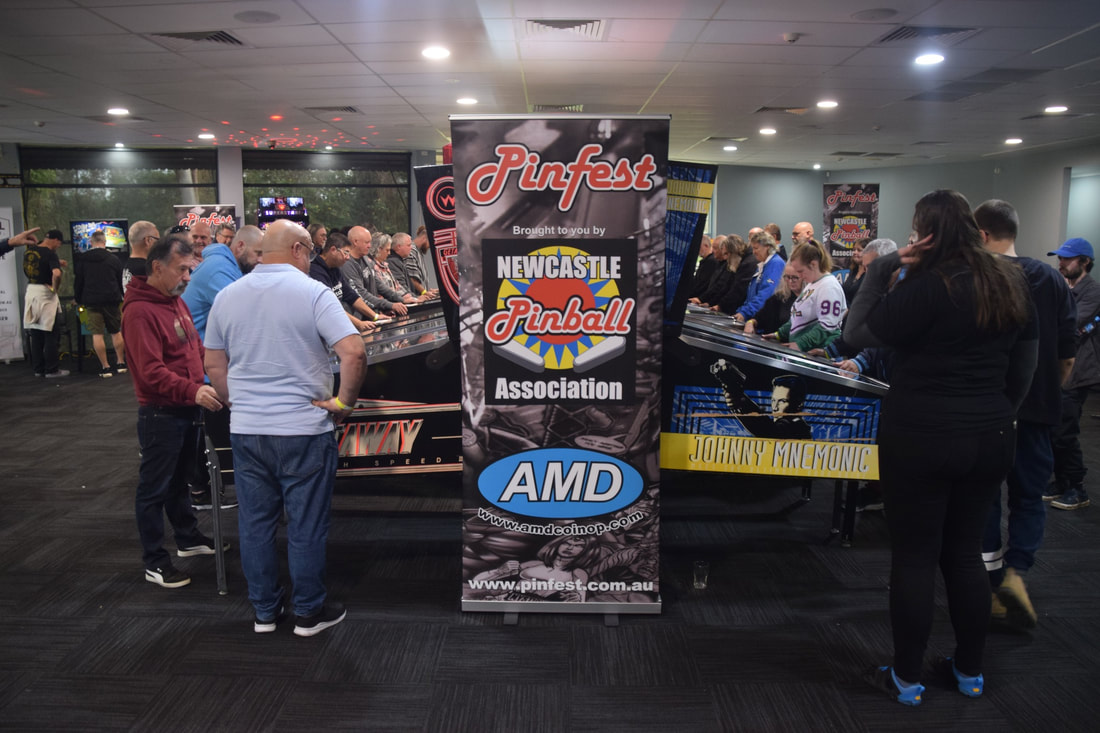
Day one down, one to go! Sunday was a short day, with only one session. Yet this was the only session that was booked out, so we were expecting the room to be a little crowded. This is where it helped to have the extra space around the machines; plenty of space to chill out and rest. All of the games were played non-stop for the two hours the event was open. Thankfully, there were no more issues with my machines during this last session.


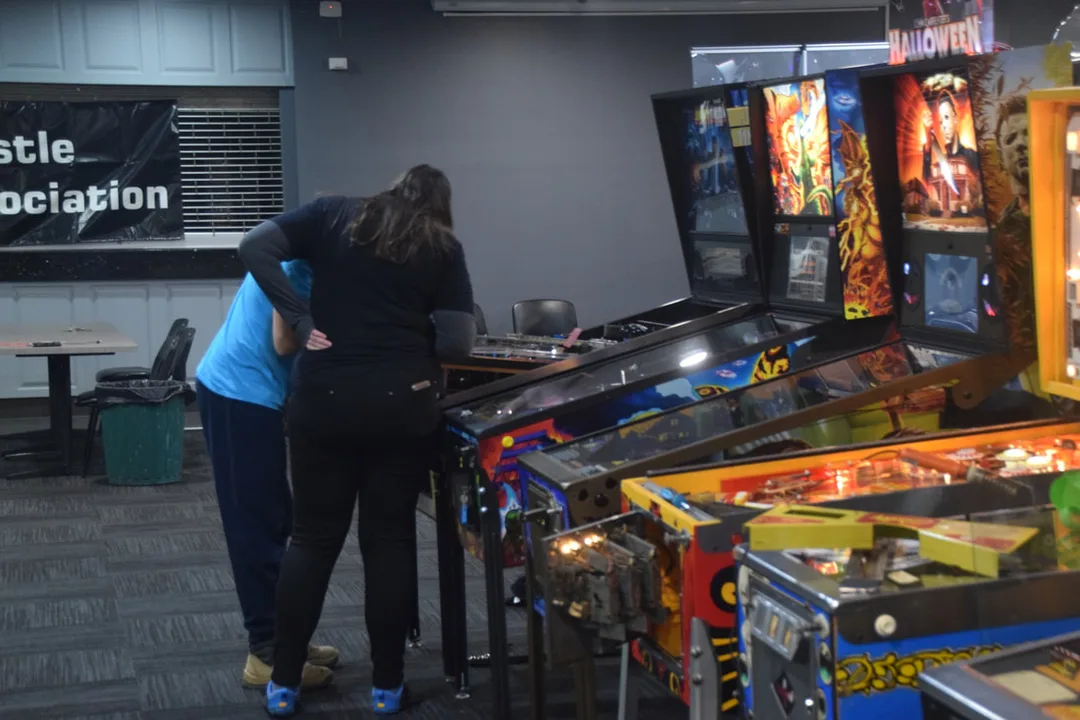
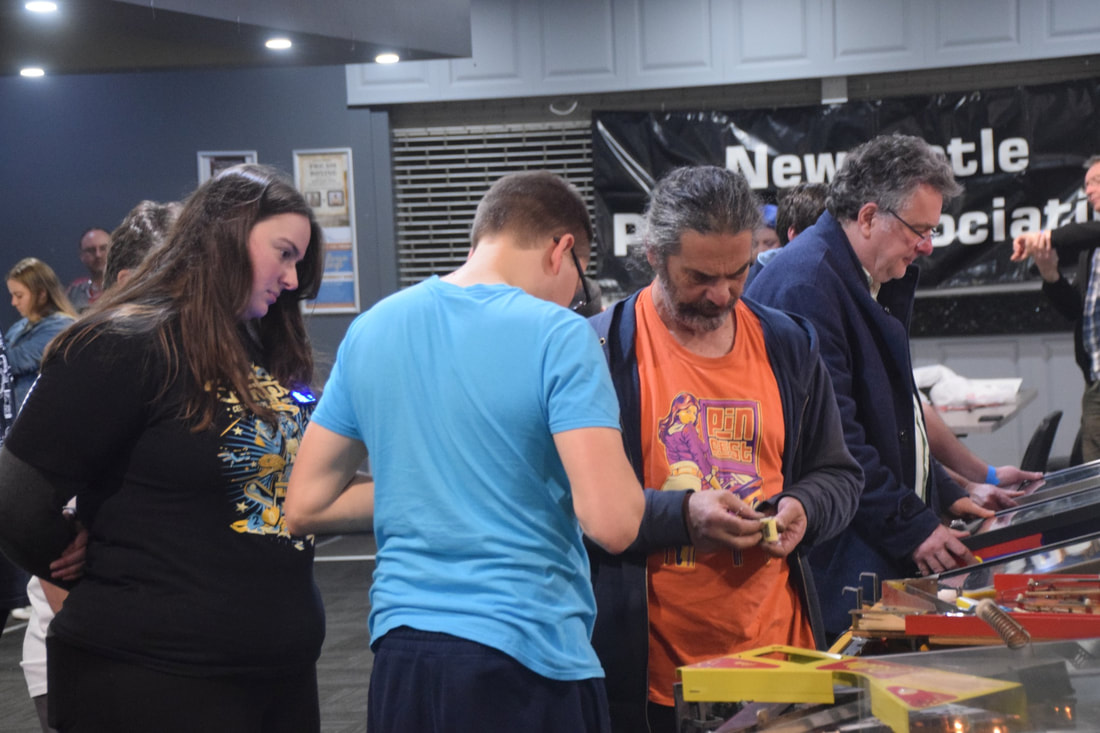
Action shots of the games over the weekend. Photos courtesy of the Newcastle Pinball Association.

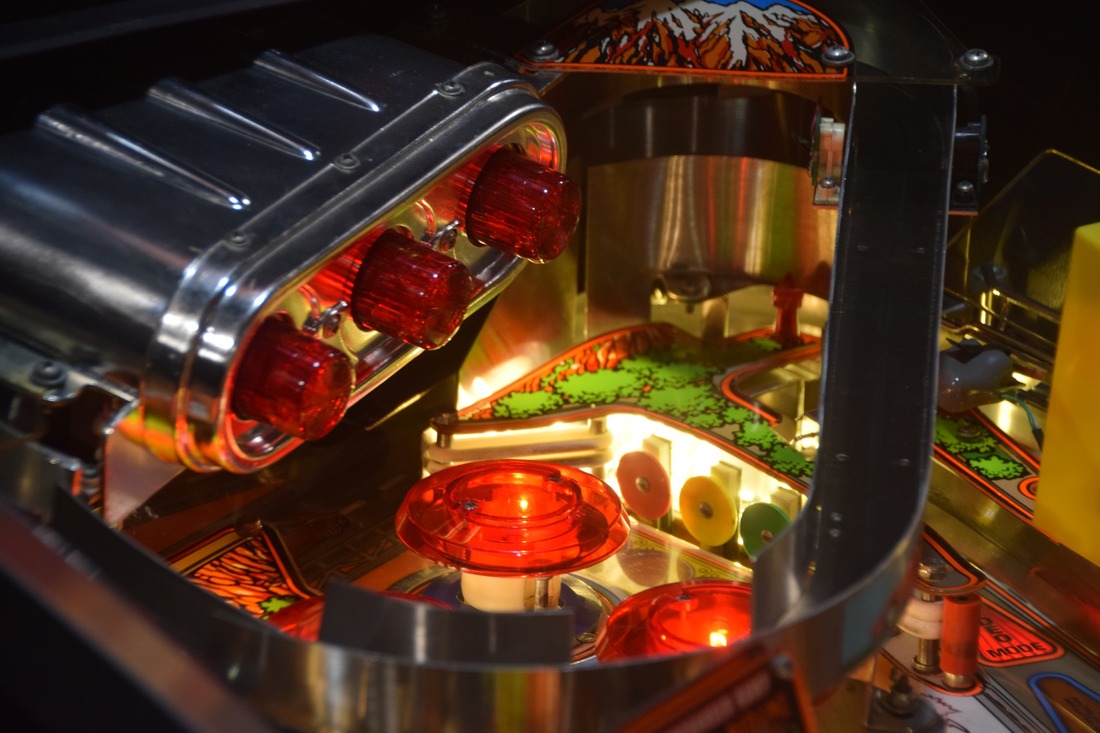
It's always great to get together with the Newcastle Pinball Association crew. Of course, we'll see them again at Pinfest in a couple of months, but the more pinball, the merrier! It was also great to spend a bit of time playing one of the coolest homebrew games in the world, The Hitchhiker's Guide to the Galaxy (Kress Electrix). I got further into the game than I had before, and saw more of the modes and shots. I love the double ball trough (a first in pinball!) and the spinning pop bumper platter. The integration of the screen (similar to Pinball 2000 games) is also really well done. It makes me wish that more Pinball 2000 games were made, as the screen really does make the game more immersive. It's awesome that we have local pinheads making awesome stuff like this.
The drive home on Sunday afternoon was uneventful and the games made it back in one piece. I am really enjoying using the van to cart games around, and the floor I installed makes it easy to slide them in and out. We'll get some more good use out of it later in the year for Pinfest. Speaking of which, if you haven't already, make sure to get your tickets for Pinfest 2024. We will see you there!

Two balls locked; one to go! Photo courtesy of the Newcastle Pinball Association.


Supercharger action! Photo courtesy of the Newcastle Pinball Association.